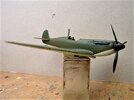
spanner's 1/72 Airfix Starter Kit Spitfire.....'Reach for the Sky' (1956)

spanner570

SALAD DODGER
SMF Supporter
Joined
May 26, 2009
Messages
13,030
Points
113
First Name
Ron
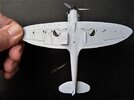
I'm building Douglas Bader's Spitfire, shortly after an alleged 'Collision' with a German Me109 during WW2.

As usual, with the starter sets I've built previously, I'll be using the excellent supplied paints, glues and brushes I've saved from the kits.

P1360179.JPG

P1360181.JPG

Cheers.
Ron
 
Last edited:

spanner570

SALAD DODGER
SMF Supporter
Joined
May 26, 2009
Messages
13,030
Points
113
First Name
Ron
Nice to have you aboard Jim. At least before we both have to jump for it!

Don't forget to bring your own chute. You ain't sharing mine!

I've been using that glue ever since I ran out of 'Contacta'. Suits me fine. It must be because years ago 'Gloopy' was all that could be had....And it knows I'm the Boss - Usually. ;)
 

spanner570

SALAD DODGER
SMF Supporter
Joined
May 26, 2009
Messages
13,030
Points
113
First Name
Ron
Nice to have you chaps aboard. :thumb2:

It's raining hard here, so I can 'legally' go into my den!

I love these so called 1/72 starter kits. People knock them, but the kits are well engineered, great detail and go together like a dream. As a bonus I get me the paints, brush and glue. again folks knock these items, but they work well for me - So there! ;);)


I have to make it completely before I can break it, so here's this morning's progress.

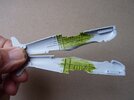
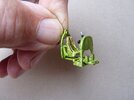
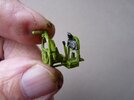
Inner fuselage painted and cockpit done. As usual, the rudimentary harness is made from the instruction sheet paper. Nice detail for 1/72.

To my eternal damnation and being a founder member of the S.M. ' Cheapskate and if it ain't seen, it don't get done' Society, I haven't been too fussy with the finish.

P1360182.JPG

P1360183.JPG

P1360185.JPG


....and yes, Matron is on her way to clean those disgusting digits and trim the nails. :fearful:

Cheers.
Ron
 
Last edited:

spanner570

SALAD DODGER
SMF Supporter
Joined
May 26, 2009
Messages
13,030
Points
113
First Name
Ron
Still peeing down. Still in my Den!

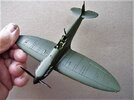
I've finished the construction of Bader's Spitfire. Once the glue dries, I can get the paint brush out.

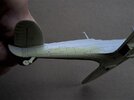
For a bit of variation, I have cranked the rudder over to stbd. Also, and to make life easier later, the tail planes are loose fitted, so once painted I can remove them and cut off, then omit or re-postion the two elevators.
With the arse end of the aircraft smashed off, all the control wires would be broken, causing the control surfaces to 'Do their own thing'


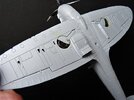
Lovely model to put together. No extra fitting needed. All the bits went together perfectly. Even the wing root join was spot on.
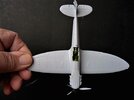
P1360187.JPG

P1360189.JPG

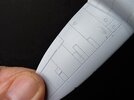
Great detail too.
P1360190.JPG


P1360188.JPG


Here's me man.
Because he had no legs, Bader had no use for flying boots and wore normal issue RAF trousers and shoes. I've scraped the boots off the kit pilot.

When he tried to abandoned his aircraft, his right prosthetic leg jammed behind the controls. When he eventually did bale out, his metal leg stayed in the aircraft. A flapping trouser leg will be fitted in due course.
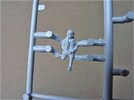
P1360193.JPG

Cheers.
Ron
 

spanner570

SALAD DODGER
SMF Supporter
Joined
May 26, 2009
Messages
13,030
Points
113
First Name
Ron
Thanks Jim.
I've always been impressed with these Airfix offerings. Folks still take a pop at them. (And what comes with the kit) I don't understand why, but there you go.
To each his own.....

Onwards we go.

Always lightest colour first.
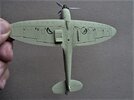
Using a flat headed brush, I've applied little tub no. 90 to the undersurface of the aircraft. One coat directly onto the plastic has sufficed.

Al;ways work from the centre of the wing to the outer edges.

P1360194.JPG


With brush painting, there is no need to mask a model. Here you can see I've let the undersurface colour wander over the demarcation line. To get a baby's bum smoothness, speed of application is paramount, the neatness comes later.
P1360195.JPG

Next it's one of the two darker upper surface colours.

Cheers.
Ron
 

adt70hk

I know its a bit sad but I like quickbuild kits!!!
SMF Supporter
Joined
Sep 4, 2019
Messages
9,517
Points
113
First Name
Andrew
Coming on very nicely Ron.

I've only make a couple of these newer Airfix offerings but agree with your assessment wholeheartedly.

Looking forward to the rest of this.

ATB.

Andrew
 

stillp

SMF Supporter
Joined
Nov 17, 2016
Messages
7,234
Points
113
Location
Rugby
First Name
Pete
Do you thin the paint in the little pots Ron? In the pot, or do you decant some paint into something else? I think it was on this forum that someone called them "snot-pots"!
Pete
 
  • Like
Reactions: JR

spanner570

SALAD DODGER
SMF Supporter
Joined
May 26, 2009
Messages
13,030
Points
113
First Name
Ron
Thanks to Andrew and Pete for your input.

Pete. I add a small amount of tap water directly into the pots. probably about two brushfuls wiped on the pot side..

People can redicule and name call these little pots all they want. I'm more than happy with the result.......But there again, the adverse comments usually come from those that use an airbrush. Wink, wink! ;)

Cheers.
Ron
 

spanner570

SALAD DODGER
SMF Supporter
Joined
May 26, 2009
Messages
13,030
Points
113
First Name
Ron
First upper camouflage colour. I prefer the green to the brown as is shows up the pencil lines a tad better when I mark out the actual in's and out's of the camo. itself.

Here's the green (Pot 30). I've also sharpened up the colour demarcation lines and painted bits and bobs as I've gone along.....

I've brushed on a single coat, which luckily, again will be sufficient.


This is the true colour.
P1360200.JPG


The sunshine hit this and made it a bit brash.....
P1360203.JPG

Next, I'll mark out the camo. pattern.

Cheers,
Ron
 
Top