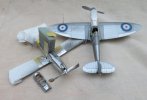
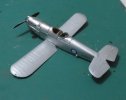
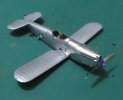
StDs 1/72 AModel Hawker Hector

Steve-the-Duck

SMF Supporter
Joined
Jul 3, 2020
Messages
1,215
Points
113
Location
Medway Towns
First Name
Chris
Cough wibble wheeze ' The truth is a three-edged sword'

Much progress, and mis-steps, have been made

IMG_2367.JPG
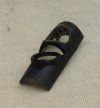
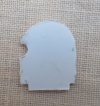
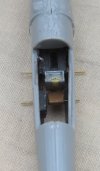
This is the Firewall at the back of the engine, out of 20 thou plasticard
IMG_2368.JPG
And here it is in place. At this stage I didn't realise it would be all but invisible anyway, but there you go. At the front of the cockpit is a piece to represent the end of the fuel tank, visible behind the control panel
I also added two small pieces to close off the engine intakes. I thought about using small piece of mesh, but looking at picture of the Napier Dagger, the intakes feed directly into the engine. It will keep the light out

IMG_2369.JPGIMG_2370.JPG
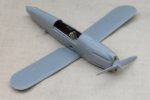
Fuselage closed up, and a bit of filler put in. The gunsight will cover any gaps on top of the cowling. And the firewall is, off course, invisible!
I added two brass rods to hold the wings on as there is, once again, only a butt joint at the lower wing roots. That the rods are in the place of the wing spars just works

IMG_2371.JPG
Wings on.
IMG_2372.JPG
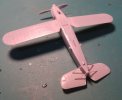
Tail surface on. Cabin floor added, which needed quite a bit of work to get to fit properly
I'm leaving the underside seam as it's visible on actual examples where the linen cover joins. I've left off the rudder as yet as i don't want to break off the aerial mast moulded on
Also, I realised that what I thought was the gunner's seat is mounted too far back, and checking the plans it's supposed to be painted black, so I removed the tape strips and repainted. I still don't know what it is, and it seems to be mounted on a turntable?

I've now reached the stage of painting. I'm a believer in putting as much together before painting, but with masking I'll need to do the cowling (very highly polished) I've left off the u/c legs. I'm probably going to use Alclad chrome for the cowling rather than polished aluminium.
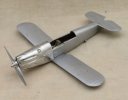
The upper wing is already painted, rattle-can silver, but that will be shown next time, once the roundels are on and it's DONE.
 

Steve-the-Duck

SMF Supporter
Joined
Jul 3, 2020
Messages
1,215
Points
113
Location
Medway Towns
First Name
Chris
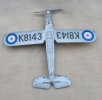
Top wing painted and decaled.
IMG_2373.JPG
Radio aerial bases out of 0,.5 brass rod
IMG_2374.JPG
Aileron cables out of 0.2 rod, my go to for rigging
It's not really pink, just the way my camera apparently corrects the YELLOW spotlight!

A Model decals are very nicely thin, but they can break up, as you can see if you look closely at the roundels where I had to touch up the paint on the blue
The do include spare extra red spots, and plenty of W/T stencils in case, as happened, one just up and disappears

In my set of 'Hart family' decals, I've found some No.4 Squadron fin badges, so that's a bonus. They're ostensibly for an Audax, and you can't tell from the photos I've got whether the fin badge was carried, but they won't go on anything else so...
 

Steve-the-Duck

SMF Supporter
Joined
Jul 3, 2020
Messages
1,215
Points
113
Location
Medway Towns
First Name
Chris
Okay, so here's where things are starting to go astray...
IMG_2376.JPG
I used the kit markings to start with for the registration number, and the last two digits out of a set of Ventura letters and numbers
And the heights don't match. So, I've subsequently replaced the '8 1' with more Ventura numbers
As previously stated, no photos definitively show the 4 Squadron badge in place, but I couldn't resist adding it
 

Steve-the-Duck

SMF Supporter
Joined
Jul 3, 2020
Messages
1,215
Points
113
Location
Medway Towns
First Name
Chris
And now the not-quite disaster.

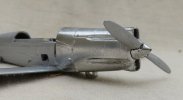
I decided to finally use the Alclad chrome I've had knocking about for a while for the shiny SHINY cowling
IMG_2375.JPG
Copious masking just in case, and on with the black base coat. So far no trouble
IMG_2392.JPG
First coat looked a little blotchy. It looked worse on the other side. So I left it a day to dry
And the second coat went VERY runny, and I dabbed it with some kitchen roll
And wiped the whole lot off!
IMG_2393.JPG
I'm now in a quandry whether to do some clean-up and have another go, or maybe even try some metallic powder to get an even more shiny result. The port side is just blotchy now
And there was me thinking I could finish this weekend and move on to the next one

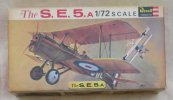
Which will be this
SE5A.jpg
Only in silver...
 
Last edited:

Allen Dewire

Proud Rabble Member
SMF Supporter
Joined
Apr 27, 2018
Messages
4,120
Points
113
Location
Bamberg
First Name
Allen
Wow, that's a shame Chris. Do you have idea what might have gone wrong? I hope you can still get a decent result and finish this puppy up...Sure you can!!!

Prost
Allen
 

Steve-the-Duck

SMF Supporter
Joined
Jul 3, 2020
Messages
1,215
Points
113
Location
Medway Towns
First Name
Chris
My brother-in-law, who swears by Alclad (unlike me swearing AT it) thinks it may not have fully dried due to the temperature. If the second attempt goes astray, I may resort to Bare Metal foil, which I've had good results in the past - check out my Prototype Spit and Hurricane posts

I'm tempted to try metal powders when I get around to the Hawker Furies - a Mk.i, Mk.Ii, and a High-speed conversion (which was VERY shiny!)
 

yak face

Wossupwidee?
Staff member
Moderator
SMF Supporter
Joined
Jun 13, 2009
Messages
12,426
Points
113
Location
sheffield
First Name
tony
Thats a blow chris , but looking at it , it seems most of it has come off so I would give it another go with something else. Personally I cant get on with Alclad either , i get better results with the Vallejo Metal Colors ( note . Not model air metallic ) they are easy to use , dont smell bad and are very hardwearing for an acrylic paint . Hope you can fix this , cheers tony
 

Andy T

SMF Supporter
Joined
Apr 26, 2021
Messages
2,037
Points
113
Location
Sheffield
First Name
Andy
I find the alclad chrome needs to be dusted on extremely lightly and built up in several almost invisible coats for best effect. Less is more, so it shouldn't be applied wet like regular paint.

Also, with it being lacquer based any subsequent coats will reactivate the previous ones no matter how long you have left them to dry, so touching it will strip the lot, as you've unfortunately found out.
 

Steve-the-Duck

SMF Supporter
Joined
Jul 3, 2020
Messages
1,215
Points
113
Location
Medway Towns
First Name
Chris
Thanks for that, Andy and Tony
My brother-in-law said the same about dust coats

Tony, depending on how this turns out, I may try the Vallejo. However, my experience with their ordinary colours, limited as it is, has not been great

I need to practice more. With the airbrush I've had for FIFTEEN years!
 

Steve-the-Duck

SMF Supporter
Joined
Jul 3, 2020
Messages
1,215
Points
113
Location
Medway Towns
First Name
Chris
So, we're kind of back on track. After leaving the remaining Alclad to dry for five days, here's round 2!

IMG_2412.JPGIMG_2413.JPG
I tried dust-coating this time round, as advised by my brother-in-law, and we may have a winner! Still needs a second go-over though, in a few more days time...

As a comparison, I did the cockpit panel in rattle-can Humbrol Chrome Silver, which I thought I might have to use all over. Or foil. I think the slightly duller look works well, as these panels wouldn't have stayed as highly shiny as the cowling, with the crew climbing in and out
Except for the Station Warrant insisting the poor erks buff up after every flight...
IMG_2414.JPG

As another compare and contrast...
IMG_2415.JPG
My prototype Spit has several different finishes. Wings are (greyish) Aluminium spray, Metalcote Polished Aluminium (blotchy because of varnish for the decals, but I COULD say it was 'weatherting'). Control surfaces are Chrome Silver. Nose cowling is Bare Metal Chrome foil, which I thought I might have to use on the Hector, but wouldn't have had the right shinyness
 

Steve-the-Duck

SMF Supporter
Joined
Jul 3, 2020
Messages
1,215
Points
113
Location
Medway Towns
First Name
Chris
'The bandages came off just this afternoon!'
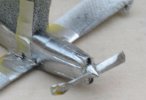
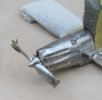
IMG_2454.JPGIMG_2455.JPG
Niow THAT's what I'm talking about. Now I have a handle on the Alclad, it may see more use.
Might still try the Vallejo if I come across it. I found a set of Mig metals and finish stuff in a model shop yesterday, but fifty quid a pop just to try out is a bit much.

Perhaps if I do decide on the Razorcrest for the Star Wars group build I may give it a go. Opinions on the Mig metals anyone?
 

colin m

Moderator
Staff member
Moderator
SMF Supporter
Joined
Dec 26, 2008
Messages
8,608
Points
113
Location
Stafford, UK
First Name
Colin
There w are moving along nicely. Alclad is great stuff. Well worth persevering with.
 

Steve-the-Duck

SMF Supporter
Joined
Jul 3, 2020
Messages
1,215
Points
113
Location
Medway Towns
First Name
Chris
Okay, the latest success and mis-step
IMG_2476.JPG
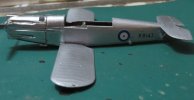
Under wing registration letters on, using Modeldecal pre-war set. The Roundels are the kit parts, which are really very nice. The transfer sheet also has spare W/T markings, but I still needed more, which came from my Modedecal Harts sheet. The fuselage join at the bottom left a gap, so I've added a strip of plastic rod for the covering join. The paintwork is a little streaky and blotchy in places, but that works for weathering.

And on to the sides
IMG_2479.JPG
Kit roundels and stencils, codes Modeldecal. Even though it's one sheet, some transfers go on perfectly, others break-up, but there are spares
Now for the latest mis-step, which I haven't shown

I was going to add the cockpit coming at this stage, but it doesn't fit. And that's because the instructions tell you to add four spare Vickers MG drums to the inner underside of the coming, which interferes with part of the inner side frame. So, I've had to shave off those parts. And then you discover that the control panel interferes at the front of the fuselage, and doesn't sit down properly.
I'm determined not to have any gaps, so once the varnish over the transfers is dry, that's the next job

Well, I know what to expect for the Amodel Hart and the Fury, when I get to them. I may use the Hart for the trainer conversion, now I've got another AZ Hart on the way
 

Ian M

Administrator
Staff member
Administrator
Moderator
SMF Supporter
Joined
Dec 14, 2008
Messages
19,798
Points
113
Location
Falster, Denmark
First Name
Ian
Alclad is the bees whatsits when it goes right. I have had a bottle or two that seemed to have 'gone off'. The results looked a bit like what you had.
The biggest help I can give is Alclad is very much a less is more thing.
 

Steve-the-Duck

SMF Supporter
Joined
Jul 3, 2020
Messages
1,215
Points
113
Location
Medway Towns
First Name
Chris
Coming along very nicely.
Well, KIND of...

With all the travails of this kit, I'm still, SLOWLY, progressing

So, the cockpit coaming (spelt right this time!) is soon to be attached, finally
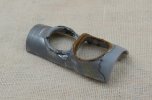
IMG_2500.JPG
First off, having altered the inside to actually fit down where it should be, I then had to shave down the best part of a millimeter for it to match the forward fuselage. So, time for a repaint. I didn't want it as shiny as the cowling, so, I thought, I'll use the rattle-can of Chrome Silver as before, with a black undercoat, Halfords Primer, and gloss varnish. Simples!
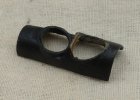
IMG_2501.JPGIMG_2502.JPG
And there we have it
Except...

My brother-in-law grey-primered a stand of his, and didn't notice this piece was still on the big flat piece of card we use as a spray table.
So back to square one. So, it now has the Chrome finish, just got to touch up the leather shroud and then...
I have to make the bulkhead that fits between the pilot and gunner on all the Hart variants, which is absent from Amodel ones entirely, but is in all the AZ kits. So there's a template right there
I've also realised, of you look back at the cockpit floor back aways, the gunners' seat is probably moulded in the wrong place. It should be a bit further back, and also attached to the side with a retractable framework, I THINK
Never mind

Oh, and another trial I finally mounted the tail fin, which attaches with a single pin, the only locating pin in the whole kit, just about. And, of course THAT broke off with handling...
So, it's now mounted with brass rod. Which does make it stand clear of the tail surfaces, like it should

At leasst all the troubles with this kit lets me know what to expect from the Hart (to be converted to a trainer) and the Fury II waiting in the, haha, wings
 

Steve-the-Duck

SMF Supporter
Joined
Jul 3, 2020
Messages
1,215
Points
113
Location
Medway Towns
First Name
Chris
Cough wibble wheeze
'Let us meet at the Hour of Scampering'

There are times with this thing... I'm not quite throwing it at the wall, it's just an exercise in mild and compounding frustrations

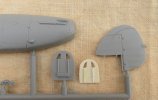
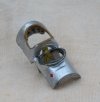
So, the cockpit coaming... This is the AZ Model Audax, which has a piece for the bulkhead between pilot and gunner, completely missing from the Amodel Harts
So, I made a quick stand-in. BTW, the AZ Model Audax, a 'plane known as "the 'Art with the 'ook", is completely missing the message hook piece from the kit
Which is odd seeing as that's the entire role of the 'plane!
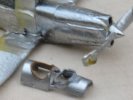
IMG_2525.JPGIMG_2527.JPGIMG_2529.JPG
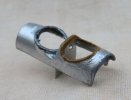
So, the bulkhead is in place, trimmed to fit
The kit has a tiny red cross transfer for the medikit, but the last time I tried putting it on, it wouldn't stay. The extra coating of primer has obscured the hatych detail but the chrome finish does look like natural metal
Which is nice

So, on with the piece, FINALLY
IMG_2531.JPGIMG_2532.JPG
Not a great fit, bit of a Matchbox 'trench' there, but nothing that can't be dealt with...
He says optimistically
 
Top