Tamiya 1/35 M4A3 Sherman

A_J_Rimmer

SMF Supporter
Joined
May 14, 2024
Messages
322
Points
93
Location
North Wales
First Name
Arnold
Hi All,

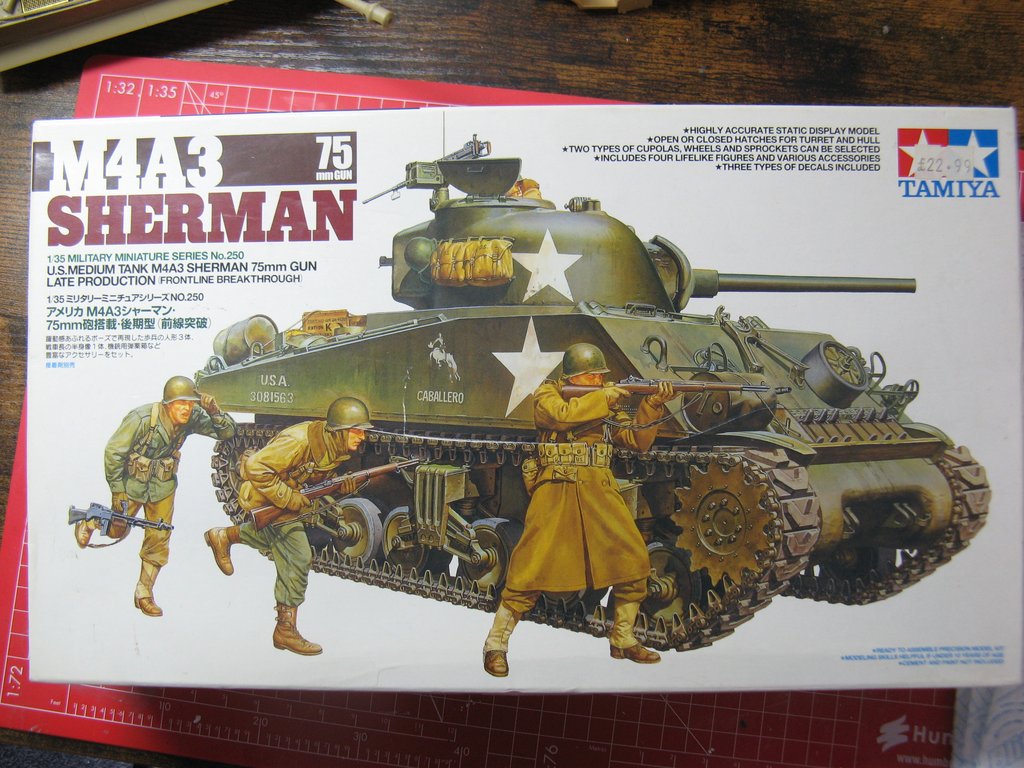
Wanted a simple project I could force through the low mojo barrier and actually get finished, so I started this last week. The intention is to build it OOB, with the minimum of work, just to get it over the finish line. That being said however, I'm pretty new to large scale armour modelling, and I've certainly never painted 'real world' figures before, so it's still got it's challenges. I'm also pretty poor at weathering - lots of interesting stuff to learn.

IMG-9537.jpg


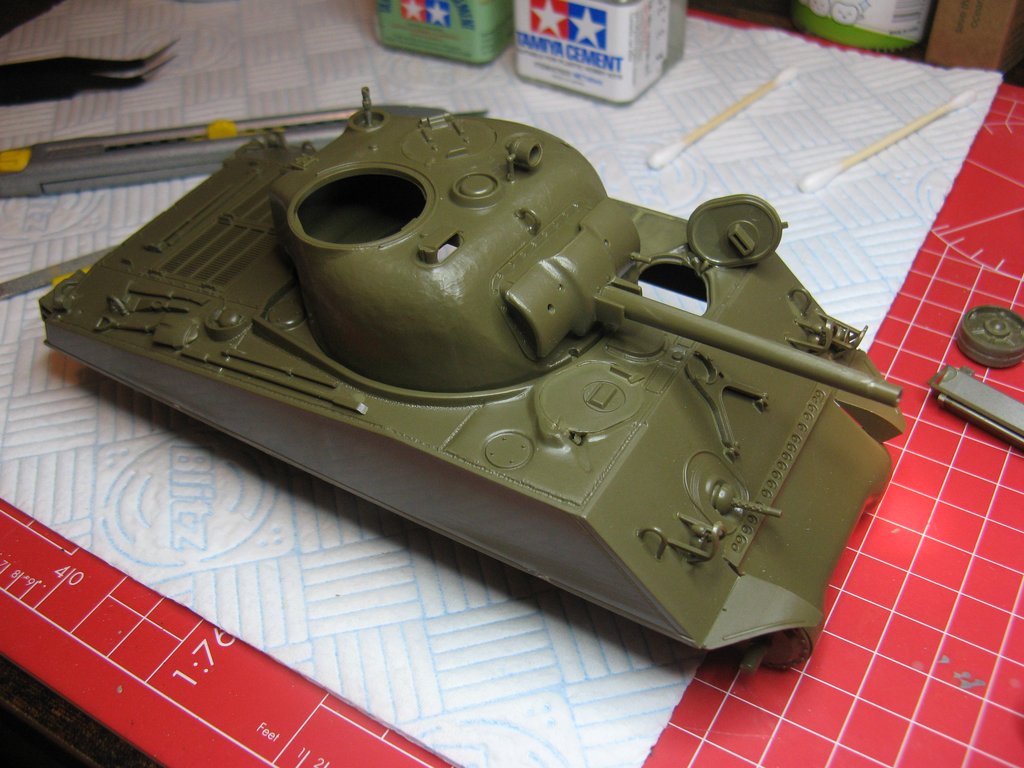
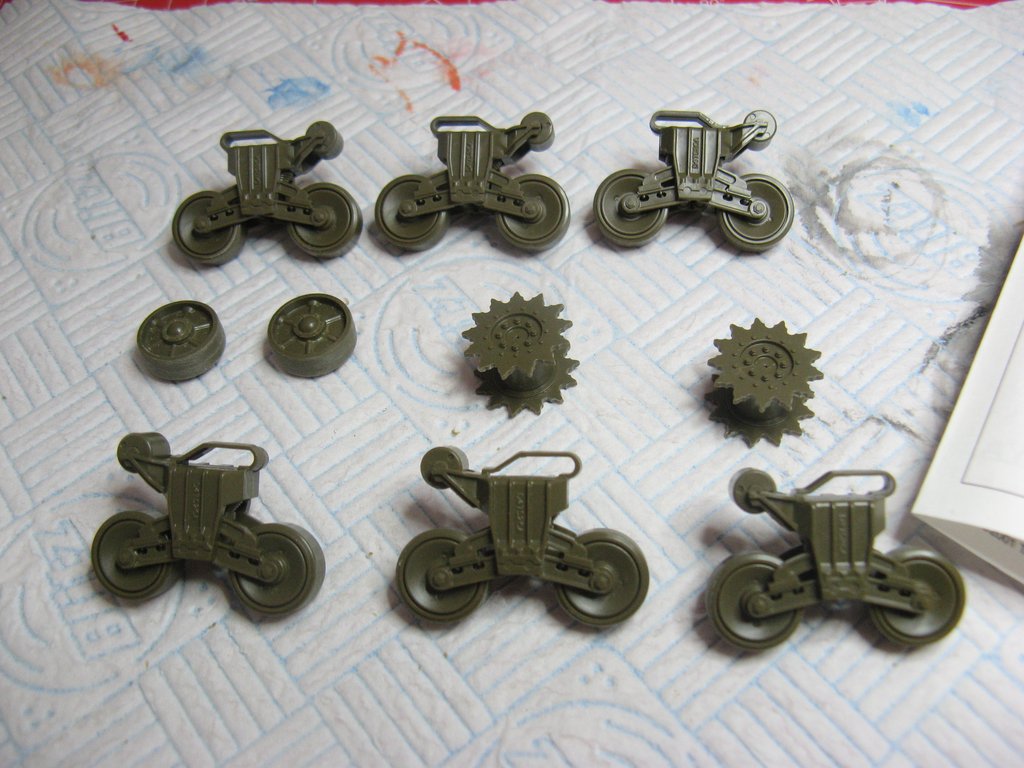
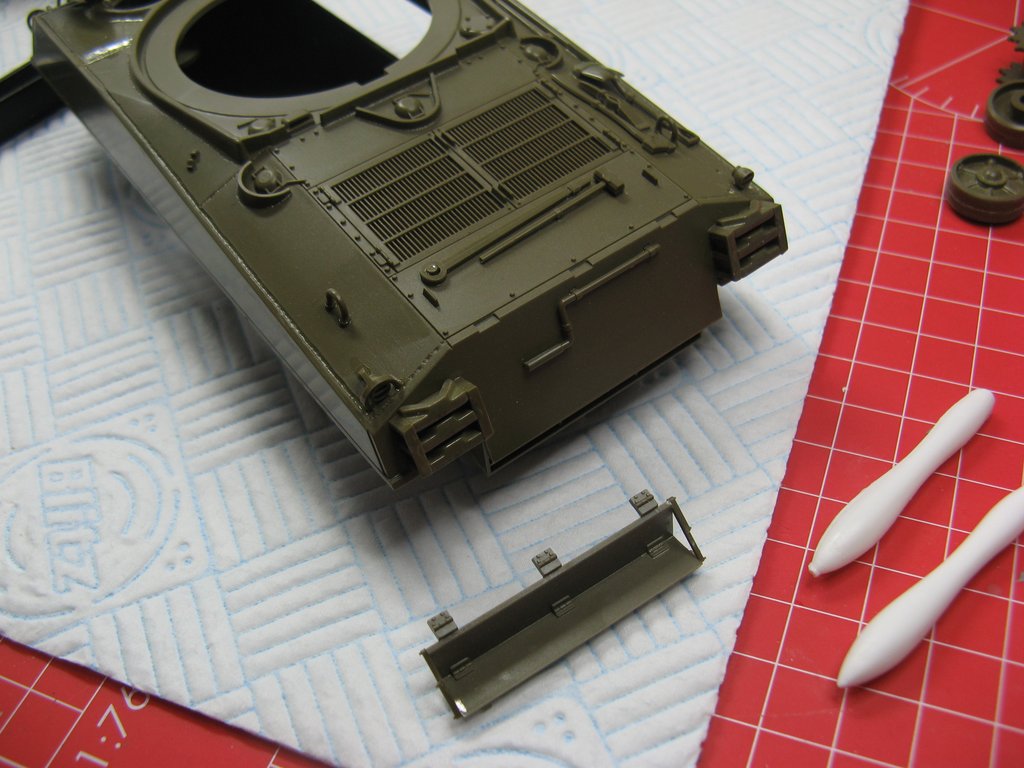
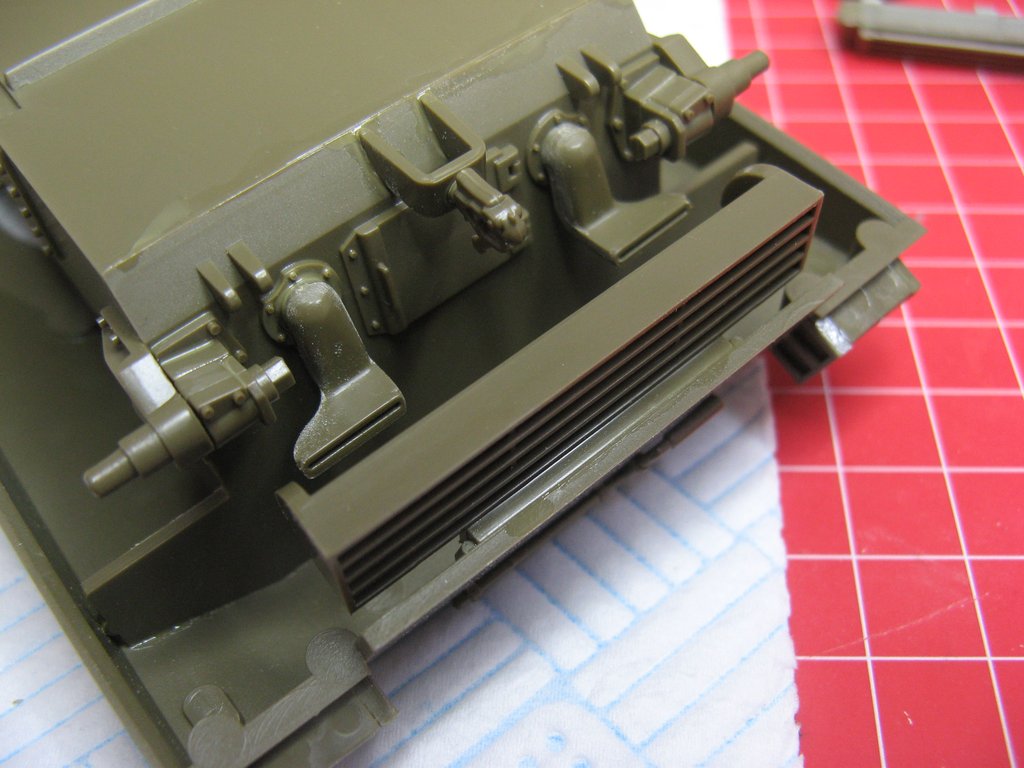
Here's where I am thus far - the bottom and upper hull parts assembled, along with all the running gear. Not sure if I should assemble them all together before paint, or paint the parts up first and then assemble. Answers on a post-card please. I know there's a lot of 'issues' with this kit (hatch detail, welds, big arse holes etc.), but I'm choosing to ignore them for this build.

IMG-9559.jpg


IMG-9543.jpg


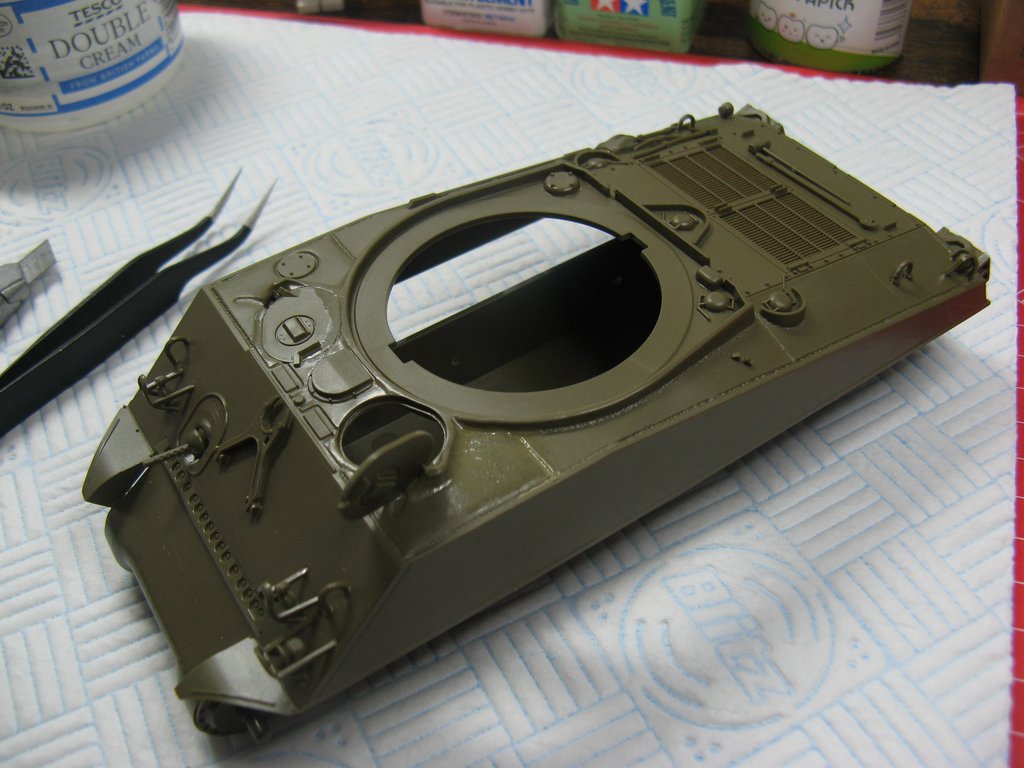
Annoyingly, one of the rear light guards flew into the either whilst coming off the sprue, so I'll have to scratch-build a new one.

IMG-9560.jpg


I'm hoping to make a start on the Turret this evening.
 
Last edited:

Jakko

Way past the mad part
SMF Supporter
Joined
Apr 28, 2018
Messages
11,017
Points
113
First Name
Jakko
You’re doing well there. I’d put most of it together, but leave the bogies, drive sprockets, and idler wheels loose, as well as the machine gun on top of the turret. This will let you paint the rubber tyres (only the twelve main wheels have those, BTW, not the idler wheels or the small return rollers) much more easily than when the bogies are already glued to the tank. Once painted, you can dry-fit the bogies to see where you need to scrape the paint off so you can glue the bogies to the hull. You don’t need to glue the sprockets and idlers, because they have poly caps inside them so they’re just a push-fit onto their axles.
 

Jim R

SMF Supporter
Joined
Apr 27, 2018
Messages
13,918
Points
113
Location
Shropshire
First Name
Jim
Good to see your build. I'd go with Jakko's recommendation. What to fix in place before painting and what to paint before assembly is always a balance. Paint first and you risk spoiling the paint when gluing , fix first and you could make painting very difficult. Being Tamiya this should go together well with not too many small parts. OK it has some accuracy issues but when built it will look like a Sherman.
My only advice is double check the instructions and dry fit everything a few times before gluing. Above all enjoy it and be proud of what you achieve. Looking forward to seeing your progress.
 

Jakko

Way past the mad part
SMF Supporter
Joined
Apr 28, 2018
Messages
11,017
Points
113
First Name
Jakko
Also: you can paint bits that will be hard to reach later on and then proceed with glueing things over them. For example, the stowage shelf on the back of your tank: it will cover the rear plate, but leave a gap that will be just about impossible to get paint under. So just paint the area that will be covered by the shelf, and the side of the shelf that faces the rear armour, then glue the shelf on.

Oh, BTW, remove the crank that’s on the rear plate, the one that will be covered by the stowage shelf. Your tank is an M4A3 and those didn’t have a starting crank :smiling3: Tamiya made a mistake there, and put it on their M4A3 when it should only be on an M4 and M4A1. This is because those had radial engines, and those needed to be cranked over by hand through four engine revolutions before it could be started, else it ran a good chance of seizing up entirely due to oil having drained to the lower cylinders while it was stationary. This required fifty turns on the hand crank … However, the M4A3 had a V8 engine that didn’t need any of this — press the button and it starts safely.
 

Scratchbuilder

SMF Supporter
Joined
Jul 2, 2022
Messages
2,098
Points
113
Location
Luton
First Name
Mike
Arnold good to see you have picked a simple but easy kit to put together. A few simple rules apart from the advice above....
Keep it simple.
Do not try to become the super detail expert all in one go.
Use this kit as your experiment model where even glueing one piece to another has its horrors.
Use the kit to test out methods of painting and weathering...
If you become frustrated with it, put it down and take a break, it is your model so take as long as you want. In the last 10 months I have almost completed 4 models, Jakko about 2,000 and Waspie tried to destroy two that we know of :smiling6: with Jim being the referee....
We will help and encourage you through the build, Jakko is I would say our Sherman 'expert' (I am convinced he lives in one) and will be able to talk you over the technicalities.
And if you botch it up or part of it, put up a pic and we will explain the problem...
Mike.
 

A_J_Rimmer

SMF Supporter
Joined
May 14, 2024
Messages
322
Points
93
Location
North Wales
First Name
Arnold
I'll tag along Arnold, I've only ever done one piece of armour! (Must do another one day as I do like the tracks!!)

Thanks Doug! You should, it's certainly different. I've done a few pieces of small scale stuff but only ever one 1/35 kit in the past 14 years - I've started loads though lol! Really hoping to get this one finished.
 

A_J_Rimmer

SMF Supporter
Joined
May 14, 2024
Messages
322
Points
93
Location
North Wales
First Name
Arnold
You’re doing well there. I’d put most of it together, but leave the bogies, drive sprockets, and idler wheels loose, as well as the machine gun on top of the turret. This will let you paint the rubber tyres (only the twelve main wheels have those, BTW, not the idler wheels or the small return rollers) much more easily than when the bogies are already glued to the tank. Once painted, you can dry-fit the bogies to see where you need to scrape the paint off so you can glue the bogies to the hull. You don’t need to glue the sprockets and idlers, because they have poly caps inside them so they’re just a push-fit onto their axles.

Thanks Jakko, that's much appreciated. That's kind of what I thought would be best, but I know people recommend all different sorts of methods. I have since secured the top of the hull to the lower. Normally, I would box in the massive gaps under the top hull, but I'm feeling very lazy with this build.

Also: you can paint bits that will be hard to reach later on and then proceed with glueing things over them. For example, the stowage shelf on the back of your tank: it will cover the rear plate, but leave a gap that will be just about impossible to get paint under. So just paint the area that will be covered by the shelf, and the side of the shelf that faces the rear armour, then glue the shelf on.

Oh, BTW, remove the crank that’s on the rear plate, the one that will be covered by the stowage shelf. Your tank is an M4A3 and those didn’t have a starting crank :smiling3: Tamiya made a mistake there, and put it on their M4A3 when it should only be on an M4 and M4A1. This is because those had radial engines, and those needed to be cranked over by hand through four engine revolutions before it could be started, else it ran a good chance of seizing up entirely due to oil having drained to the lower cylinders while it was stationary. This required fifty turns on the hand crank … However, the M4A3 had a V8 engine that didn’t need any of this — press the button and it starts safely.

Cool - thanks! I had intended to paint the area first but really good to know about the crank. I'm not that informed about US armour but I do think I've head about those radial engines - are those the same ones that were fitted to the Hellcat, sucking ice cold air through the crew compartment in the winter and freezing the crew to death.

I'll get the crank taken off. As you seem to be the 'Sherman guy' maybe you can help with a question - what's going on with these undersides? I assume the parts coming out of the rear of the bottom hull are exhausts, but that's with the big thing hanging off the back - was it a heat exchanger or radiator or something (and should they be connected?)

IMG-9564.jpg


IMG-9563.jpg
 

A_J_Rimmer

SMF Supporter
Joined
May 14, 2024
Messages
322
Points
93
Location
North Wales
First Name
Arnold
Good to see your build. I'd go with Jakko's recommendation. What to fix in place before painting and what to paint before assembly is always a balance. Paint first and you risk spoiling the paint when gluing , fix first and you could make painting very difficult. Being Tamiya this should go together well with not too many small parts. OK it has some accuracy issues but when built it will look like a Sherman.
My only advice is double check the instructions and dry fit everything a few times before gluing. Above all enjoy it and be proud of what you achieve. Looking forward to seeing your progress.

Thanks Jim, that's sage advice indeed. tbh, I'm so used to building old crappy Airfix kits and the like that even an old Tamiya kit like this has been a wonderful change. I hear you on the instructions though, they're not that clear in places - I actually assembled the first bogie with the older spoked wheels before I picked up on the note about the later solid type. Thankfully the glue hadn't cured so I could take it apart and change them! Lesson learnt!
 

A_J_Rimmer

SMF Supporter
Joined
May 14, 2024
Messages
322
Points
93
Location
North Wales
First Name
Arnold
Arnold good to see you have picked a simple but easy kit to put together. A few simple rules apart from the advice above....
Keep it simple.
Do not try to become the super detail expert all in one go.
Use this kit as your experiment model where even glueing one piece to another has its horrors.
Use the kit to test out methods of painting and weathering...
If you become frustrated with it, put it down and take a break, it is your model so take as long as you want. In the last 10 months I have almost completed 4 models, Jakko about 2,000 and Waspie tried to destroy two that we know of :smiling6: with Jim being the referee....
We will help and encourage you through the build, Jakko is I would say our Sherman 'expert' (I am convinced he lives in one) and will be able to talk you over the technicalities.
And if you botch it up or part of it, put up a pic and we will explain the problem...
Mike.

Thanks Mike, that's very much appreciated, and very much where my head is with this build. OOB, not correcting the issues etc. etc. I should get the construction finished soon, but the painting and weathering - that's going to be fun, especailly the figures and the weathering. But I don't want to go OTT with this build. Maybe just some general grime, streaks, dust and mud 0 I can kind of see how I want it, no idea how to get there - so I'll be asking advice. :smiling5: 
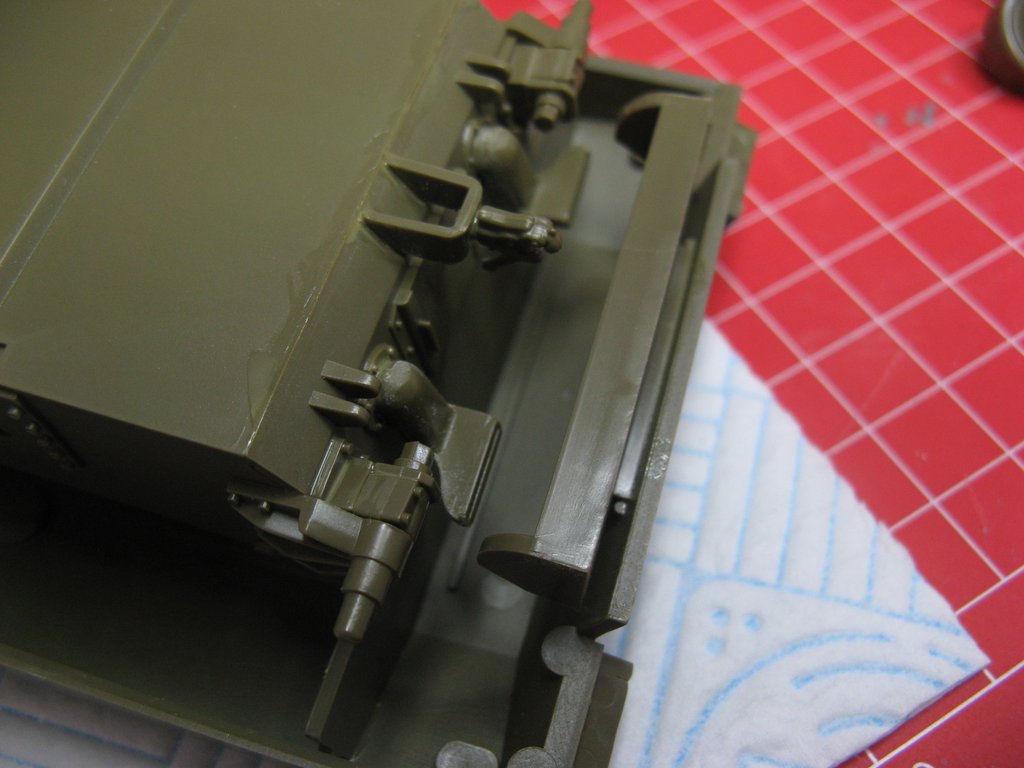
Funny, I've mudded up some small 1/76 stuff, but that was just a case of dark earth paint, acrylic medium and a citadel wash. This larger scale stuff I can see needs a lot more care - but I'd like to get it right, so I'm looking forward to learning some new techniques and investing some in some new products.

You may have only completed four, but from what I've seen they look awesome. But others, how they can turn our a huge amount of builds at such high quality - the mind boggles!

Thanks for your words though - much appreciated. I do think I've found a good place to hang out.
 

A_J_Rimmer

SMF Supporter
Joined
May 14, 2024
Messages
322
Points
93
Location
North Wales
First Name
Arnold
Oh and some progress last night - which having spent a day chatting to you lot I really enjoyed. I've got most of the turret built up, just some handles, the cupola (now I know which one should be fitted) and the .50 cal to be added. I can see why people invest in turned metal barrels though, I did my best with the kit one but I do have some clean up to do (must also remember to drill out the coax and the ... co-driver's gun?)

IMG-9561.jpg
 

A_J_Rimmer

SMF Supporter
Joined
May 14, 2024
Messages
322
Points
93
Location
North Wales
First Name
Arnold
Can anyone tell me what the pole thing is sticking up behind the loaders hatch? Is it a antenna base or is it some form of range finder or scope?
 

minitnkr

Rabble & escape committee member
SMF Supporter
Joined
Apr 27, 2018
Messages
6,786
Points
113
Location
Dayton, OH
First Name
Paul
Mostly to diffuse exhaust flames, gasoline powered 450 hp V8 could throw some big ones.
 
Last edited:

Jakko

Way past the mad part
SMF Supporter
Joined
Apr 28, 2018
Messages
11,017
Points
113
First Name
Jakko
In the last 10 months I have almost completed 4 models, Jakko about 2,000
I wish :smiling3: My score for the last ten months is also somewhere in the order of four, at a quick guess. I mean, I took four weeks to paint a model I didn’t even have to build myself!

I'm not that informed about US armour but I do think I've head about those radial engines - are those the same ones that were fitted to the Hellcat, sucking ice cold air through the crew compartment in the winter and freezing the crew to death.
Yep, same on the Sherman :smiling3: The first two variants had a radial engine — which is why the hull is so tall — and all the others came about because radial engines turned out to be in short supply when wartime production ramped up. Who would have thought that the aircraft industry wanted them as well? So they went shopping for other types of engine that could be produced without interrupting something else, leading to the M4A2, M4A3, M4A4 and M4A6.

The M18 76-mm gun motor carriage (“Hellcat” is a name thought up by its manufacturer, BTW, and was probably not used by anyone at all in the US Army) had a seven-cylinder radial, the same type as in the M3 light tank. The M3 and M4 medium tanks used a larger, nine-cylinder one instead.

As you seem to be the 'Sherman guy' maybe you can help with a question - what's going on with these undersides? I assume the parts coming out of the rear of the bottom hull are exhausts, but that's with the big thing hanging off the back - was it a heat exchanger or radiator or something (and should they be connected?)
The S-bend pipes are the exhausts for the V8, yes — one for each bank, straight through without a muffler. The grille on the back is incomplete on this old Tamiya kit: it should actually have a curved plate that follows the sides they did mould into it, with holes for the exhaust pipes in it.

What it is, is an air deflector. On the M3 and M4 medium tanks, there is — as you can see from the model — a big overhang at the rear. Engine cooling air exits through there: the rear wall, with the door in, doesn’t go all the way up in the middle, so there’s a hole the width of the hull there for the air to blow through. That looks like this on a real one:

D69610DA-A140-4DB5-B5E1-02489AFF731E_1_105_c.jpeg

This is an M4A4, but it’s not much different on the other variants. We’re looking towards the rear here from inside the engine compartment, of which the access plate has been removed. (I took this photo of a monument tank under restoration a few years ago.)

Once through that hole, it gets deflected downward by a curved plate in the overhang. But that caused a problem: the large mass of moving air caused dust clouds on dry ground. Oddly, each variant of the M4 has its own solution this problem, instead of using the same basic design on all, and on the M4A3, it’s a curved deflector made of sheet steel. If you look at the back of it, you see four horizontal louvres. On the real tank, those are actually four pieces of curved sheet metal, as you can see on this cross-section drawing:

M4A3 cross-section.jpg

The whole thing was hinged so it could be swung up into the overhang, because it was very much in the way for opening the engine door in the rear plate.

As you can also see in the drawing, on the M4A3 the radiators were in that big hole in the rear plate, with some curved deflectors behind them.

the ... co-driver's gun?
Assistant driver is the US Army term, IIRC. But yes, in combat his only real task was to aim and fire that bow machine gun.

Ignore me - it's the antenna base isn't it - I've seen it on other builds...
It is, yes. On the M4, the radio is in the back of the turret (British influence there, the Americans would have put it in the hull but British practice prevailed) and on the American tanks, the aerial is in the round opening. British tanks had one aerial there, and another on the little square lump with four bolts to the right of it on the rear roof. This because American SCR-508-series radio sets used only one aerial, while British No. 19 sets needed two.
 

Jakko

Way past the mad part
SMF Supporter
Joined
Apr 28, 2018
Messages
11,017
Points
113
First Name
Jakko
BTW, I forgot to mention: I suppose this kit also includes the extra armour plates, parts C9 and C10? Those were in the original issue of this kit, and you can see them in plenty of photos of real Shermans. However, don’t fit them to your model. They’re another mistake by Tamiya, this time because they confused M4A2s with M4A3s. Shermans like yours never had those armour plates added to the hull, except for a small production run of M4A2s. But if you can’t see the engine deck and hull rear, it’s very hard to tell an M4A2 from an M4A3, so Tamiya’s mistake is understandable. However, generations of modellers have put those plates on M4A3 models because Tamiya told them it was an option :smiling3:
 

A_J_Rimmer

SMF Supporter
Joined
May 14, 2024
Messages
322
Points
93
Location
North Wales
First Name
Arnold
BTW, I forgot to mention: I suppose this kit also includes the extra armour plates, parts C9 and C10? Those were in the original issue of this kit, and you can see them in plenty of photos of real Shermans. However, don’t fit them to your model. They’re another mistake by Tamiya, this time because they confused M4A2s with M4A3s. Shermans like yours never had those armour plates added to the hull, except for a small production run of M4A2s. But if you can’t see the engine deck and hull rear, it’s very hard to tell an M4A2 from an M4A3, so Tamiya’s mistake is understandable. However, generations of modellers have put those plates on M4A3 models because Tamiya told them it was an option :smiling3:

LOL! I won't quote in both your posts just to cut down on scroll time for the dear readers - but WOW, what a fabulous amount of info. Taking in what you said I looked up some photos on the net. I get what you're getting at regarding the deflectors now - man that's an interesting system! Tamiya really did leave a lot of it out didn't they. I hope my Easy Eight kit is a bit more accurate.

Thanks Jakko, I really appreciate the time it took you to write that - it was very interesting indeed. I have a bit more respect for the old Sherman now. I may even have to buy a book or two, as I can definitely see me building more.

You'll be pleased to know that C9 and C10 are still on the Sprues - I don't think the destructions called them up.
 
Top