Nice updatesSo a little update - not much has been going on over the past week as I've been away for a bit for work and I've now had a flair up of an old foot problem, which means I have to keep my leg elevated - hard to do when you're sat at the bench.
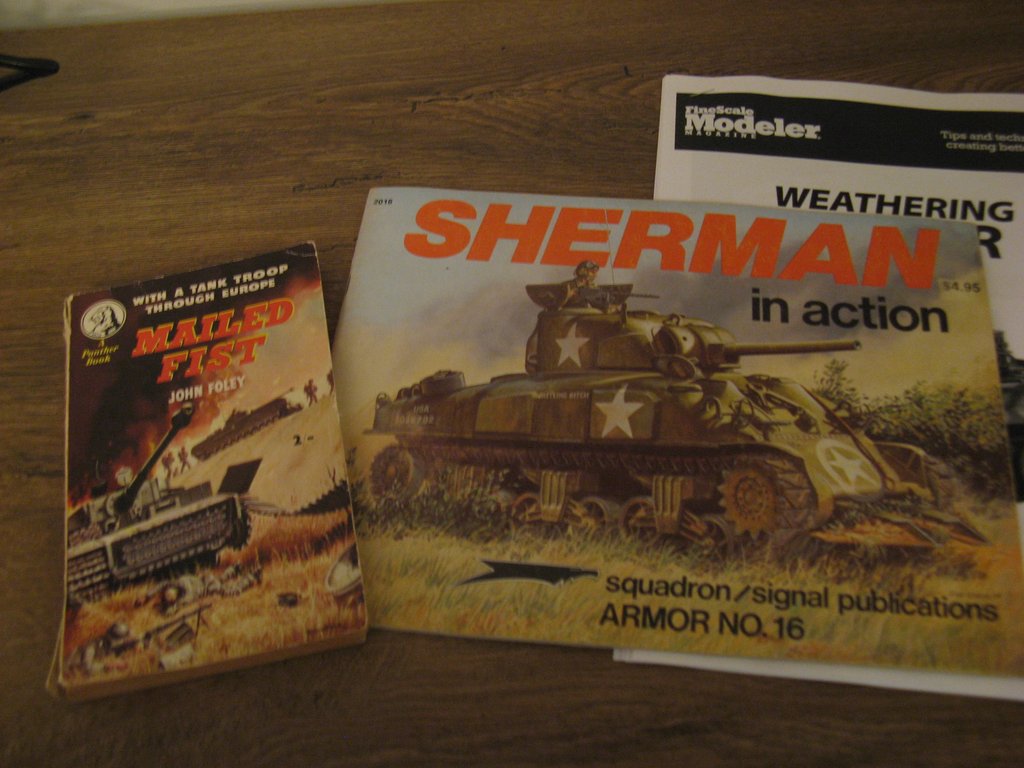
First off - thanks for the recommendations on the books Gents - I shall look forward to reading them.
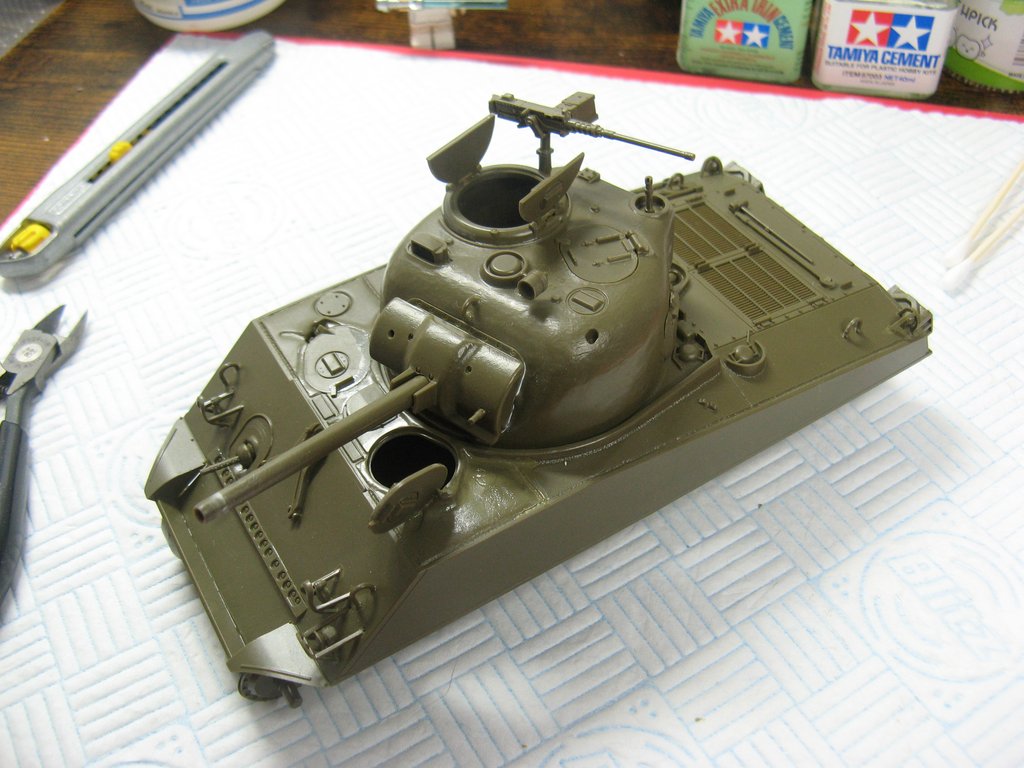
And the model itself is pretty much ready for primer. I'm just in the process of building the stowage. I had one little incident building up the .50 cal, whereby the gun mount pinged off into the either. It must have gone directly into the mouth of the carpet monster, as I spent an hour trying to find it and couldn't. In the end I had to use the other one in the kit, which is too tall. It's not actually glued to the turret yet, it's just there for priming. I'll remove it to paint it.
Questions for you all regarding the stowage that comes with this kit.
How do you go about it? Do you attach it all to the Tank before painting, and just paint what you can in situ? Or do you paint the tank and stowage separately, and assemble it all before weathering?
Also, What do you do to make it look like it's not just glued to the surface of the tank? I can see from the Sherman in Action book a lot of the stuff on the rear deck was roped down using straps and ropes tied to the grab handles etc, but what about the front and especially the turret? Or am I over-thinking this?
Confused.
- Home
- Forums
- Military Vehicles
- Military Vehicles Under Construction
- Armoured Vehicles Under Constuction
You are using an out of date browser. It may not display this or other websites correctly.
You should upgrade or use an alternative browser.
You should upgrade or use an alternative browser.
Tamiya 1/35 M4A3 Sherman
- Thread starter A_J_Rimmer
- Start date
A_J_Rimmer
SMF Supporter
You bet. I can’t wait to get started on my 1/48 Sherman for the D-Day GB.Thanks Lee
A_J_Rimmer
SMF Supporter
Very cool! Looking forward to seeing that!You bet. I can’t wait to get started on my 1/48 Sherman for the D-Day GB.
- Joined
- Apr 28, 2018
- Messages
- 11,433
- Points
- 113
- First Name
- Jakko
Copper wire is cheap to buy from electronics parts supplier. A quick search turned up this vendor in the UK, for example. £1.73 (plus P&P) for 15 metres of 0.5 mm wire is one I see there, which will last for absolutely ever.I'm sure I can rustle up some wire to make it look more realistic.
The tanks came with one type of wheel from the factory, but in the field, for replacements they just put in whatever they had at hand.What I find interesting about those photos is the mix of wheels on some of those tanks - Spoked, press spoked and solid. I guess they went with whatever was to had in the field.
You put the right wheels in, thenCaballero is the Tank I'm making.
 The Tamiya kit unfortunately doesn’t have spoked wheels, else you could see about swapping out the No. 5 wheel on the left for one. As it is, you can just claim the model represents the tank before it got that wheel replaced. Or you could see if someone in the UK can mail you one (I would offer to, as I’ve got tons of them, but international postage is IMHO rather too high for sending just a single wheel
  )
)A_J_Rimmer
SMF Supporter
You put the right wheels in, then
Ahhhh I'd love to, but alas I've already glued the bogies together, which is a shame! Knowing how ham fisted I am, I'd almost certainly break one getting it apart!
A_J_Rimmer
SMF Supporter
0.5mm copper wire ordered - thanks Jakko!
I may actually redo the hatch handles on this build.
I may actually redo the hatch handles on this build.
- Joined
- Apr 28, 2018
- Messages
- 11,433
- Points
- 113
- First Name
- Jakko
I would saw through both ends of the axle, then just glue the replacement wheel between the suspension armsKnowing how ham fisted I am, I'd almost certainly break one getting it apart!
A_J_Rimmer
SMF Supporter
I would saw through both ends of the axle, then just glue the replacement wheel between the suspension arms
Yes that would work - I'll take a look.
Copper wire is pretty soft, and from a reel will be curved as well. To get nice straight handrails first cut a length off, grip one end in a bench vice and the other end in some pliers and pull. You will feel the wire “give’ slightly. It will then be straight and work hardened. This will make crisp bends easier and the slightly stiffer wire will be easier to handle in this application.
A_J_Rimmer
SMF Supporter
Copper wire is pretty soft, and from a reel will be curved as well. To get nice straight handrails first cut a length off, grip one end in a bench vice and the other end in some pliers and pull. You will feel the wire “give’ slightly. It will then be straight and work hardened. This will make crisp bends easier and the slightly stiffer wire will be easier to handle in this application.
That's good to know, thanks for the tips Tim.
A_J_Rimmer
SMF Supporter
Another way is to roll it between two flat surfaces, such as a cutting mat and a steel ruler.
Ah cool! Thanks Jakko!
A_J_Rimmer
SMF Supporter
Okaaaay, so not a very exciting post I know, apologies for that, but progress over the last few weeks has been a bit slow over the last few weeks.
My copper wire and thread has turned up - the thread maybe a bit thin for 1/35 rope but no matter, if I need to order some thicker thread I can just give this to my daughter who is doing a creative arts degree.

And contrary to what I originally wanted to do with this build (which was to just finish it), I've been so inspired by you lot that I came to the conclusion that if I was going to have a go at replacing hatch handles and adding stowage racks etc. then I might as well sort out the bloody awful massive holes in the undersides of the hull and around the drives.

I need to sand down the filler, but I won't make too good a job of it as I plan to mud up that whole area anyway.
I've also drilled out the three machine gun barrels and assembled all of the stowage (not that I'm going to be using it all). So no real excuses now, I really do need to get on and paint it!
Cheers!
My copper wire and thread has turned up - the thread maybe a bit thin for 1/35 rope but no matter, if I need to order some thicker thread I can just give this to my daughter who is doing a creative arts degree.
And contrary to what I originally wanted to do with this build (which was to just finish it), I've been so inspired by you lot that I came to the conclusion that if I was going to have a go at replacing hatch handles and adding stowage racks etc. then I might as well sort out the bloody awful massive holes in the undersides of the hull and around the drives.
I need to sand down the filler, but I won't make too good a job of it as I plan to mud up that whole area anyway.
I've also drilled out the three machine gun barrels and assembled all of the stowage (not that I'm going to be using it all). So no real excuses now, I really do need to get on and paint it!
Cheers!
- Joined
- Apr 28, 2018
- Messages
- 11,433
- Points
- 113
- First Name
- Jakko
The thread is thin for rope, but not for the kind of string that people usually tie stuff onto tanks with Also, I bet that no matter how many models you build in your life, you will have about 99% of that bobbin left when you’re done …
Also, I bet that no matter how many models you build in your life, you will have about 99% of that bobbin left when you’re done …A_J_Rimmer
SMF Supporter
The thread is thin for rope, but not for the kind of string that people usually tie stuff onto tanks with
Yeah I bet, I don't see me ever running out!
A_J_Rimmer
SMF Supporter
Okay so executive decision made, I will add some wire stowages racks etc. but in the interests of moving forward I've decided against messing around with all the hatch handles. I'm almost certainly going to make another one of these kits and I'll sort them out on the next build.
With that in mind I hit it all with a coat of Tamiya Primer - feels good to get some paint on it.

I then had a play with the Humbrol #166 I picked up for this build. It's not a particularly good paint but I've used worse. It's as thick as hell from the bottle but I added a fair bit of Hataka thinners to a few drops in palette and it went on quite nicely. I'm only really painting up the rear part that goes under the stowage rack so I can fit it - when I paint up the rest of the build I'll get my wet palette out - with some thinners the paint should go on well.
Note: I know Jakko mentioned the starting handle shouldn't be there - but it helps support the stowage rack so I'll leave it be - it'll give me something extra to glue it onto.
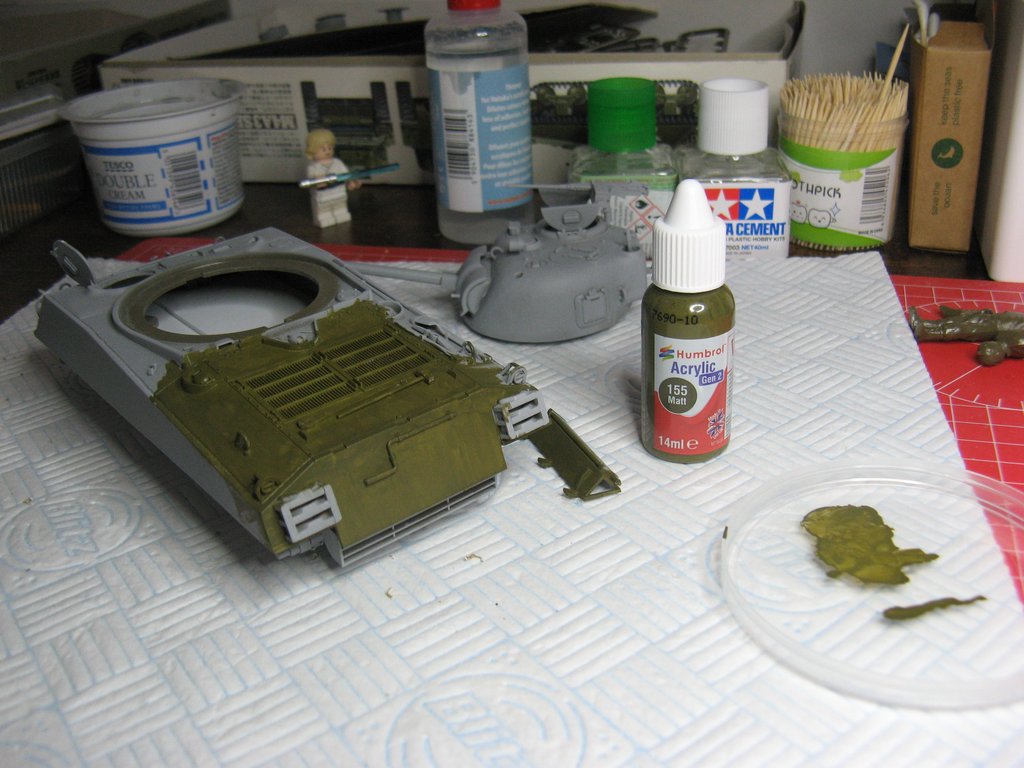
I'll add another coat to the rear plate before I glue the rack into place.
Cheers!
With that in mind I hit it all with a coat of Tamiya Primer - feels good to get some paint on it.
I then had a play with the Humbrol #166 I picked up for this build. It's not a particularly good paint but I've used worse. It's as thick as hell from the bottle but I added a fair bit of Hataka thinners to a few drops in palette and it went on quite nicely. I'm only really painting up the rear part that goes under the stowage rack so I can fit it - when I paint up the rest of the build I'll get my wet palette out - with some thinners the paint should go on well.
Note: I know Jakko mentioned the starting handle shouldn't be there - but it helps support the stowage rack so I'll leave it be - it'll give me something extra to glue it onto.
I'll add another coat to the rear plate before I glue the rack into place.
Cheers!
scottie3158
SMF Supporter
Arnold,
Another great source of wire is off cuts of cable I have a selection of all types of cables that i just cut to length and strip off the insulation.
Another great source of wire is off cuts of cable I have a selection of all types of cables that i just cut to length and strip off the insulation.
A_J_Rimmer
SMF Supporter
Arnold,
Another great source of wire is off cuts of cable I have a selection of all types of cables that i just cut to length and strip off the insulation.
Thanks Paul!
Waspie
SMF Supporter
I stripped out the wire from a standard 3 core UK cable. Removed the plastic outer core. Then through trial and error, removed several strands of the wire until the thickness needed was attained. Then twisted them between a hook on the bench and a hand drill. Cut to the required length, the ended sealed with CA or solder. Somewhere in my Chally build thread I mentioned the number of strands for a 1/35 tanky thing!!!! I'll check and get back!
Managed to edit before my 10 minutes lapsed.
I removed 4 strands of wire from the brown or blue wire!! That achieved the correct thickness wire for me on a modern 1/35 Challenger 2. Don't know if WW2 armour used thicker or thinner tow cables!!
Managed to edit before my 10 minutes lapsed.
I removed 4 strands of wire from the brown or blue wire!! That achieved the correct thickness wire for me on a modern 1/35 Challenger 2. Don't know if WW2 armour used thicker or thinner tow cables!!
Last edited: