I hope the red paint doesn't come off when I mask it to apply the repair coat of primer and the black.
You are using an out of date browser. It may not display this or other websites correctly.
You should upgrade or use an alternative browser.
You should upgrade or use an alternative browser.
The one thing about models I don't like: Seams!
- Thread starter SUBSIM
- Start date
Try sticking the masking tape to the back of your hand a couple of times. This removes or masks some of the adhesive making it less sticky and less likely to pull up your earlier paint.
There are quite a few really good suggestions above but there will often be the odd ‘difficult’ area that you get left with.
If you think about it, after a bit of sanding any issues will relate to very fine small imperfections. Often they might be what we call ‘ghost seams’.
To resolve these you do need a very fine filler and, ideally, one that self levels with the ‘hard material’ sinking into any tiny gap as the carrier evaporates.
The ideal product for this is Mr Dissolved Putty.
MDP is amazing used the right way, not really for any significant gaps, but for smoothing over a rough surface it is perfect when combined with light sanding. It puts filler material into dips while sanding takes care of raised areas. The qualities that makes it perfect for getting rid of, perhaps, finger impressions, are also good for the really fine imperfections in seams.
First make sure your MDP is well thinned and mixed. A pot can thicken relatively quickly so I frequently thin it with Mr Levelling Thinner.
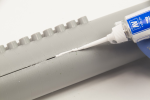
It can be applied to the seam areas with a cocktail stick or a disposable brush.
It is important to allow it to fully cure and harden and not be impatient. It is during that hardening process that it sinks into the ‘dips’. I usually leave it overnight before sanding.
In awkward areas you can also ‘sand it’ by wiping it with a cotton bud dipped in Mr Levelling Thinner or i.p.a. to preserve detail.
If you think about it, after a bit of sanding any issues will relate to very fine small imperfections. Often they might be what we call ‘ghost seams’.
To resolve these you do need a very fine filler and, ideally, one that self levels with the ‘hard material’ sinking into any tiny gap as the carrier evaporates.
The ideal product for this is Mr Dissolved Putty.
MDP is amazing used the right way, not really for any significant gaps, but for smoothing over a rough surface it is perfect when combined with light sanding. It puts filler material into dips while sanding takes care of raised areas. The qualities that makes it perfect for getting rid of, perhaps, finger impressions, are also good for the really fine imperfections in seams.
First make sure your MDP is well thinned and mixed. A pot can thicken relatively quickly so I frequently thin it with Mr Levelling Thinner.
It can be applied to the seam areas with a cocktail stick or a disposable brush.
It is important to allow it to fully cure and harden and not be impatient. It is during that hardening process that it sinks into the ‘dips’. I usually leave it overnight before sanding.
In awkward areas you can also ‘sand it’ by wiping it with a cotton bud dipped in Mr Levelling Thinner or i.p.a. to preserve detail.
Yeah, I am going to give it 48 hours to dry this time, then mask off the red.
Well, my touch up job is not a great match but it's good enough. Let's just say Let's just say this Akula had some repairs done in Bucharest, call this "weathering effects".  I know if I try to fix it any more there's a very likely chance it will get worse, not better. That's what I get for not keeping a bit of the original mix for touch ups, I forgot.
The other side will be the "show side", no one will ever see this side.

As you can see, the colors on the test sprue are the HobbyBoss recommended paints, tire black and hull red. The Mr Hobby hull red just doesn't appear to be very "red".
Can I ask, do the Micro Set and Sol decal solution affect the paint? I was using them for the first time and it looked like it was smearing the paint!

I know if I try to fix it any more there's a very likely chance it will get worse, not better. That's what I get for not keeping a bit of the original mix for touch ups, I forgot.The other side will be the "show side", no one will ever see this side.
As you can see, the colors on the test sprue are the HobbyBoss recommended paints, tire black and hull red. The Mr Hobby hull red just doesn't appear to be very "red".
Can I ask, do the Micro Set and Sol decal solution affect the paint? I was using them for the first time and it looked like it was smearing the paint!
Looks nice and sharp to me Neal. Great stuff.Well, my touch up job is not a great match but it's good enough. Let's just say Let's just say this Akula had some repairs done in Bucharest, call this "weathering effects".
The other side will be the "show side", no one will ever see this side.
View attachment 452499
As you can see, the colors on the test sprue are the HobbyBoss recommended paints, tire black and hull red. The Mr Hobby hull red just doesn't appear to be very "red". View attachment 452501
Can I ask, do the Micro Set and Sol decal solution affect the paint? I was using them for the first time and it looked like it was smearing the paint!
View attachment 452500
I’ve had one of the solutions leave white marks on gloss varnish, but they dissapeared when i put the second coat on to seal the transfers. Never had one make paint run before though?
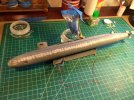
Back on the Ohio, I went around the whole sub and sanded on the seam between the vertical scribed lines, hoping to diminish the seam without marring the lines too much.

Reprimed the model last night, the seam still seems pretty evident


Sigh. Any suggestions? Should I add filler along the entire line and sand? Wet sand?
Reprimed the model last night, the seam still seems pretty evident
Sigh. Any suggestions? Should I add filler along the entire line and sand? Wet sand?
Definitely wet sand, and use the sanding pad/paper on a hard backing to ensure it only takes off the high spots.
I would say yes to the filler along the join. Personally I would use a cellulose type filler rather than an acrylic one because it bonds to the plastic better, and, in my experience, sands smoother without crumbling back out of the join.
Another option is to stretch some kit sprue really thinly and cement that into the crack. Once it has dried completely (couple of days) you can sand it back. The advantage of that approach is that the sprue will bond the hull parts and stop movement of the join causing ghost crack lines to appear as it dries.
Can’t tell from the images, but are the plate lines incised? If so, don’t wait until you have finished sanding before re-scribing them. If you gradually deepen them as you sand it’s much easier because the existing lines act as guides for the scribing. If you wait until you have finished you may have to scribe completely new lines, which isn’t that easy.
As Barry said i would use Mr Dissovled Putty all the way along and after hardening for 24 hours sand the whole seam, although this does mean you will need to rescribe the vertical lines.
Ok, I will try that. Ordered via Amazon, so hopefully I can start again Monday. That Ohio, quietly taunting me....
Definitely wet sand, and use the sanding pad/paper on a hard backing to ensure it only takes off the high spots.
I would say yes to the filler along the join. Personally I would use a cellulose type filler rather than an acrylic one because it bonds to the plastic better, and, in my experience, sands smoother without crumbling back out of the join.
Another option is to stretch some kit sprue really thinly and cement that into the crack. Once it has dried completely (couple of days) you can sand it back. The advantage of that approach is that the sprue will bond the hull parts and stop movement of the join causing ghost crack lines to appear as it dries.
Can’t tell from the images, but are the plate lines incised? If so, don’t wait until you have finished sanding before re-scribing them. If you gradually deepen them as you sand it’s much easier because the existing lines act as guides for the scribing. If you wait until you have finished you may have to scribe completely new lines, which isn’t that easy.
I don't think the seam is deep enough to be called a crack, it's not really fingernail detectable. But it is visible after priming so I have to think it will be visible after painting.
Which cellulose type filler ? I have Tamiyo Liquid Surface Primer, Tamiyo White Putty, AK Modeling Grey putty and several older Testor putties.
but are the plate lines incised? What exactly do you mean? The vertical lines are etched into the surface, barely detectable by fingernail.
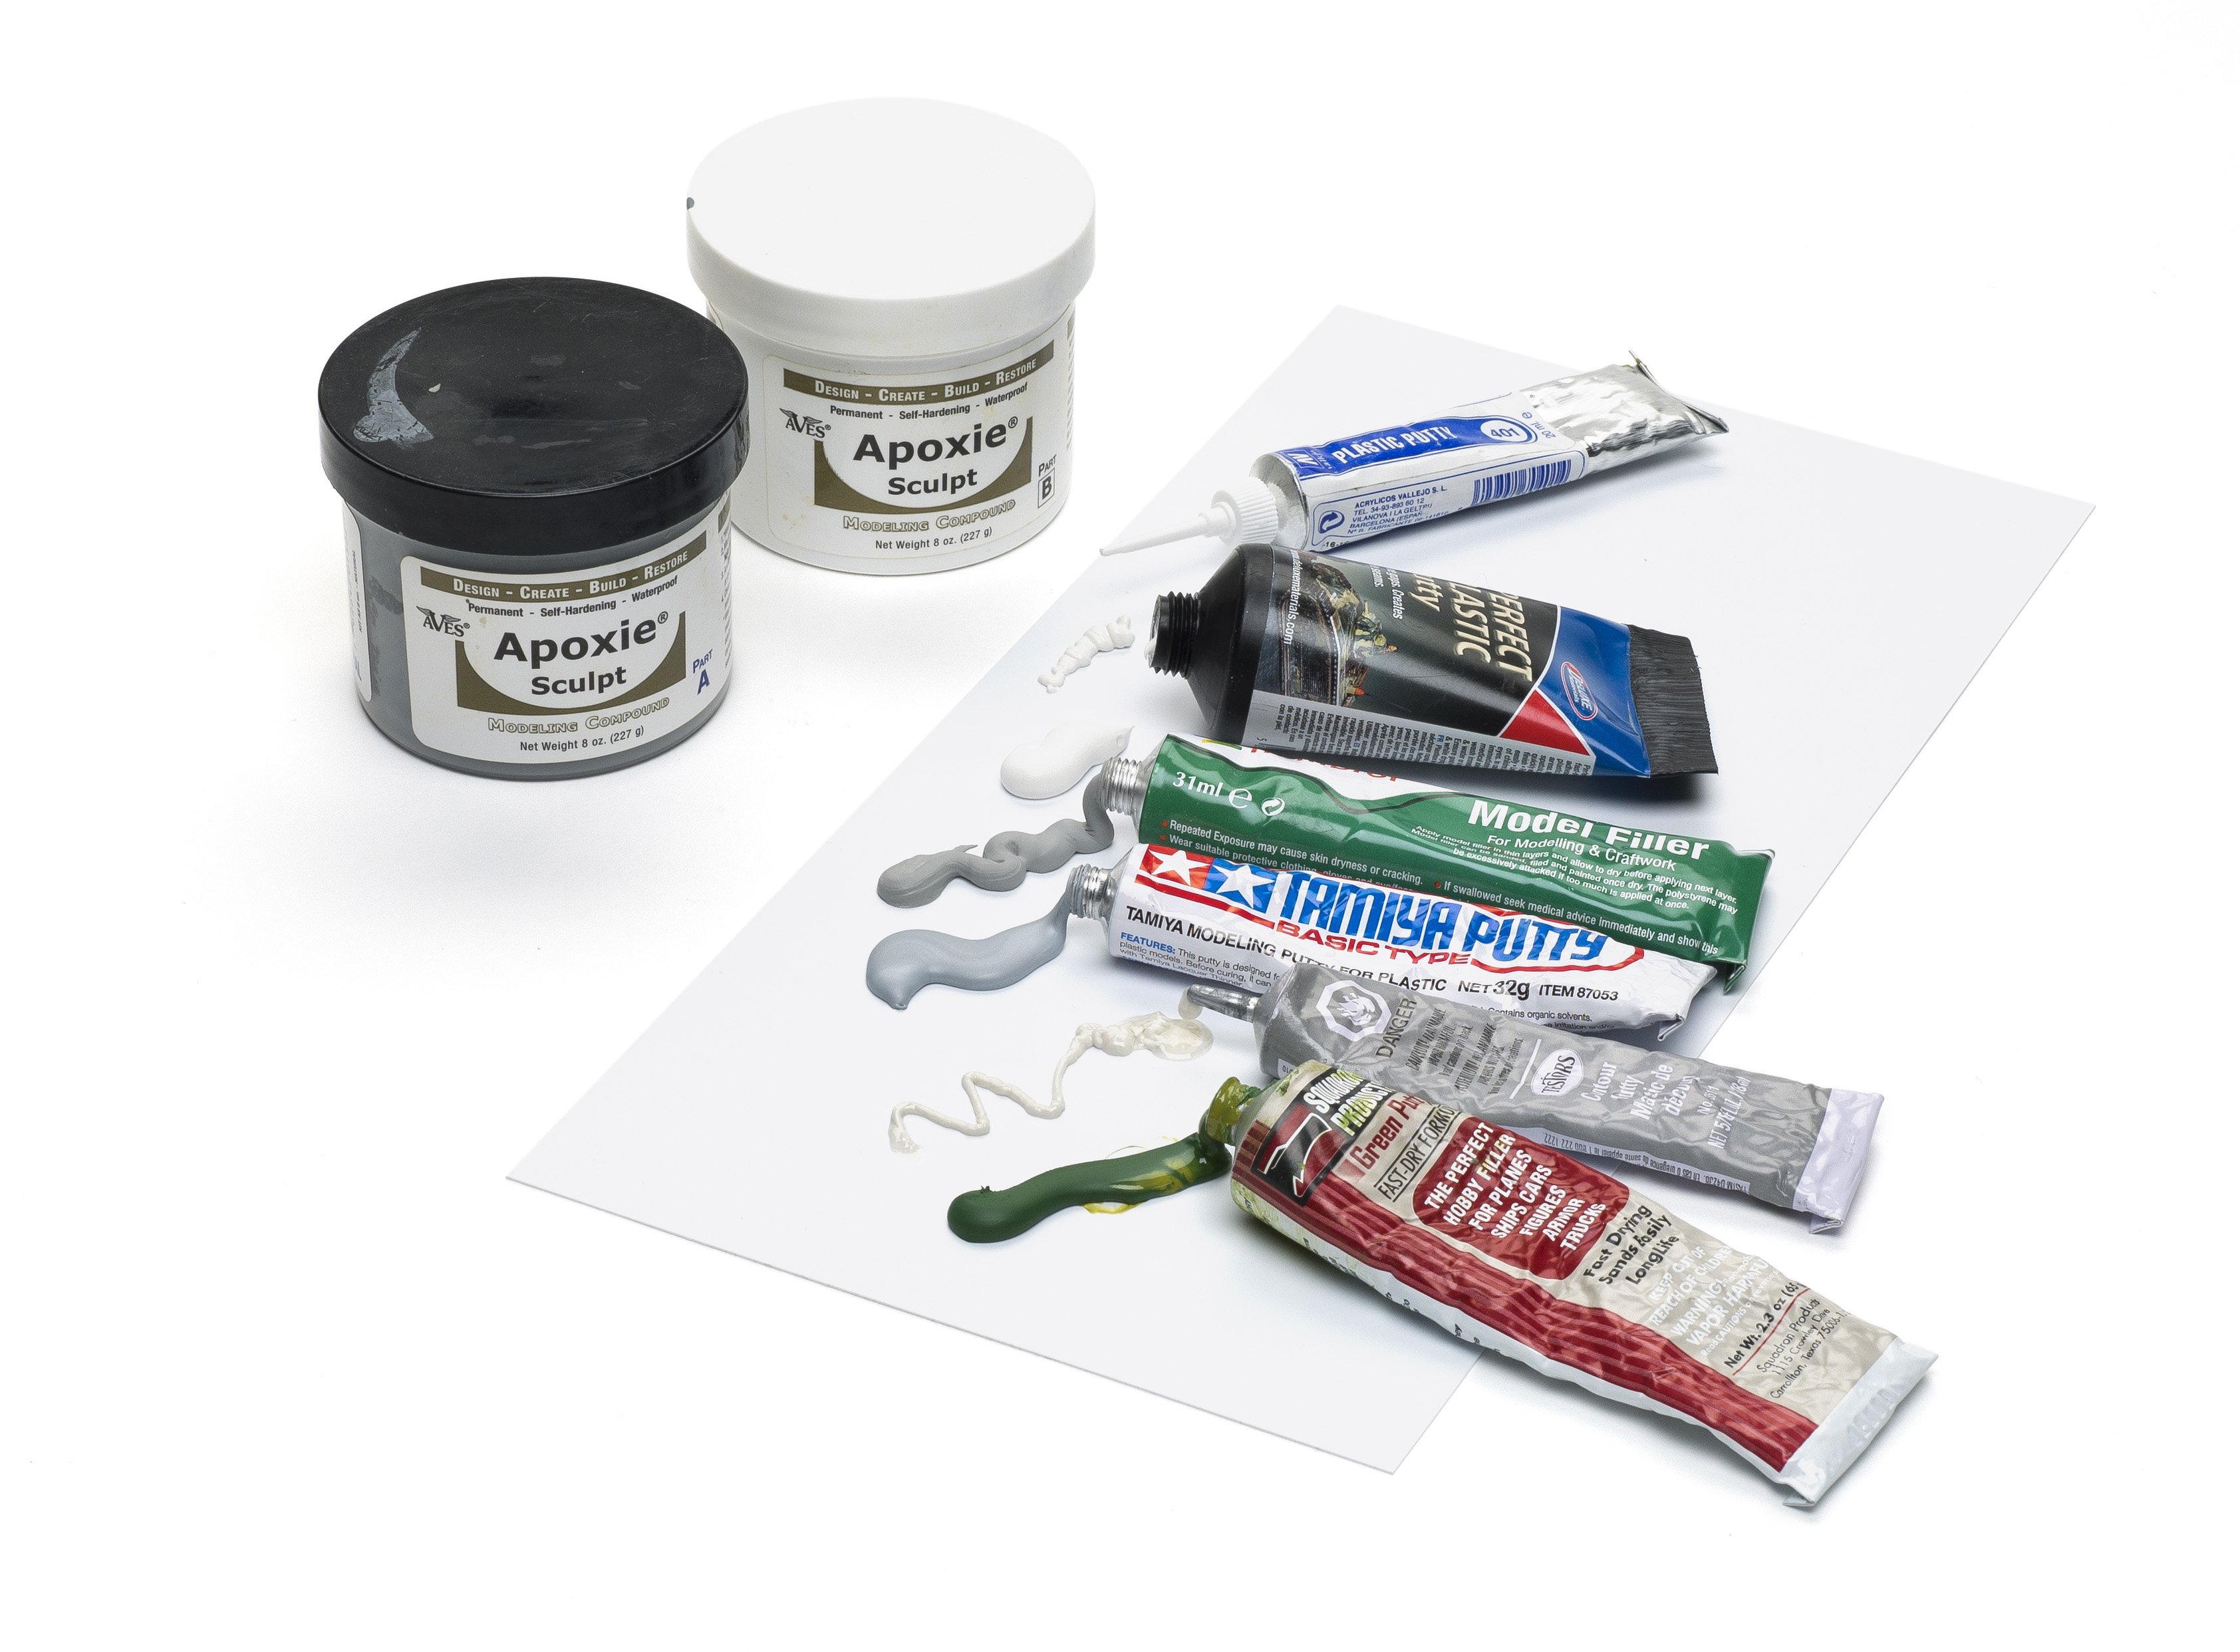
How to use filler putties to cover scale model gaps | FineScale Modeler Magazine
Gap fillers and how to use them. Obviously kits consist of individual parts. But the object of finishing them is to make them look like a solid object. The best way to do that is to eliminate gaps between the pieces. Sanding will take care of minor problems. However, if the parts don’t quite...
finescale.com
Edit: lol, looks exactly like my Ohio model :D
Attachments
Mr dissolved putty is cellulose based, so will do what you want. Etched into the surface is what I mean by “incised”. After you put the filler on I would run a scriber down the line to clear it of putty. No point in having to rescribe the detail if you don’t need to.
Mr Dissolved Putty is here, I applied it last night, will start sanding after lunch. Fingers crossed!

I've had enough sanding, so I pushed ahead with masking it off. I used Mission Models HULL RED ANTI FOULING NORFOLK 65A MMP-111 with a few drops of flat red added and made sure to make enough to have some left over for touch up.
Thankfully, no paint came off on the tape!


Now I can finish painting the hatch insides and then gluing them into place, hopefully a nice neat pair of rows (they are just sitting in place currently, all crooked & haphazard-looking).


Then at last I can start on the missile smoke and lights!
Thankfully, no paint came off on the tape!
Now I can finish painting the hatch insides and then gluing them into place, hopefully a nice neat pair of rows (they are just sitting in place currently, all crooked & haphazard-looking).
Then at last I can start on the missile smoke and lights!
Looking pretty fine Neil. Nice job 

rtfoe
SMF Supporter
In such a small scale I would thin coat gloss varnish then decal then varnish again with gloss coat then over that with matt. The gloss varnish in between the decaling and matt varnish is to create an even level of the decal film and the surface and to further achieve a smoother surface is to wet sand lightly with very fine grit paper. Polish if you want to. I heard there's a 7 or 12 steps to a mirror finish of sanding and polishing for car modelers but that could be a myth.
It also depends on the kind of decals you are working with. If they have that shine on the backing paper and the film around the image isn't too visible or thick then half the battle is won. If they look matt and thick then chances are they will react like paper and not conform to any raised surface and most likely silver.
Weathering finish sometimes camouflages bad decal application especially armour but for planes and ships there is no escape.
Remember that the varnish coat has to level of and not dry immediately on application for a smooth finish or you'll get orange peal surface and at the scale you're working on will look like coarse sand paper viewed to scale.
Not wanting to scare you but if done properly and patiently you'll get a reasonable good finish to decaling. Just treat it as a separate process on its own and not a step in a build.
Applying the decal.
Cut separate images from the backing paper and dip into luke warm water until the backing paper is soaked then remove and place the backing paper image facing up on a paper towel or tissue. There will be a thin puddle on the backing paper to let the carrier film and image detach on its own and not float all over the place. The moment you can feel it slide then it's ready to apply. Grab one side of the backing paper with a clamp tweezer and with a paint brush slide the carrier film and image onto the pre-prep'd surface. Moist the paint brush and surface if you want to adjust the decal position. And that's all to it.
Cheers,
Richard
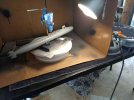
Since the missile portion seems likely to make the model top-heavy, I'm extending the pegs on the plastic base,
and adding some tabs to screw it down onto the wooden base, so any jiggling the switch is less likely to capsize the boat.


Decided to do some touch up painting, the Mission Models paint is really odd.
It has a mottled look after handling. Maybe I should have let it dry longer? Well, after the touchup coats I followed up with 2 coats matt clear...


Finally, completed the electrical circuits!

Now with the sub mostly complete (lacking decals and scopes), the base assembled and the electrical finished and tested,
testing different configs of smoke and glues. Looks like plain Elmer's white glue is the best.

and adding some tabs to screw it down onto the wooden base, so any jiggling the switch is less likely to capsize the boat.
Decided to do some touch up painting, the Mission Models paint is really odd.
It has a mottled look after handling. Maybe I should have let it dry longer? Well, after the touchup coats I followed up with 2 coats matt clear...
Finally, completed the electrical circuits!
Now with the sub mostly complete (lacking decals and scopes), the base assembled and the electrical finished and tested,
testing different configs of smoke and glues. Looks like plain Elmer's white glue is the best.