Trumpeter 1/35 BTM-3 High Speed Trench Digger

Dave Ward

Still Trying New Things
SMF Supporter
Joined
Apr 27, 2018
Messages
8,654
Points
113
Location
South Gloucestershire
First Name
David
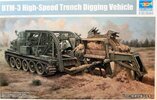
I've been struggling with my modelmaking mojo recently & been searching my stash to find something that would appeal - I found this at the bottom of the stash ( it's a big box! )
P8100021.JPG
It actually says 770 parts, but 180 of those are the individual track links - even so, I think it's the largest number of parts an any model I've attempted ( and also one of the most expensive ). The whole thing is based on a heavily modified T-55 chassis reversed, so the drive sprockets are at the front. The whole feature is the bucket wheel - it looks complex, and it looks like a challenge.
I'll be putting up some sprue shots ( not all ) and detail shots - the instructions, typically Trumpeter, are 42 stages long!, and you get a real box full!
Dave
 

Jim R

SMF Supporter
Joined
Apr 27, 2018
Messages
13,735
Points
113
Location
Shropshire
First Name
Jim
I'll follow along with this most unique build. If the kit is like my current Trumpeter half-track there will be a vast number of tiny pieces. On mine the parts need a lot of clean up but detail and fit is good.
I hope this will reset your mojo.
 

Dave Ward

Still Trying New Things
SMF Supporter
Joined
Apr 27, 2018
Messages
8,654
Points
113
Location
South Gloucestershire
First Name
David
Reading through the instructions, it looks like I can build it in four modules, the chassis, the cab, the support deck/frame & the bucket wheel. I can see that painting is going to be tricky in places, as there a load of bits that will be visible, but not easily accessible. I got this from John in a Trumpeter sale - I think I paid around £50 ( a vast fortune for me! :tongue-out3:) - you can still get it in the UK for £72-80.................
Dave
 

Scratchbuilder

SMF Supporter
Joined
Jul 2, 2022
Messages
1,943
Points
113
First Name
Mike
Hello Dave,
Bit daunting with all those parts staring at you. I have their Scud and Launcher and must say thay after getting close to finishing the chassis I had to put it away for later, but still get it out when the mood takes me - do a bit and then away it goes again.
But that is an interesting subject you have there, and look forward to sitting in on the build.
Mike.
 

boatman

SMF Supporter
Joined
Nov 8, 2018
Messages
12,925
Points
113
Location
NORFOLK UK
First Name
christopher
YES GO FO IT Dave it will be anintresting build an i'll also follow along a chair at the front please before the rest of the rabble turn up a tea an cakes at all or hobobs ?
chrisb
 

Dave Ward

Still Trying New Things
SMF Supporter
Joined
Apr 27, 2018
Messages
8,654
Points
113
Location
South Gloucestershire
First Name
David
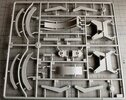
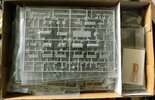
I'm not going to post all 16 sprues,just the mildly interesting ones! The model comes in a big sturdy box 420mm X 297mm X !00mm. - A deep A3 box.
Full of sprues
DSCF3595.JPG
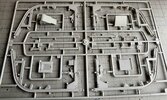
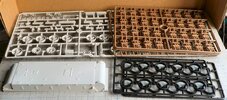
All the sprues are very clean, absolutely no flash, but will need a fair amount of clean up, due to a lot of ingates and moulding pips.
DSCF3596.JPG
All the chassis bits, most of which are from Trumpeters' T-55 models.
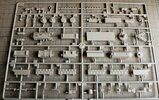
DSCF3597.JPG
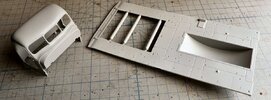
One piece cab & support deck - very nice mouldings
DSCF3599.JPGDSCF3600.JPGDSCF3601.JPGDSCF3602.JPG

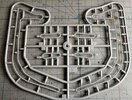
This sprue is really odd
DSCF3603.JPG
It has the bits for a complete engine & transmission, but it isn't much use, as there is no way of displaying it ( ie bonnet open ), and it's no way complete, there's no cooling system, radiator etc. It's like Trumpeter started to do a complete interior, but gave up halfway!

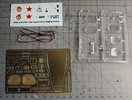
DSCF3598.JPG
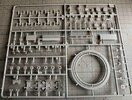
The little bits - I can see that those tiny PE rivets/nuts will stay on the fret!!!
I'll post more pictures shortly.....................
Dave
 

Dave Ward

Still Trying New Things
SMF Supporter
Joined
Apr 27, 2018
Messages
8,654
Points
113
Location
South Gloucestershire
First Name
David
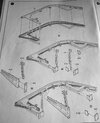
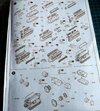
The instructions are typical Trumpeter, b&w line drawings on 32 A4 pages, in 42 steps, they look reasonably clear
DSCF3610.JPG
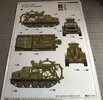
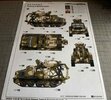
There are two colour vaiants, one overall green, the other in the typical Soviet 3-colour camo.
DSCF3611.JPGDSCF3612.JPG I think the camo version would complicate the painting too much, so I'm going for the overall Russian Green!
A few detail shots....................
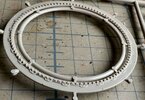
DSCF3609.JPG
One of the outer bucket ring sides
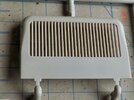
DSCF3608.JPG
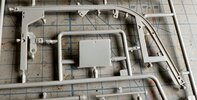
The large front grille ( pity there's nothing to put behind it! )


DSCF3607.JPG One of the four support rails......................

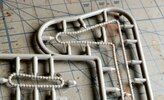
DSCF3605.JPG
Chain drives for lowering & hoisting the bucket wheel

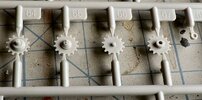
DSCF3604.JPG
Sprocket wheels for the chain drives.

There is a massive amount of small parts, which mean nothing on the sprues, but add a large amount of detail during construction. It's certainly not going to be a quick build, and due to the large parts count, not for a beginner.

Watching the YouTube video, several things struck me - how dirty the thing would get, especially in damp soil! - another is the limitations of a machine like this. You would need a generally even surface, with no gullies or streams, a sufficient depth of soil above the bedrock. The soil would not have to be too wet ( It'd clog the guts up ), or too dry ( the trench would collapse ). It'd destroy any drains/pipes/cables - you'd need a bulldozer to clear up any walls etc. You couldn't use it near any built up areas. I can't imagine it tackling any real gradient. It seems particularly suited to Russian conditions - like open Steppe country, but very limited elsewhere.
Dave
 

Gern

'Stashitis' victim
SMF Supporter
Joined
May 17, 2009
Messages
9,705
Points
113
Location
Stourbridge
First Name
Dave
You say the instructions look pretty clear, but I'm confused by the pics of the bucket wheel frame you've shown. Part H7 looks like it is standing vertically against the plate securing it to the frame - part H32? If that's right, the only person I can think of that could fit it the way it's shown is Mr E M Escher!

Edit: I gotta ask 'cos I got one of these in the stash.
 

Dave Ward

Still Trying New Things
SMF Supporter
Joined
Apr 27, 2018
Messages
8,654
Points
113
Location
South Gloucestershire
First Name
David
You say the instructions look pretty clear, but I'm confused by the pics of the bucket wheel frame you've shown. Part H7 looks like it is standing vertically against the plate securing it to the frame - part H32? If that's right, the only person I can think of that could fit it the way it's shown is Mr E M Escher!

Edit: I gotta ask 'cos I got one of these in the stash.
I can see what you mean - but the only way I'll be able to tell for sure is when I actually try to fit the bits together! So, maybe a week ( or two ) into the build!
Dave
 

stillp

SMF Supporter
Joined
Nov 17, 2016
Messages
7,225
Points
113
Location
Rugby
First Name
Pete
Interesting subject Dave, looking forward to watching this build.
Pete
 
Joined
Apr 12, 2019
Messages
2,215
Points
113
Location
Selkirk
First Name
Andy
You say the instructions look pretty clear, but I'm confused by the pics of the bucket wheel frame you've shown. Part H7 looks like it is standing vertically against the plate securing it to the frame - part H32? If that's right, the only person I can think of that could fit it the way it's shown is Mr E M Escher!

Edit: I gotta ask 'cos I got one of these in the stash.
I have pictures of a built up model and part H7 does lie at an angle, it's just the drawing that makes it look strange.

Andy.
 

Dave Ward

Still Trying New Things
SMF Supporter
Joined
Apr 27, 2018
Messages
8,654
Points
113
Location
South Gloucestershire
First Name
David
Construction starts, not with the first stages:
DSCF3616.JPG
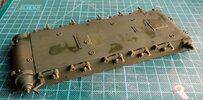
I'm leaving the engine out, you can't see it, it has no cooling system & no transfer box to power the bucket - and doesn't provide any locations for further bits, a waste of plastic............
The chassis has all the bits added, primed & basecoated ( dark patches are undried paint - all bit fitted well, no problems.
DSCF3613.JPG
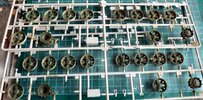
Wheels, idlers & sprockets assembled, primed & basecoated
DSCF3614.JPG
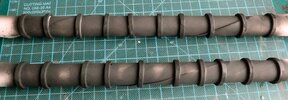
The road wheel tyres were primed & sprayed rubber black
DSCF3615.JPG
My usual method of rolling a piece of paper & threading the tyres over - makes it easy to handle & spray.
Had a calamity - the quick release coupling failed between hose & airbrush - it uncoupled OK, but wouldn't shut the air off & I couldn't reconnect the airbrush again. A nuisance, I had to drain the air-tank, remove the coupling from the hose & because my airbrushes have the quick release spigot fitted remove those as well, before continuing the session. Not disastrous, but very annoying - I managed to get paint all over my hands & jeans..............
Dave
 

langy71

SMF Supporter
Joined
Apr 27, 2018
Messages
1,559
Points
113
Location
Nottingham
First Name
Chris
'Shift up lads !!', I'm in for this bad boy, anybody got any Jaffa cakes ?'

A good start Dave, looking forward to seeing you work your magic with this .. :thumb2:
 

Tim Marlow

Little blokes aficionado
SMF Supporter
Joined
Apr 27, 2018
Messages
16,781
Points
113
Location
Somerset
First Name
Tim
What an interesting subject. Great start as well Dave. Are you going to make a base for it in use, or are you building it in transport mode?
 

Dave Ward

Still Trying New Things
SMF Supporter
Joined
Apr 27, 2018
Messages
8,654
Points
113
Location
South Gloucestershire
First Name
David
What an interesting subject. Great start as well Dave. Are you going to make a base for it in use, or are you building it in transport mode?
Tim,
I'm seeing how the model goes, I don't have to make a decision about bucket wheel up, or down until near the end of assembly. One of the major problems with showing the beast in operation is the sheer size needed, not only long & wide, but deep as well..............
Dave
 
Top