US Army M32B1 Tank Recovery Vehicle

Graeme C.

SMF Supporter
Joined
Apr 29, 2018
Messages
1,485
Points
113
First Name
Graeme
Looking good Jakko, you're putting a lot of effort in to the interior, I just hope it can still be seen when it's closed up.
 

Jakko

Way past the mad part
SMF Supporter
Joined
Apr 28, 2018
Messages
10,784
Points
113
First Name
Jakko
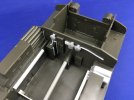
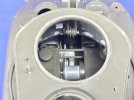
Thanks, all :smiling3: When I build or detail an interior, I always keep dry-fitting the outside parts and look through the holes in them so I don’t end up building too much stuff that will never be seen again. This is part of why I went for the AFV Club parts for the interior: it lacks the control handles, pedals, instrument panel, floor plates and all sorts of other stuff that’s there in a Sherman driver’s compartment (see page 16 of this Tech Manual for the M4A4 for a good view) — it’s basically the same for all Sherman variants and derivatives) but nearly all of that wil be out of sight on this model, so there is no need to add it. The Academy M10 and M36 tank destroyer kits do include a much more complete interior, and would have been a better choice had I wanted to leave the front hatches open. As it is, all I really still need to add to the driver’s compartment is the parking brake lever (see the TM link above).
The same goes for all the other interior bits: I’ll add what’s clearly visible, and some stuff that’s sort of visible, but not all of it and not with as much detail as the things that are easily seen :smiling3:
 

Jakko

Way past the mad part
SMF Supporter
Joined
Apr 28, 2018
Messages
10,784
Points
113
First Name
Jakko
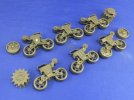
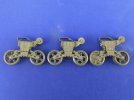
Here are the wheels and bogies:

F77D7343-54DB-4198-B80D-8F27278AB19A.jpeg

The white bolt heads on four of the bogies is because on the real thing, a plate could be bolted to them to lock out the suspension when lifting heavy loads with the crane. These bolts are screwed into the normal holes that are in the fronts of Sherman bogies anyway, so I only had to drill out the middle bogies to show those. The lip at the top of the front and rear bogies, above the bolts, is a shear plate that the bolt-on plate sits against, so the weight of the tank and load isn’t borne by the bolts.

Because of the heavy mine roller, I also adjusted the suspension so the nose of the tank will be down:

D3DB7258-3C91-4252-B7CA-CEA0D841B5F5.jpeg

Tasca (and Asuka) provide plates to go inside the bogies to regulate the suspension height. I used A (1.5 mm) at the front, A+C (2 mm in total) in the middle and A+B (2.5 mm) at the rear. To do this, though, I had to cut and chisel out the track that the spring package sits in on the inside of the rear bogies, else it wouldn’t go down far enough. That, then, is why there is filler on the rear right bogie: I accidentally went through it with the chisel …

(Shermanophiles may not that I used a bogie with “high” return roller mount at the front left, basically because I can :smiling3: The idea is that the sharp-eyed viewer may notice this is a replacement bogie.)
 

Jakko

Way past the mad part
SMF Supporter
Joined
Apr 28, 2018
Messages
10,784
Points
113
First Name
Jakko
The interior is now mostly finished:

429EEA58-4CD2-4380-B568-DFECF2638422.jpeg

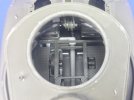
On the framework on top of the floor, there will be a plate on the left and right, so it will obscure more of the stuff I built than is the case now, and the winch drum in the middle will do the same. Here’s what I put behind the driver’s seat:

5683784E-BC68-4A09-A6A7-368A3F3A4AED.jpeg

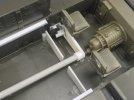
This is the winch transmission (low, high and reverse gears), which is driven via a chain from the transmission shaft. As the chain has a cover over it, I represented that with the front piece of plastic card. I skipped building the rear of the winch transmission, as it won’t be visible anyway. Under the floor, I added the visible bits of the actual winch drive and another chain cover:

69F96074-BB7F-4B27-BBCF-A29A66BACC29.jpeg

What it still needs is some levers, at least the winch gearshift and clutch, as well as the tank’s handbrake and possibly also the tank’s gearshift lever.
 

Jakko

Way past the mad part
SMF Supporter
Joined
Apr 28, 2018
Messages
10,784
Points
113
First Name
Jakko
Nice additions certainly gives the interior a busy look.
That’s what I’m aiming for :smiling3: The hull front was just too empty, and too obviously so, to leave it alone :sad:

nice updates and scratch work
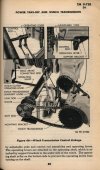
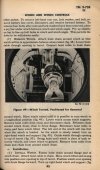
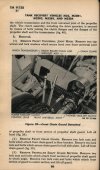
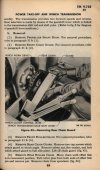
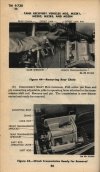
Thanks :smiling3: Though it’s not that great, as it’s all actually a pretty quick bodge job — even if I walked away from that winch transmission a couple of times because I couldn’t get my head around a good way to build it. This afternoon, I took another look at the technical manual (most of the relevant pages:
Page080.jpgPage085.jpgPage086.jpgPage089.jpgPage093.jpg

) and just went for it with scraps I found on my workbench :smiling3:

Now I know why I 'tasked' you mate ...
Now I know why I should stop building models with an interior … ;)
 
Last edited:

Jakko

Way past the mad part
SMF Supporter
Joined
Apr 28, 2018
Messages
10,784
Points
113
First Name
Jakko
There is a Dutch saying that translates as “He who keeps something, has something.”

2DB20FA2-960E-4242-9452-E2B235420303.jpeg

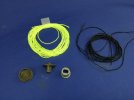
These are the bits for the winch. Tasca give you the bright yellow thread and the two green parts. I didn’t feel like trying to turn that yellow thread black, so I looked around for black thread instead, but found that if you order it online, you pay a lot more postage than the actual thing costs … So, because I was in town today, I went to a couple of craft shops to see if they had anything, but no luck (including “Oh, zero point seven millimetres?” after she had pointed me to thread about 5 mm thick … :rolling:).

Tonight, I was looking for some bits I could use to detail the model, and suddenly remembered I have a bag of leftover thread from kits … and yes, it turned out to include about a metre and a half of black thread of about the right thickness … Maybe I should have looked at that a week earlier :smiling3:

Now, Tasca tells you to wind 150 cm of the yellow thread onto the winch drum. I think this is wasteful unless you’re actually going to show (almost) that much actually in use, so I was looking for something to increase the winch drum’s diameter. I couldn’t find tube of the right diameter, but looking through my aircraft spares box, I found the grey bit. This fits neatly over the winch drum in both length and diameter, only needing the slot at the end reamed out, the flange cut off and about half a millimetre added to its length.

Inside the hull, I detailed the oil tank:

93091A78-5429-4302-AE0A-B6ECE4BAC884.jpeg

That’s the long, narrow, square tank in the corner. I added a round lid to the top from a piece left over from some unknown kit that was about the right diameter, and only needed a hole in the middle filled with a punched bit of card. The pipework is plastic rod and a little copper wire, the other stuff on the firewall is card, rod, strip and some Dragon canteens.
 

Caustik Filth

SMF Supporter
Joined
Jan 26, 2022
Messages
268
Points
63
Location
Portsmouth
First Name
Rob
Heel mooie Jakko,
Looks mighty fine for a 'bodge job' to me mate. A true mage of the scratchity for sure!
Cheers Rob.
 

Jim R

SMF Supporter
Joined
Apr 27, 2018
Messages
13,719
Points
113
Location
Shropshire
First Name
Jim
Hi Jakko
That interior is looking much more than adequate.
Maybe I should have looked at that a week earlier :smiling3:
I'm sure we have all done similar. I once tried to sort out all the hundreds of left over kit parts. I gave up and they are back, jumbled up, in a big plastic box.
The oil tank looks excellent.
Jim
 

Jakko

Way past the mad part
SMF Supporter
Joined
Apr 28, 2018
Messages
10,784
Points
113
First Name
Jakko
Looks mighty fine for a 'bodge job' to me mate. A true mage of the scratchity for sure!
That interior is looking much more than adequate.
It could be done a lot better, I assure you :smiling3: But as I mentioned before, the front bits are there more to give the impression that everything is there, rather than to be truly complete and accurate. The stuff at the rear of the hull and inside the turret is more important because it’s much more obvious.

I'm sure we have all done similar. I once tried to sort out all the hundreds of left over kit parts. I gave up and they are back, jumbled up, in a big plastic box.
I did persevere with that, to a fair degree. I have separate boxes for several subjects (M113s, Shermans, M26–M60-series MBTs, German vehicles, ammunition (all of these 1:35 only), propeller aircraft, jet aircraft, 1:76–1:72 vehicles and more) but all the rest goes into one large “miscellaneous” box. Yes, I have too much, really … And then, with a model like this, I’m happy I didn’t throw out an insignificant little part like that round thing I used as the oil tank lid :smiling3:

The oil tank looks excellent.
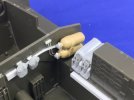
It actually needs a little more work :smiling3: The real thing has a lip around the top and tiny bolts on the round lid, which I intend to add, as they will (hopefully …) show up well after washing and drybrushing the interior.
 

Jakko

Way past the mad part
SMF Supporter
Joined
Apr 28, 2018
Messages
10,784
Points
113
First Name
Jakko
I’ve not been working on any models of late, so progress is a little slow … Also not helped by trying to think of a good way to build the fire extinguisher bottles. This afternoon, I suddenly remembered that I should have some from a Tamiya M113 somewhere, which should be about the right size. After a lot of rummaging around, I didn’t find them, but then recalled that the old and pretty awful Tamiya M60 kits have some too …

8A1D3CEB-205D-4488-835F-877E1736EED9.jpeg

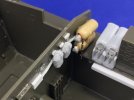
And luckily, I did find that part :smiling3: I cut off the handles and then glued on some rod to make the connectors on the tops of the bottles, as well as using stretched sprue to make the activation lines that run to them from the handles in the engine deck. It still needs some pipes from the bottles, but I’m still thinking about how to best do that.
 

Jakko

Way past the mad part
SMF Supporter
Joined
Apr 28, 2018
Messages
10,784
Points
113
First Name
Jakko
The interior work is finally almost complete … first, I made some pipework for the fire extinguishers:

33F382CF-F516-44C3-BA3D-9318CF5F4423.jpeg

The second bottle isn’t connected, because it turns out almost all of this will be hidden by the left rear seat, so I didn’t bother showing more. I also moved the water bottles over to the left a bit, as they were too far towards the vehicle’s centreline.

At the front, I added the winch control levers:

B537FE04-6466-487F-9258-C6A56AB1C858.jpeg

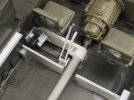
At the left is the winch gear lever (here in low forward gear, more or less), the other large handle is the winch clutch (here shown engaged) and the small handle next to the drive shaft is the clutch for the power take-off (also shown engaged).

With the floor plates and winch drum in place, this is what you can see of all of that through the open top:

8098739E-493E-4538-A31F-C6EF704946D3.jpeg

And because the clutches are engaged and the winch is in gear, there needs to be someone in the driver’s seat:

A3D02BEC-0343-4553-95D9-76ED5753B2A6.jpeg

This because with the power take-off clutch engaged, the tank’s transmission would be uncoupled from the drive shaft, so the winch could be controlled by means of the tank’s gas pedal.

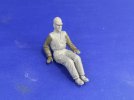
The figure has legs from a MiniArt set of American tankers, an upper body from a different such set, the arms are Asuka and the head is a resin one from Royal Model,
 

Jim R

SMF Supporter
Joined
Apr 27, 2018
Messages
13,719
Points
113
Location
Shropshire
First Name
Jim
Hi Jakko
Good progress. Frankenstein figure looks fine. Considering the different makers of his parts the proportions are very good.
Jim
 
Top