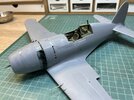
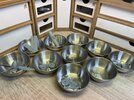
Zoukei Mura J2M2 Rai Den, 1/32 scale.

BarryW

SMF Supporter
Joined
Jul 23, 2011
Messages
5,040
Points
113
Location
Dover
First Name
Barry
The Raiden was a late war high altitude point defence interceptor, code named ‘Jack’. It was used to combat the B29s and was the fastest aircraft the Japanese Navy had.

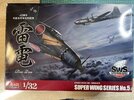
The box
IMG_6670.jpeg

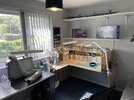
My workbench all cleaned up and ready with the kit sprues labelled for easy selection.
IMG_6671.jpeg

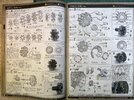
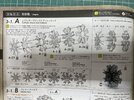
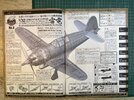
A couple of pictures of the superb instructions ZM produce.
IMG_6672.jpeg
IMG_6673.jpeg

ZM want no ambiguity as to how this aircraft is built and while looking busy the instructions really simplify the build by ensuring you know exactly how parts fit and providing a lot of tips.

Some people claim that ZM are ‘over engineered’ but that ignores the concept of these kits which is to give you an idea of how the actual aircraft went together while offering options for you to open as many, or as few, panels as you want. The detail of their kits is exquisite, the fit excellent but it does have tight tolerances to allow for. Personally I prefer to have hatches closed up and I don’t bother to paint unseen detail but I do love building up the internals. From the reading the instructions you know you are not just cementing part A-2 to part A-1 but you are cementing the pushrods to the front cylinder block! I love their approach.

Anyway, I should start cutting plastic over the weekend or, at least, by Monday. More to follow.
 

Andy T

SMF Supporter
Joined
Apr 26, 2021
Messages
1,952
Points
113
Location
Sheffield
First Name
Andy
Even the instructions are a thing of beauty, I can't wait for the build!
 

BarryW

SMF Supporter
Joined
Jul 23, 2011
Messages
5,040
Points
113
Location
Dover
First Name
Barry
I managed some bench time unexpectedly.

Look at the first stage in the instructions, how ZM take care to show you how the engine block goes together. The different views, the photo. You cannot go wrong.
IMG_6674.jpeg

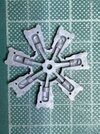
Now look at this. Some people criticise ZM for moulding in the cylinder internals all in the right position relative to each other. Well this is ZM having fun, their ‘signature’ if you like. This won’t add a penny to the cost, they are just shouting,!look at our detail!!
IMG_6675.jpeg

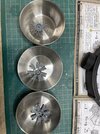
A little clean up and three engine sub assemblies ready to out together next time.
image.jpg
 

Jakko

Way past the mad part
SMF Supporter
Joined
Apr 28, 2018
Messages
10,793
Points
113
First Name
Jakko
img_6675-jpeg.481923
Well, I can certainly see that engine isn’t going to run any time soon … ;)
 

BarryW

SMF Supporter
Joined
Jul 23, 2011
Messages
5,040
Points
113
Location
Dover
First Name
Barry
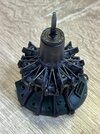
I have been working on the engine block for a few hours. Imps in red her black and then dry brushed with Uschi metal powders.

IMG_6676.jpeg

That’s much more effective than painting it metallic black as per instructions.
 

BarryW

SMF Supporter
Joined
Jul 23, 2011
Messages
5,040
Points
113
Location
Dover
First Name
Barry
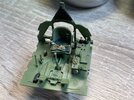
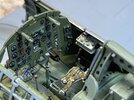
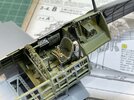
I have been building up the cockpit. It all goes together well and I am painting as I go. No detailing sets here, just the old fashioned hairy stick. Even the seatbelts are moulded in and paint up well.

I will have some weathering to do here, a semi-gloss coat, washes, semi-matt coat, dry brushing.

IMG_6677.jpeg

You can see her the underside of the cockpit. I not painting this as it won’t be seen, but I build it up nevertheless.

IMG_6679.jpeg
 

BarryW

SMF Supporter
Joined
Jul 23, 2011
Messages
5,040
Points
113
Location
Dover
First Name
Barry
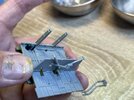
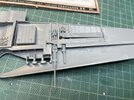
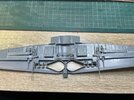
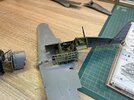
Much to my surprise I had a fit issue with the wing ribs associated with the guns. Up to then the fit was perfect. I spent ages checking them against the instructions, including the photos and really could not work out why. The only part already fitted into the wing was the spar, I checked it at all angles and it was in exactly the position pictured. It’s a real mystery but, for me, not a problem as I am building it with the hatches closed so it won’t be seen. I had to do a lot of carving to ensure the ribs fit into the wing and the wing top fits correctly. Here is how it looks

IMG_6682.jpeg

Here is the whole wing built up. I just need to spray the wheel wells and then attach the wing top.
IMG_6683.jpeg

I will show pictures of the completed cockpit soon, as soon as I have done the finishing touches. It’s looking good.
 

adt70hk

I know its a bit sad but I like quickbuild kits!!!
SMF Supporter
Joined
Sep 4, 2019
Messages
9,494
Points
113
First Name
Andrew
Coming on nicely Barry.
 

BarryW

SMF Supporter
Joined
Jul 23, 2011
Messages
5,040
Points
113
Location
Dover
First Name
Barry
Is it just me or are there no holes in the leading edge for the outer MGs?
No Gern
This was before the guns were fitted and they thread through holes in the upper wing. After cutting back the ribs the top wing fitted perfectly. I will put more pictures up later today.
 

Gern

'Stashitis' victim
SMF Supporter
Joined
May 17, 2009
Messages
9,696
Points
113
Location
Stourbridge
First Name
Dave
No Gern
This was before the guns were fitted and they thread through holes in the upper wing. After cutting back the ribs the top wing fitted perfectly. I will put more pictures up later today.
Aahh! Just me then!
 

BarryW

SMF Supporter
Joined
Jul 23, 2011
Messages
5,040
Points
113
Location
Dover
First Name
Barry
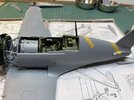
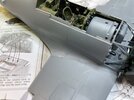
Gradually pulling together the fuselage/wings.

The instructions say fit the right side of the fuselage to the cockpit then that to the wings before adding the left side. I can see why, because it gives you access to cement in place and check it’s in the right position.
IMG_6687.jpeg
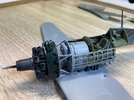
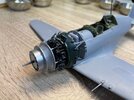
I have added the engine block as well at this point.
IMG_6691.jpeg

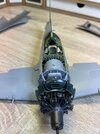
A front view
IMG_6693.jpeg

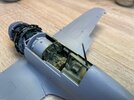
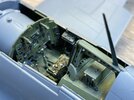
A couple of shots of the cockpit.
IMG_6689.jpeg
IMG_6690.jpeg
Once this is dry I will add a wing fillet on the right before attaching the left side and fillet.
 

Jim R

SMF Supporter
Joined
Apr 27, 2018
Messages
13,724
Points
113
Location
Shropshire
First Name
Jim
Superb Barry. I reckon the kit must be a pleasure to put together. Just that one hiccup to keep you on your toes.
 

BarryW

SMF Supporter
Joined
Jul 23, 2011
Messages
5,040
Points
113
Location
Dover
First Name
Barry
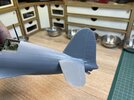
The airframe is ready for painting. I just need to do some masking.

I had some issues attaching the engine panels, not due to poor fit, the fit was perfect. The problem is that something was not lined up perfectly which then had a knock on effect. This is a key point about how these kits are engineered and why they take so much trouble to show, in the instructions, exactly how parts should fit. A moments inattention to the instructions and it can cost you. Anyway, I got there in the end with the use of filler and sanding. I never did work out exactly where I went wrong. If I wanted panels open though, it would have been a much bigger problem.

IMG_6702.jpeg

I have all the other subs ready as well, all in need of paint before assembly.
IMG_6703.jpeg
 

BarryW

SMF Supporter
Joined
Jul 23, 2011
Messages
5,040
Points
113
Location
Dover
First Name
Barry
Oh, a note to the observant. Yes I did break the aerial in the process. I have it and will glue it back in place in due course. I am just relieved that the two guns are still there!
 
Top