You are using an out of date browser. It may not display this or other websites correctly.
You should upgrade or use an alternative browser.
You should upgrade or use an alternative browser.
Zoukei Mura J2M2 Rai Den, 1/32 scale.
- Thread starter BarryW
- Start date
Jim R
SMF Supporter
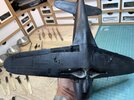
Looks good under the primer. Does the polishing make a big difference to the final finish or is it just a precaution against rogue dust or hair?
Exactly that. It helps ensure a smooth surface. You don’t want to sand paint away, just smooth the finish hence a polishing sponge.Looks good under the primer. Does the polishing make a big difference to the final finish or is it just a precaution against rogue dust or hair?
Must admit Barry, I’ve only ever done that under a gloss or metal finish. Probably why your finishes look so much better than mine LOL….this one is no exception, by the way. Looking very nice.Exactly that. It helps ensure a smooth surface. You don’t want to sand paint away, just smooth the finish hence a polishing sponge.
Ernie
SMF Supporter
Excellent work, that is coming along very nicely. The Raiden is one of my favorite aircraft and I am enjoying watching your build.
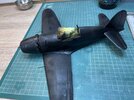
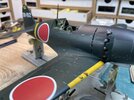
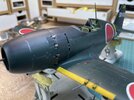
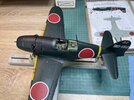
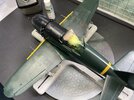
I have been getting on with the painting. Still got some more detail painting to do before applying decals. Here is where I am at.
Almost every build of the Raiden I have seen has been with the lightning bolts on the side. I have decided to be different and do a different aircraft without them. A much plainer, simpler scheme and the beauty is in its simplicity.
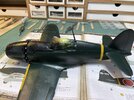
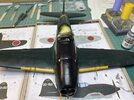
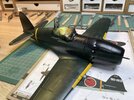
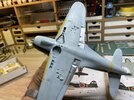
The scheme I am doing is below.
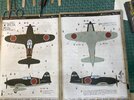
Almost every build of the Raiden I have seen has been with the lightning bolts on the side. I have decided to be different and do a different aircraft without them. A much plainer, simpler scheme and the beauty is in its simplicity.


The scheme I am doing is below.

Jim R
SMF Supporter
Coming on a treat. Nice to see a scheme which is not so common.
Last edited:
Ernie
SMF Supporter
Very nice!
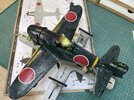
Detail painting done, note that I painted the red no walk lines. I always do this as it’s far easier and effecting than the decals.
That said Zoukei Mura decals are excellent so I decided to use them instead of painting the main markings.
First of all I applied a gloss coat. Because I spray with MRP’s lacquer varnish you do need to be a little careful not to reactivate the base paint so I use several very light mist coats and no heavy varnish coats.
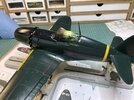
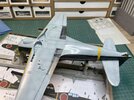
I will do decals later today and, when they are bedded down, do another light gloss varnish to seal them ready for a wash.

That said Zoukei Mura decals are excellent so I decided to use them instead of painting the main markings.
First of all I applied a gloss coat. Because I spray with MRP’s lacquer varnish you do need to be a little careful not to reactivate the base paint so I use several very light mist coats and no heavy varnish coats.


I will do decals later today and, when they are bedded down, do another light gloss varnish to seal them ready for a wash.
Jim R
SMF Supporter
Looking very good Barry. Does the lacquer varnish reactivate the colour coat regardless of how long the colour coat is left to cure? Have you considered an acrylic varnish?
Lacquers simply spray so much better than any water based paint so I only use that. The answer is yes, it is reactivated, though it is less prone to it if on for longer. This is very much a ‘lacquer thing’. It’s just a matter of being careful and it’s fine.Looking very good Barry. Does the lacquer varnish reactivate the colour coat regardless of how long the colour coat is left to cure? Have you considered an acrylic varnish?
Jim R
SMF Supporter
Thanks Barry.
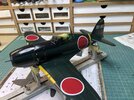
Decals all done and I have sprayed a sealing coat of gloss varnish.
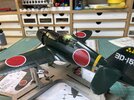
I have also been prepping the other bits ready for final fittings.
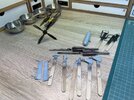
So far I used an enamel pin wash to bring out detail on the internal parts, u/c legs etc. for the airframe I am going to use Flory clay washes, I have not used these for some time but I think they will work well with this kit. Mostly it will be Dark Dirt wash but I am considering mixing a little Light wash with it for the topsides as I think it will be more effective in this case. These are water based ‘sludge’ washes. I will post more progress on that hopefully later today.


I have also been prepping the other bits ready for final fittings.

So far I used an enamel pin wash to bring out detail on the internal parts, u/c legs etc. for the airframe I am going to use Flory clay washes, I have not used these for some time but I think they will work well with this kit. Mostly it will be Dark Dirt wash but I am considering mixing a little Light wash with it for the topsides as I think it will be more effective in this case. These are water based ‘sludge’ washes. I will post more progress on that hopefully later today.
The wash dried and after a couple of hours I used a piece of dry blue roll to wipe it off. I used a cotton bud in hard to reach areas. A couple of tips on this:
1/ Always end with a wipe in the direction of airflow.
2/ If you don’t like the effect then you can use a wet piece of blue roll to clean it out of the panel lines to start again.
3/ I used a gloss surface as I only really wanted the wash left in panel lines and around detail. If you use a matt or semi matt varnish then it will stain other areas and this can be very effective. I do suggest practice to see how you like it. Again, even on a matt surface, you can clean up with water if you need to.
Finally, once you have finished, walk away and have a cuppa or a pint. Then return to examine the model afresh and it is likely that you will find somewhere that still needs a clean. It’s important to sort it before you matt varnish.
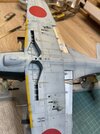
Below one wing has been cleaned up with the other wind to do. It did not take long.
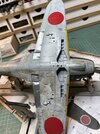
Below the model is done, one final inspection to do before matt varnishing.
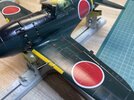
Flory washes are a great option and you cannot really go wrong with them. They don’t replace enamel washes, I stil prefer them around fine detail, particularly internal detail. Flory washes are by far the best for large surfaces with fine detail. Of course enamel washes are also by far the best option for replicating kerosene and oil spills.
So, next up, a matt coat.
1/ Always end with a wipe in the direction of airflow.
2/ If you don’t like the effect then you can use a wet piece of blue roll to clean it out of the panel lines to start again.
3/ I used a gloss surface as I only really wanted the wash left in panel lines and around detail. If you use a matt or semi matt varnish then it will stain other areas and this can be very effective. I do suggest practice to see how you like it. Again, even on a matt surface, you can clean up with water if you need to.
Finally, once you have finished, walk away and have a cuppa or a pint. Then return to examine the model afresh and it is likely that you will find somewhere that still needs a clean. It’s important to sort it before you matt varnish.
Below one wing has been cleaned up with the other wind to do. It did not take long.

Below the model is done, one final inspection to do before matt varnishing.

Flory washes are a great option and you cannot really go wrong with them. They don’t replace enamel washes, I stil prefer them around fine detail, particularly internal detail. Flory washes are by far the best for large surfaces with fine detail. Of course enamel washes are also by far the best option for replicating kerosene and oil spills.
So, next up, a matt coat.
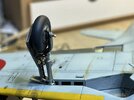
The main undercarriage was tricky to put together but in the end, with a bit of patience it was fine.
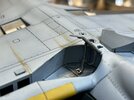
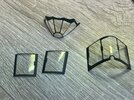
ZM do a lot of innovation and I am sure that producing separate frames for the windows onto which you glue the actual windows after the frames are painted sounded like a good idea. I thought so, but in practise trying to fit the frames to the windows in exactly the right position without making a mess I found to be impossible. Naturally you need to use one of the low tac glues that dry clear which adds to the problem. I tried three times, each time having to clean the parts and start again. I gave up because, thankfully, ZM included a normal set of windows with masks. It took me just a hour to mask the up, paint the interior colour, the camo colour and then matt varnish them.
The separate frames and windows
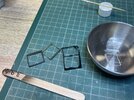
All ‘disposed of’
The alternatives, masked
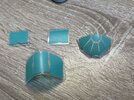
Painted
I suspect that ZM thought there would be issues which is why they included both sets. As far as I know they did not repeat that approach on later kits.


ZM do a lot of innovation and I am sure that producing separate frames for the windows onto which you glue the actual windows after the frames are painted sounded like a good idea. I thought so, but in practise trying to fit the frames to the windows in exactly the right position without making a mess I found to be impossible. Naturally you need to use one of the low tac glues that dry clear which adds to the problem. I tried three times, each time having to clean the parts and start again. I gave up because, thankfully, ZM included a normal set of windows with masks. It took me just a hour to mask the up, paint the interior colour, the camo colour and then matt varnish them.
The separate frames and windows

All ‘disposed of’
The alternatives, masked

Painted

I suspect that ZM thought there would be issues which is why they included both sets. As far as I know they did not repeat that approach on later kits.

