A time for celebration.

Scratchbuilder

SMF Supporter
Joined
Jul 2, 2022
Messages
1,943
Points
113
First Name
Mike
Hello Joe, for a re-start of the mojo you are doing a great job.
Nuts and bolts, I use Meng nuts and bolts, they come in different sizes with and without washers, you can also get rivets, again in different sizes. Just use a chisel blade to remove them from the plastic board and then pick up with a pointed blade and dip into some c/a and position.
The light guards - had a problem similar with Sherman ones, so used the kit ones to mark out on a thick bit of card and then used that as a guide to bend the brass ones around after running the brass through a lighter flame first to soften it.
As JR said - good to see you back.
 

Jim R

SMF Supporter
Joined
Apr 27, 2018
Messages
13,729
Points
113
Location
Shropshire
First Name
Jim
Just found this Joe. A lot of work but you're doing a fine job to bring this old kit up to date. Love what you've done with the seats.
 

scottie3158

SMF Supporter
Joined
Apr 27, 2018
Messages
12,704
Points
113
Location
Spalding
First Name
Paul
Joe,
Sorry mate I have only just found this and wow your off to a great start. Loving the additions and scratch work. Chair pulled up at the front.
 

Strenko J

Faithful rabble apprentice
SMF Supporter
Joined
May 1, 2018
Messages
566
Points
93
Location
Pennsylvania
First Name
Joe
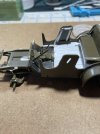
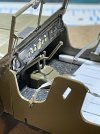
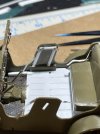
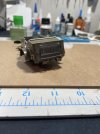
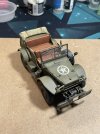
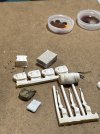
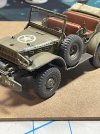
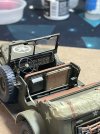
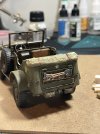
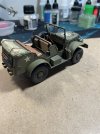
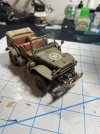
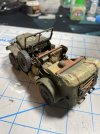
Thanks guys for joining in… so a big weekend for me..not only did I celebrate yet another year on this Planet…I also decided to pull the trigger…not literally though …. I am officially now part of the retiree group… after 43 years in the engineering and management of commercial construction projects I felt that it was time to enjoy life and not deal with working ungodly hours, stress out the yang yang..etc.. so hopefully I can keep up with all of my hobbies…

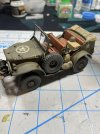
updates on the Dodge


IMG_0363.jpegIMG_0355.jpegIMG_0354.jpegIMG_0362.jpeg
and finally
IMG_0361.jpeg
Have a great evening everyone
 

Strenko J

Faithful rabble apprentice
SMF Supporter
Joined
May 1, 2018
Messages
566
Points
93
Location
Pennsylvania
First Name
Joe
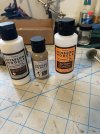
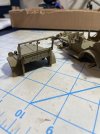
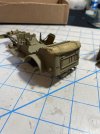
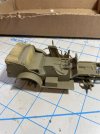
IMG_0374.jpegIMG_0373.jpegIMG_0372.jpegIMG_0371.jpegShameless plug for a new brand of paint that I have never used before.. Mission Models,,, really enjoyed the application and coverage with the AB, but it’s definitely more flat than the Valejo paint that I am used to using. I knew this was going to happen as well after reading some articles regarding their paints. The polyurethane mix that I had sitting on the shelf had solidified, and I could not add it to the mix, which would have given the finish a bit more of a Sheen….anywho..some updates…I had to build my own fire extinguisher out of sprue and styrene rod.. it’s not going to fit on the passenger side panel where I am guessing that this is the most likely position based on some photos…However, I will find a spot inside for it. I also had to give the canvas top, some more texture with PVA and tissue. Thanks for watching
 

Jakko

Way past the mad part
SMF Supporter
Joined
Apr 28, 2018
Messages
10,806
Points
113
First Name
Jakko
Question about that paint: doesn’t it come off if you rub your finger over the model, or scratch it with your nail, or even try drybrushing over it? I’ve only used Mission Models paint twice, and it did that to me the second time (the first had a year to dry, maybe that’s why it stayed on the model).
 
  • Like
Reactions: JR

Strenko J

Faithful rabble apprentice
SMF Supporter
Joined
May 1, 2018
Messages
566
Points
93
Location
Pennsylvania
First Name
Joe
IMG_0390.jpegIMG_0389.jpegIMG_0388.jpegIMG_0387.jpegIMG_0386.jpegIMG_0384.jpegHello again able to make some very good progress over the last couple days on getting at least the car completed. I still have storage to add and a light dusting for weathering, but figuring it is a command car, It doesn’t take much battle damage And wear and tear. Thank you all for looking in and your continued support. Have a great day fellow modelers
 

Allen Dewire

Proud Rabble Member
SMF Supporter
Joined
Apr 27, 2018
Messages
4,105
Points
113
Location
Bamberg
First Name
Allen
Sorry Joe that I'm so late in seeing this great build. Story of my life I guess. A really beautiful job with some great scratchy thrown in too. The rear tarp is fantastic!!! You definitely haven't lost your touch my friend. You're right about the weathering too. It was probably very well taken care of by the driver. Nice!!! Hope all is well with you and the family in Pennsy...

Prost
Allen
 

Scratchbuilder

SMF Supporter
Joined
Jul 2, 2022
Messages
1,943
Points
113
First Name
Mike
Well done Joe, a great build and a credit to you.
Congrats on the retirement, now you can settle down and relax, get out of bed when you feel like it, put that old alarm clock in a drawer in the garage, feet up in the afternoon watching Oprah..... Did you by any chance notice that list on the fridge door - no - well take a look again, you have just entered the realm of SWMBO and all those little jobs she has lined up for you from the day you mentioned 'retirement'.... But do not fret Joe, you are not alone....
 

Strenko J

Faithful rabble apprentice
SMF Supporter
Joined
May 1, 2018
Messages
566
Points
93
Location
Pennsylvania
First Name
Joe
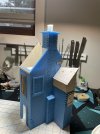
IMG_0398.jpegIMG_0397.jpegIMG_0396.jpegIMG_0399.jpegThe finished project with a light dusting applied with washes and also the stowage added. ….looks like this one is going to end up in a little diorama,,,the building pic attached …found it on the internet and it is in need of some TLC to make it look presentable…but overall it’s not a bad little kit..
 
Top