Allen's 1/72 Hasegawa Mitsubishi Ki67 'Peggy' Bomber

Allen Dewire

Proud Rabble Member
SMF Supporter
Joined
Apr 27, 2018
Messages
4,121
Points
113
Location
Bamberg
First Name
Allen
Late afternoon all,

Thanks to the current heat wave, progress has slowed down at the table. I'm typing this and the temp outside is 36° C and probably warmer in here. Anyway, I have cut plastic, assembled some bits and even slobbered some paint about with the hairy stick...

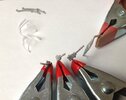
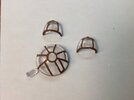
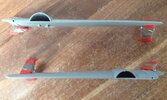
I nipped off and cleaned up the wings to test the fit and see if a lot of work (filling) would be necessary. Only 2 clamps on each and no glue,
IMG_3923.JPG
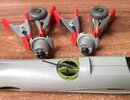
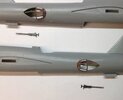
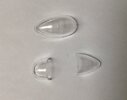
A lousy pic, but the fit is rather good. That was a nice surprise and the little gap on the bottom one closes when you press it together. The destructions don't explain everything and there are options for parked in the hanger or mission ready. The MG port on each side were closed in the hanger and opened for the mission. To open them, you have to saw them in half. Out with the razor saw blade and carefully, we cut one in half,
IMG_3920.JPG
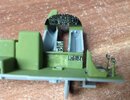
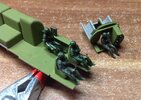
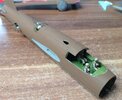
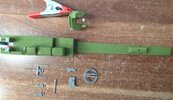
The little circle is the mounting point for the MG mount, with the other end glued inside the fusillier. Letting the nerves calm down from not sawing crooked, I cleaned up some MGs and rear turret parts, along with interior stuff. I then glued some parts in the interior. Let the glue dry and then slapped some IJN M3 Mitsubitchi green int. paint from AK on them,
IMG_3919.JPG
The paint brushes on very good, but the color is a flashback to a pot of pea soup from years ago. I also will attempt to drill the MG barrels for realism. The top MG with the mount arms has to be cut out and only the mount added. On a mission, the front and rear MG's weren't mounted in the plane. No idea why though...

That's it for now people. Ain't much, but the heat is limiting progress of things. Thanks for looking in and please try to stay cool...

Prost
Allen
 

Mini Me

SMF Supporter
Joined
Jun 1, 2018
Messages
10,162
Points
113
First Name
Rick
So Dude1.....how many Wagner's did it take to steady the nerves before making that very precise cut? ;) And may I add that Peggy Sue is looking pretty good so far. Too bad yer working in a sweat shop there in Deutschland. :thumb2:
 
Last edited:

Geoffers

SMF Supporter
Joined
Jan 26, 2017
Messages
1,051
Points
113
Location
Shropshire
First Name
Geoff
Cracking job cutting the clear parts Allen…..on second thoughts obviously not cracking :tears-of-joy:

Coming along very nicely Allen ;)

Geoff.
 

The Smythe Meister

Born to be WILD....... until about 9pm
SMF Supporter
Joined
Jan 30, 2019
Messages
5,791
Points
113
Location
Devon
First Name
Andy
Hi Allen,
All looking very neat and tidy there:thumb2:.
I'm going to be having a bash at brush painting some AK Kawasaki green later today,did you thin it much,and if so, just with tap water?:thinking:
 

Allen Dewire

Proud Rabble Member
SMF Supporter
Joined
Apr 27, 2018
Messages
4,121
Points
113
Location
Bamberg
First Name
Allen
So Dude1.....how many Wagner"s did it take to steady the nerves before making that very precise cut? ;) And may I add that Peggy Sue is looking pretty good so far. Too bad yer working in a sweat shop there in Deutschland. :thumb2:
Hey Buddy, I didn't have even one...Too damn hot for beer, so water was the only answer. Thanks Rick and how's the weather in your neck of the woods???

Cracking job cutting the clear parts Allen…..on second thoughts obviously not cracking :tears-of-joy:

Coming along very nicely Allen ;)

Geoff.
Thanks Geoff! You have to love the JLC saw blades. The fine tooth side saws smooth as silk. It's the masking that worries me...

Hi Allen,
All looking very neat and tidy there:thumb2:.
I'm going to be having a bash at brush painting some AK Kawasaki green later today,did you thin it much,and if so, just with tap water?:thinking:
Hey Andy (I'm being nice today), Thanks and I didn't thin the AK with anything. It's straight out of the bottle. I did wet my brush before starting and once in a while during. The paint spreads really well and covers good too. I used a flat brush, if that helps my Friend...

Prost
Allen
 

The Smythe Meister

Born to be WILD....... until about 9pm
SMF Supporter
Joined
Jan 30, 2019
Messages
5,791
Points
113
Location
Devon
First Name
Andy
Hey Buddy, I didn't have even one...Too damn hot for beer, so water was the only answer. Thanks Rick and how's the weather in your neck of the woods???


Thanks Geoff! You have to love the JLC saw blades. The fine tooth side saws smooth as silk. It's the masking that worries me...


Hey Andy (I'm being nice today), Thanks and I didn't thin the AK with anything. It's straight out of the bottle. I did wet my brush before starting and once in a while during. The paint spreads really well and covers good too. I used a flat brush, if that helps my Friend...

Prost
Allen
It certainly does buddy, thanks very much :thumb2:
 

Mini Me

SMF Supporter
Joined
Jun 1, 2018
Messages
10,162
Points
113
First Name
Rick
Weather here is fine as a cat's whisker Bro........best time for a beer is when it's hot out, cools me right off. I used to stick one in the freezer just to the slushy point of icing up......then slam it down! ;)
 

Jim R

SMF Supporter
Joined
Apr 27, 2018
Messages
13,811
Points
113
Location
Shropshire
First Name
Jim
Progress is looking very good Allen. Come together pretty quickly and it appears to fit well. Fine work with the razor saw.
 

Allen Dewire

Proud Rabble Member
SMF Supporter
Joined
Apr 27, 2018
Messages
4,121
Points
113
Location
Bamberg
First Name
Allen
Afternoon Folks,

So sorry for my absence of late and lack of replies on the forum. The mojo was flying, but the brain was dead. Through it all, I was still forcing myself to drive on and work on 'Betty'. Things are much better now and life is back to normal. I even got a new washing machine delivered yesterday. I got tired of always turning my clothes inside out every few days...

Looks good Allen
Thanks so much Lee!!!

Dude,
Sorry mate I had missed this but here now.
Great to have you Bro, I have missed so much over the past 13 days too...

Progress is looking very good Allen. Come together pretty quickly and it appears to fit well. Fine work with the razor saw.
Thanks Jim!!! I love my JLC blades and I don't think I could live without them. More progress below Sir...

Nice start Allen
Thanks Ian!!! I love the panel shading work on that Kate of yours. I wanted to try it on Peggy, but went with the hairy stick...

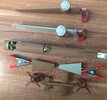
This post will be pic heavy as I have been busy over the past 12 days. I'll try to keep it short and sweet too! We started off with drilling out the MG/cannon barrels and removing the MG from the nose mount,

IMG_3924.JPG
This version only used the turret and side window weapons. The nose and tail weapons were left out as this bird had a crew of 6 people. I also sawed the other side window off. Next, we painted the inside of everything with the ugly pea soup green,

IMG_3925.JPG
I didn't get crazy with a perfect coat as most of it won't be seen once she's closed up. The kit includes 3 decals for the interior,

IMG_3927.JPG
While they were drying, I painted up some other things and did a test fit of the turret in the fusi,

IMG_3928.JPG
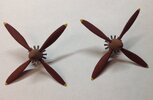
I also painted up the props. I love Mr. Colors #131 paint..."Propeller Color"!!! The closest match is Red Oxide or there-abouts...

IMG_3929.JPG
The fan blades behind are done in Metal Color Matt Alu. We then did a test fit of the figs in the pit and nose,

IMG_3932.JPG
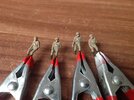
Yin & Yan are going to have to lose their feet to fit. Yuck and Yoshi are good to go. Some cleanup and paint were in order,

IMG_3933.JPG
These puppies are some tiny thangs!!! I wanted to paint the eyes, but....Fergitit. So here they are in the pit,

IMG_3934.JPG
Yin & Yan weren't happy about losing the feet, but you won't see them anyway. They also need more paintwork. Moved on to attempting to freehand some glass frames with a tiny hairy stick,

IMG_3935.JPG
After a bit of cleanup, they didn't look to bad. I glued the side windows onto the fusi and added the MG mounts to them,

IMG_3936.JPG
I used AK'S Crystal Magic Glue on them and it worked really well. You just to take care on how much comes out of the needle in the bottle. It dries clear and seems to hold the parts in place. The MG's will be added when the model is complete, so they don't get pinged off. I decided to paint the fusi with a flat hairy stick as trying to mask it for spraying wouldn't work without adding some glass work, if at all. I started with the upper color first. Then I brushed the under color on, being careful to match up the demarcation line between colors on the fusi. This went better than I had expected, so I decided to do the wings with the hairy stick too!!! The AK 3rd Gen colors brush well as long as you keep the brush wet as they are a bit thick. The IJN grey flows a bit better than the IJA Tea,

IMG_3937.JPG
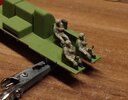
Then I realized I had painted the #27 (bomb) the wrong color. I'll re-paint it later. Yin, Yan & Yuck had their seatbelts painted and I CA'd their butts to their seats. Yoshi will get placed when the nose glass has been painted and ready to install,

IMG_3938.JPG
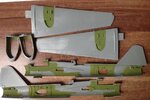
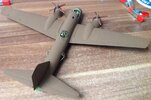
Once everything had dried, it was time to glue the wings on her. The fit was good and now it looks like a wing thingy,

IMG_3947.JPG
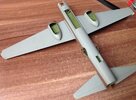
The underside,

IMG_3948.JPG
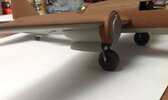
Lastly, I added the landing gear stuff and the doors for them,

IMG_3950.JPG
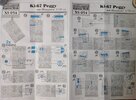
I really got lucky here, as all the wheels touch the ground!!! I played a bit today with the mask set. Here's what you have to deal with,

IMG_3952.JPG
I did all the J7 Masking (top left) and painted it. The mask's stick Ok, but I am not looking forward to doing the J1 and J11 masking at all!!!...

That's all for today as it's a really long post. Apologies again for my lateness and being AWOL. I hope get 'Peggy' finished in the next week or 2. Too many other things on my plate and my eyes definitely need a rest from this mini stuff...

All C, C and Abuse are cheerfully welcome! Now I just have to ketchup with all your great builds................

Prost (and back among the living)
Allen
 

Andy T

SMF Supporter
Joined
Apr 26, 2021
Messages
2,039
Points
113
Location
Sheffield
First Name
Andy
Well haven't you been a busy boy!

Great to have you back and see some most excellent progress.
 

Mini Me

SMF Supporter
Joined
Jun 1, 2018
Messages
10,162
Points
113
First Name
Rick
They do look similar Andy....You have really "jumped" on Peggy, Allen and she's looking pretty good so far. Cant wait for the Meatballs, they always bring these crates to life! Moggle on Bro! :thumb2:
 
Top