Great updates Andrew nice painting the fig.
- Home
- Forums
- Group Builds
- The New Group Builds (2017 on)
- The User Created Group Builds
- 2023 Builds
- Andy's WWII Japanese Aircraft GB: July - Sept 2023
You are using an out of date browser. It may not display this or other websites correctly.
You should upgrade or use an alternative browser.
You should upgrade or use an alternative browser.
Andrew's 1/48 Tamiya Raiden
- Thread starter adt70hk
- Start date
Well,going "the extra mile" with this old kit was certainly worth the effort eh Andrew?!.......... what an improvement that is  .
.
Cracking work,I have some of those sanding sticks,always thought they were a bit of an unnecessary luxury, but, about 12 months ago I finally bought some,to see what all the fuss was about !.... Have to say that I'm glad I did, they're a great addition to the "tool kit" ,
,
Looking forward to seeing the paint going on !
!
.Cracking work,I have some of those sanding sticks,always thought they were a bit of an unnecessary luxury, but, about 12 months ago I finally bought some,to see what all the fuss was about !.... Have to say that I'm glad I did, they're a great addition to the "tool kit"
,Looking forward to seeing the paint going on
!Looks good after all that wrangling Andrew.
Still with you here, Andrew! Nice work so far and a great job in repairing the step. It's also good to see the pilot recovered well and can sit in the pit Sir!!!...
Prost
Allen
Prost
Allen
- Joined
- Sep 4, 2019
- Messages
- 9,526
- Points
- 113
- First Name
- Andrew
Great updates Andrew nice painting the fig.
Just caught up Andrew and you've done some great work on this kit, I shall pay closer attention now
Well,going "the extra mile" with this old kit was certainly worth the effort eh Andrew?!.......... what an improvement that is
Cracking work,I have some of those sanding sticks,always thought they were a bit of an unnecessary luxury, but, about 12 months ago I finally bought some,to see what all the fuss was about !.... Have to say that I'm glad I did, they're a great addition to the "tool kit"
Looking forward to seeing the paint going on
Looks good after all that wrangling Andrew.
Still with you here, Andrew! Nice work so far and a great job in repairing the step. It's also good to see the pilot recovered well and can sit in the pit Sir!!!...
Prost
Allen
Thanks gentleman, glad you're liking it.....with a bit of luck I might just get it finished within the GB date!
Andy - I know what you mean about the sanding sticks....worth they're weight in gold IMHO! Will try not disappoint!
Allen - I'll take that as a compliment.......as for the pilot, Matron had some stern words with me but managed to undo the damage his 'perch' had caused him!
")

Thanks again chaps.....given your collective skill sets I will take the above comments as a real compliment!
ATB
Andrew
- Joined
- Sep 4, 2019
- Messages
- 9,526
- Points
- 113
- First Name
- Andrew
Good evening all
So I realised earlier today that I forgot to post a picture of the finished prop and spinner last time.
Both the brown and yellow where home brew mixes but the instructions were not very clear......and I've just spotted a tiny bit of bleed the camera picked up....but it will have to do....

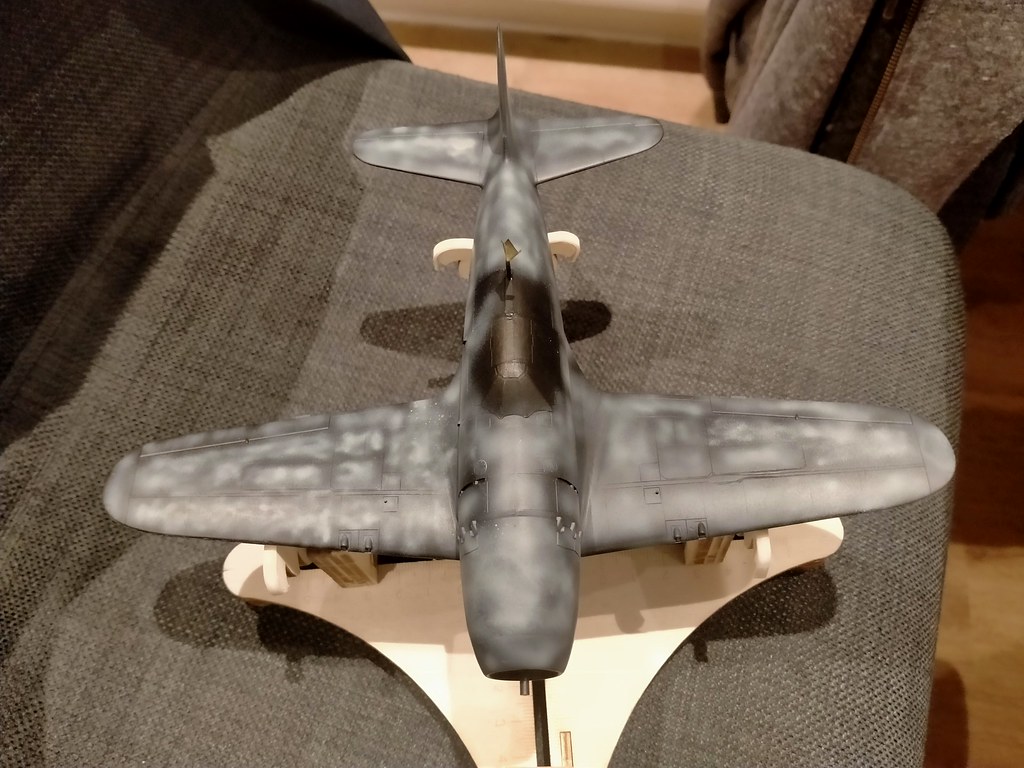
Also.....my wife happened to be in London today.....for those not in the UK, we're in the middle of a short heat wave (33C/91F today in London) and no breeze at all to take the edge of the classic humid British heat!

This of course meant I was duty bound to get the AB out....the heat made it slightly harder that usual but it went ok.....as you will see I have applied the pre-base-coat mottling on top of the primer. I used Vallejo Model Air IJN Medium Grey 71.312.
With a bit of luck I'll get the light grey underside coat on tomorrow.
ATB.
Andrew
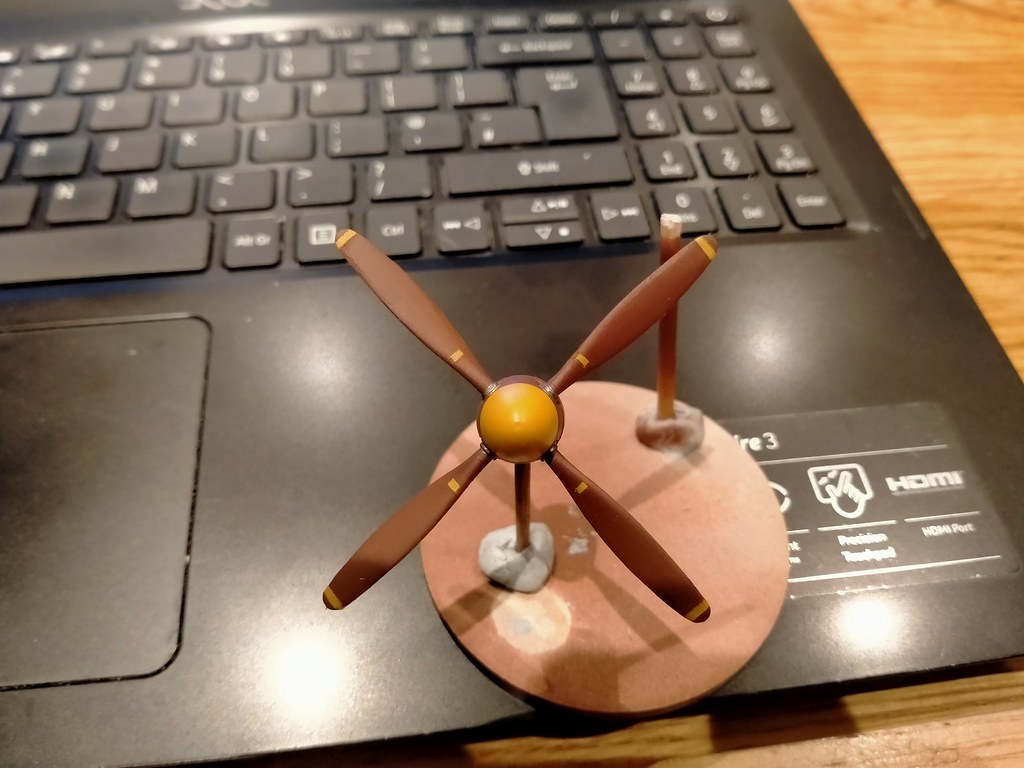
So I realised earlier today that I forgot to post a picture of the finished prop and spinner last time.
Both the brown and yellow where home brew mixes but the instructions were not very clear......and I've just spotted a tiny bit of bleed the camera picked up....but it will have to do....
Also.....my wife happened to be in London today.....for those not in the UK, we're in the middle of a short heat wave (33C/91F today in London) and no breeze at all to take the edge of the classic humid British heat!
This of course meant I was duty bound to get the AB out....the heat made it slightly harder that usual but it went ok.....as you will see I have applied the pre-base-coat mottling on top of the primer. I used Vallejo Model Air IJN Medium Grey 71.312.
With a bit of luck I'll get the light grey underside coat on tomorrow.
ATB.
Andrew
- Joined
- Sep 4, 2019
- Messages
- 9,526
- Points
- 113
- First Name
- Andrew
Ok chaps!
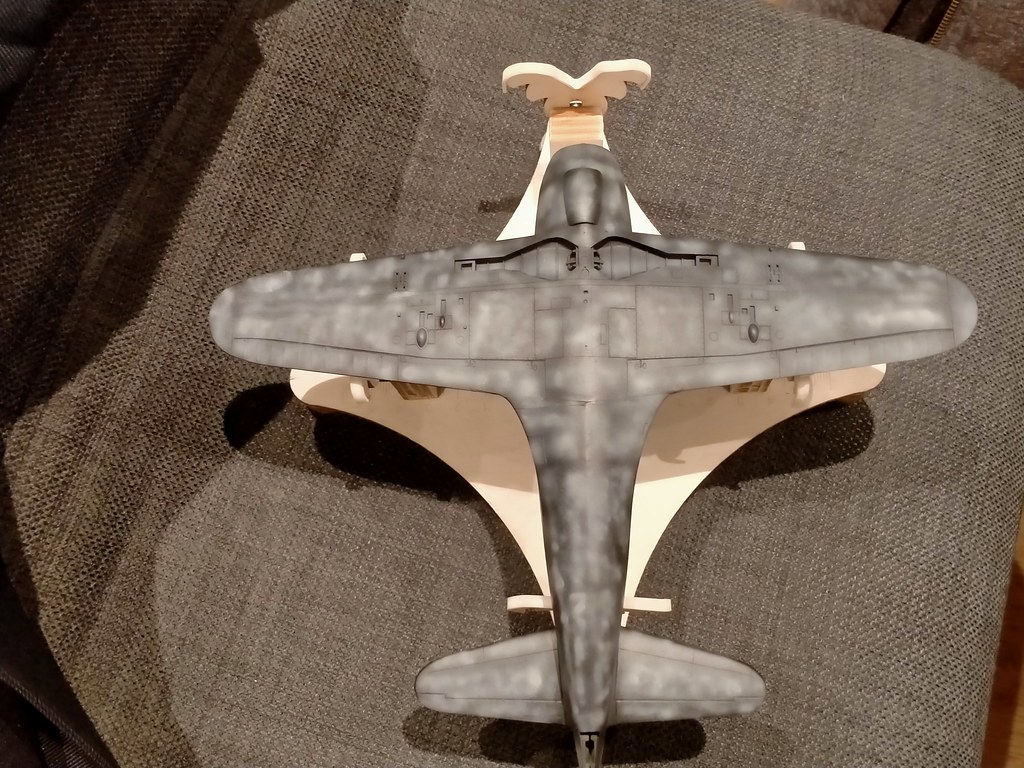
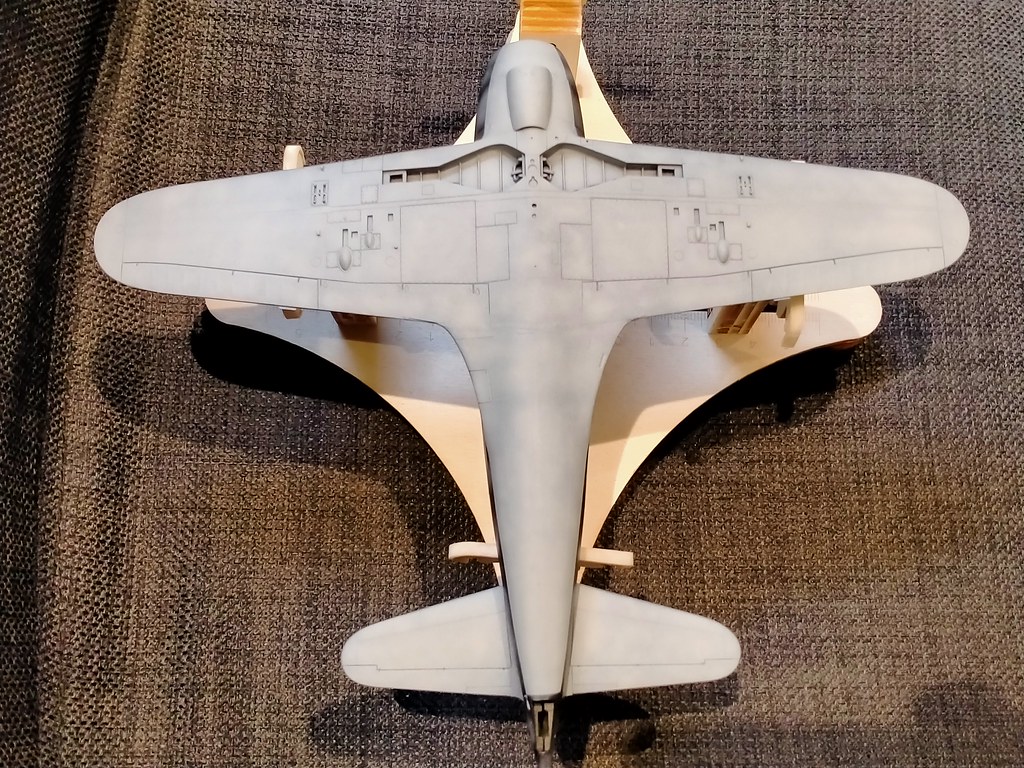
Underside paint is on......in terms of the colour, this is my interpretation (using my own concoction of paints) of what was on the underside, which was apparently IJA #1 Hairyokushoku*** (spellings vary breaking it up into three words)...I have seen it as described as a grey-green.
Apparently the fresh paint is very close to RAL 7034 Gelbgrau (Yellow grey) and to my eyes appears to have been a grey with a slight brown tint....the weathered paint was more of a light-medium grey from what I can gather.
I'm still not sure If I'm happy with what you will see below....I was expecting something a bit lighter. So maybe the coat of paint is too thin and the black primer and mottling is showing through too much, or it needs a light coat of a lighter grey over the top.
However, I will leave it alone for the time being and do the green top-side. I will then have a look at how they look together and make a decision then.
All comments welcome on the colour from any Japanese wingy experts out there....happy to be told it is wrong!
ATB
Andrew
*** apparently it started the war as 'J3 Special Paint'
**** Source for all of the above is www.aviationofjapan.com/ run by a Nick Millman
Jim R
SMF Supporter
Well done with the wing step. A case of "Now you see it, now you don't". That took a lot of patience and determination.
Nice to see some paint going on.
Nice to see some paint going on.
Looking good Andrew. Nothing wrong with the shade I’d say. It looks quite similar to the one I’ve mixed from the Eduard instructions.
If you suffering from insomnia, this site is excellent….there is a huge amount there though.
If you suffering from insomnia, this site is excellent….there is a huge amount there though.
- Joined
- Sep 4, 2019
- Messages
- 9,526
- Points
- 113
- First Name
- Andrew
Well done with the wing step. A case of "Now you see it, now you don't". That took a lot of patience and determination.
Nice to see some paint going on.
Looking good Andrew. Nothing wrong with the shade I’d say. It looks quite similar to the one I’ve mixed from the Eduard instructions.
If you suffering from insomnia, this site is excellent….there is a huge amount there though.
Gents a very belated thanks and sorry for the late reply, trying to get any forum time has proved very challenging recently!
Jim - it certainly did take a lot of patience...plus the right tools in the form of the Albion Alloys sanding needles. It's not perfect but it's looking pretty good to my eye.
Tim - Good to hear I'm not far out on the shade. I have left it as is, given that the green paint is reasonably dark And as for that link your not wrong....but I think the one I stumbled across might just beat it!
Oh and by the way, green paint went on earlier this week. Pics to follow soon!
ATB
Andrew
- Joined
- Sep 4, 2019
- Messages
- 9,526
- Points
- 113
- First Name
- Andrew
Good evening all.
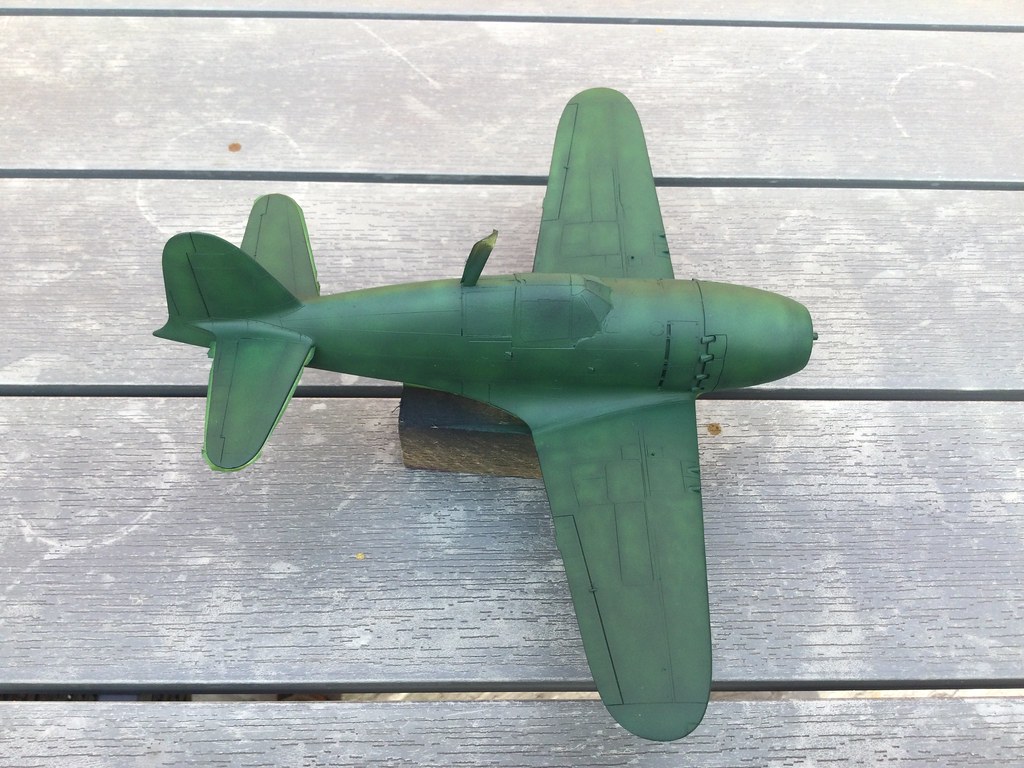
So the upper surface green and off-black anti-glare patch are done!
As you may have seen from previous posts I have been consulting a site for this build called Aviation of Japan run by a chap called Nick Millman (www.aviationofjapan.com/).
I must admit I had not heard of this site or Nick before starting this build but it seems very well researched, a lot of people seem to rate it and from the short exchange I had with Nick on something he seems a decent enough chap.....so in for a penny, in for a pound!
For this whole build and as usual, I have been largely been using Vallejo Model Air in particular their IJN Colours Pre-war to 1945 (71.169).
The following are some of Nick's not wholly enthusiastic thoughts on the set:
So the kit was painted as follows:
Oh and just a minor faux pas on my part.....I applied the pre-decal clear coat this afternoon.....before I painted the exhausts! DOH!! So I'll have to deal with that later.
All comments welcome as usual.
Andrew
-----------------------------------------------
Before the anti-glare coat went on.


And just some minor masking ahead of the anti-glare coat on the cowling....you can't be too careful after all!!

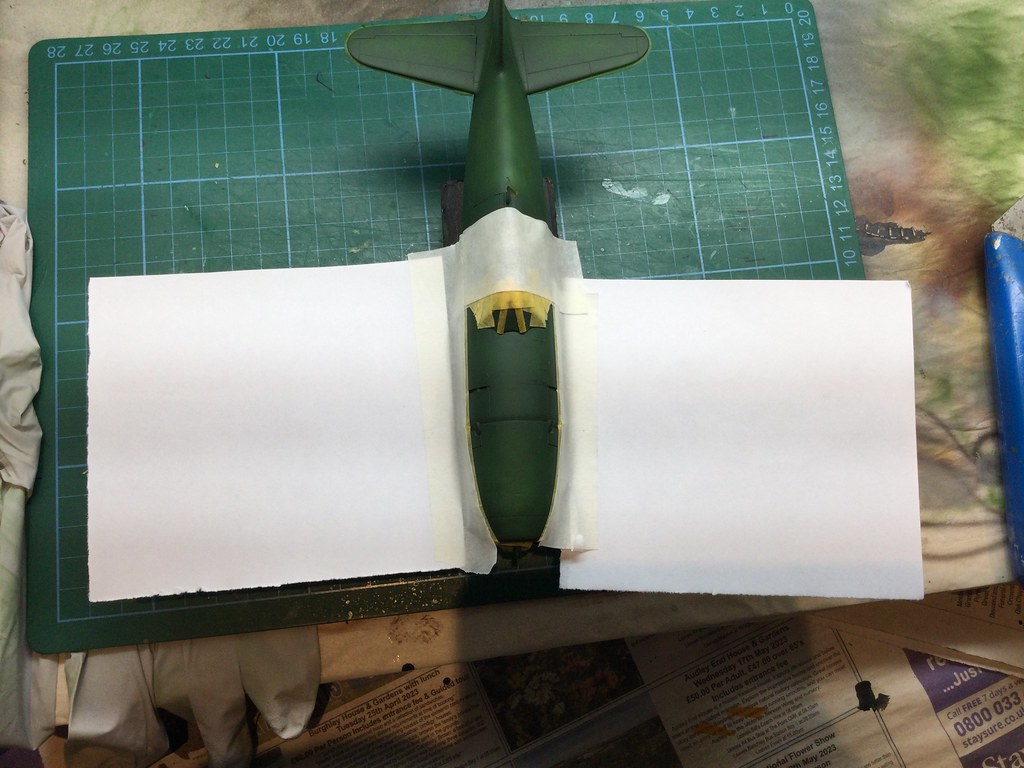
All in all very pleased with it, even if the anti-glare coat is very slightly off-centre.

So the upper surface green and off-black anti-glare patch are done!
As you may have seen from previous posts I have been consulting a site for this build called Aviation of Japan run by a chap called Nick Millman (www.aviationofjapan.com/).
I must admit I had not heard of this site or Nick before starting this build but it seems very well researched, a lot of people seem to rate it and from the short exchange I had with Nick on something he seems a decent enough chap.....so in for a penny, in for a pound!
For this whole build and as usual, I have been largely been using Vallejo Model Air in particular their IJN Colours Pre-war to 1945 (71.169).
The following are some of Nick's not wholly enthusiastic thoughts on the set:
- "...the Vallejo colour descriptions do not fully correspond to IJN paint colour designations. This makes it more difficult to reconcile them without direct comparisons..."...that is something of an understatement and I found his site when trying to reconcile this exact problem when looking at the kit properly.
- In is opinion, Vallejo get the colours of the black greens wrong way around. Vallejo attributes Dark Black Green (71.325) to Mitsubishi and the other to Nakajima (Black Green 71.322)....in his opinion the colours are a better match the other way around.
- Both theses colour apparently suit more weathered paints than a fresh coat but that is ok as I'm doing a slightly weathered coat.
- The anti-glare paint on the cowling is not pure black but a blue-back....apparently similar to RAF 'Night'. This lines up with Tamiya's instructions.
So the kit was painted as follows:
- The green you will see below is IJN Black Green 71.322. This was done over a mottle coat of IJN Medium Grey 71.312. The initial finish looked a bit too mottled and not in line with the underneath and so I ended up giving it a second light coat.
- The anti-glare coat on the cowling was done use a 3:1 mix (as per the instructions) of Black 71.057 and the nearest blue I had, RLM24 Dark Blue 71.266
Oh and just a minor faux pas on my part.....I applied the pre-decal clear coat this afternoon.....before I painted the exhausts! DOH!! So I'll have to deal with that later.
All comments welcome as usual.
Andrew
-----------------------------------------------
Before the anti-glare coat went on.
And just some minor masking ahead of the anti-glare coat on the cowling....you can't be too careful after all!!
All in all very pleased with it, even if the anti-glare coat is very slightly off-centre.
Yep, liking that a lot too .
.Looking very good Andrew.
- Joined
- Sep 4, 2019
- Messages
- 9,526
- Points
- 113
- First Name
- Andrew
That's a lovely bit of paintwork!
Yep, liking that a lot too
Looking very good Andrew.
Thanks chaps! I like the effect too!!!
However..........
Two issues......as well as forgetting to paint the exhausts, I have also forgot to paint the wing leading edges yellow.....so another post decal paint job!
More importantly....I have almost certainly painted it the wrong shade of green.....

Anyone who has ever complained about German wartime Luftwaffe RLM colours and not done a Japanese plane.......DON'T!!! Really RLM colours are a walk in the park compared to the dark art of Japanese greens!!!
There are the D1 and D2 greens, there are the N1 and N2 greens......and shades in between.......that has you chasing your tail in endless circles!
PLUS...the Raiden green was apparently it's own special colour.......so whilst the colour I chose may have been an ok-ish match for the usual Mitsubishi green, it is seemingly wrong for the Raiden.
The Raiden green was apparently was more muted green with a definite tinge of blue to it.
It is too late now to correct it and if any rivet counter complains I'll just put my hand up and agree with them....that said it is only a £14 kit and I still like it!!! My model my rules!!
ATB
Andrew
Jim R
SMF Supporter
Well Andrew I think that paint job is looking mighty fine. I wouldn't get too hung up about the colours, very few would know when admiring your work.
Onwards and upwards - you're well on the way to a cracking build.
Onwards and upwards - you're well on the way to a cracking build.
I wouldn’t worry too much about the colour Andrew. The Japanese had enough trouble keeping the paint on the airframe to get hung up over the colour Yours is definitely a blue tinged green as well.
As to the post decal masking……not much I can suggest. Do it after post decal varnish so the surface is as tough as it will get, and let everything dry for a few days to make sure they are as stuck as they are going to be is all I can think of. Another approach is to get some clear decal film, spray it yellow, and make your own wing edge decals……
Good luck with whatever approach you take though.
Yours is definitely a blue tinged green as well. As to the post decal masking……not much I can suggest. Do it after post decal varnish so the surface is as tough as it will get, and let everything dry for a few days to make sure they are as stuck as they are going to be is all I can think of. Another approach is to get some clear decal film, spray it yellow, and make your own wing edge decals……
Good luck with whatever approach you take though.
I agree with the chaps on "Greengate" here,it looks fine to me... it's a kinda Mitsubishi green,and it's a Japanese plane, therefore it's "Japanese Green",
As for the Leading edge problem, Tim's advice about leaving it to let a Varnish coat to cure for plenty of time is definitely the way to go,also,if you have any left over vinyl paint mask bits left over from other builds,use that instead of masking tape, it leaves no "Step line" around the sprayed area, and is much less likely to lift anything upon removal,(just in case!).
If you don't have any, I've saved loads,and use it regularly,so just shout and I can send you some .
.
All in all it's coming along very nicely mate.... carry on!!
,As for the Leading edge problem, Tim's advice about leaving it to let a Varnish coat to cure for plenty of time is definitely the way to go,also,if you have any left over vinyl paint mask bits left over from other builds,use that instead of masking tape, it leaves no "Step line" around the sprayed area, and is much less likely to lift anything upon removal,(just in case!
).If you don't have any, I've saved loads,and use it regularly,so just shout and I can send you some
.All in all it's coming along very nicely mate.... carry on!!
Very nice Andrew I like the color and the shade looks well. Great jobGood evening all.
So the upper surface green and off-black anti-glare patch are done!
As you may have seen from previous posts I have been consulting a site for this build called Aviation of Japan run by a chap called Nick Millman (www.aviationofjapan.com/).
I must admit I had not heard of this site or Nick before starting this build but it seems very well researched, a lot of people seem to rate it and from the short exchange I had with Nick on something he seems a decent enough chap.....so in for a penny, in for a pound!
For this whole build and as usual, I have been largely been using Vallejo Model Air in particular their IJN Colours Pre-war to 1945 (71.169).
The following are some of Nick's not wholly enthusiastic thoughts on the set:
Source: www.aviationofjapan.com/2017/04/vallejo-ijn-colors-set-visual-appraisal.html?m=1
- "...the Vallejo colour descriptions do not fully correspond to IJN paint colour designations. This makes it more difficult to reconcile them without direct comparisons..."...that is something of an understatement and I found his site when trying to reconcile this exact problem when looking at the kit properly.
- In is opinion, Vallejo get the colours of the black greens wrong way around. Vallejo attributes Dark Black Green (71.325) to Mitsubishi and the other to Nakajima (Black Green 71.322)....in his opinion the colours are a better match the other way around.
- Both theses colour apparently suit more weathered paints than a fresh coat but that is ok as I'm doing a slightly weathered coat.
- The anti-glare paint on the cowling is not pure black but a blue-back....apparently similar to RAF 'Night'. This lines up with Tamiya's instructions.
So the kit was painted as follows:
- The green you will see below is IJN Black Green 71.322. This was done over a mottle coat of IJN Medium Grey 71.312. The initial finish looked a bit too mottled and not in line with the underneath and so I ended up giving it a second light coat.
- The anti-glare coat on the cowling was done use a 3:1 mix (as per the instructions) of Black 71.057 and the nearest blue I had, RLM24 Dark Blue 71.266
Oh and just a minor faux pas on my part.....I applied the pre-decal clear coat this afternoon.....before I painted the exhausts! DOH!! So I'll have to deal with that later.
All comments welcome as usual.
Andrew
-----------------------------------------------
Before the anti-glare coat went on.
And just some minor masking ahead of the anti-glare coat on the cowling....you can't be too careful after all!!
All in all very pleased with it, even if the anti-glare coat is very slightly off-centre.