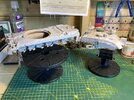
Another First - 1/35 CH2 TES.

Scratchbuilder

SMF Supporter
Joined
Jul 2, 2022
Messages
2,020
Points
113
Location
Luton
First Name
Mike
B*gg*r!!!!:angry::angry::angry: I was so keen to get the primer on I forgot to mask off the commanders windows!!!! As a result I have about 7 or eight transparent bits that are primed.
Is there a cheat or any way to remove the primer before recommencing!!!
I did read somewhere, coat with IPA and leave for a few minutes before trying to remove the paint - any truth?
No pics as I was pretty annoyed. On the plus side I did manage to prime the hull and turret, only the side armour to go!!

Must learn to slow down!!
Use the cocktail stick dipped in IPA as Pete said. Remember which finger to scratch your eye with.....
 

JR

Member of the Rabble and Pyromania Consultant
SMF Supporter
Joined
May 26, 2015
Messages
17,361
Points
113
Location
lincs
First Name
John
The reason they are not allowed to carry arms is that decades ago the rookies from a certain regiment went through one of the villages and decided to get rid of all their unused blank ammo which included thunderflashes, drove the villagers under their beds and gave the local coppers red faces of rage...... I sem to remember our next training area was Dartmoor...
Wibble hope we're not you involved in such a dasterly deed.
Wobble
 

Waspie

SMF Supporter
Joined
Mar 13, 2023
Messages
2,619
Points
113
Location
Portland - Dorset
First Name
Doug
Use the cocktail stick dipped in IPA as Pete said. Remember which finger to scratch your eye with.....
That worked a treat!! (Well a tiny plastic spatula did). I tried the airbrush cleaner but that was only a partial success. Left it a while, returned to attack with IPA and hoorah!!!
That led to my next problem!! After cleaning the airbrush twice last evening I found it was splattering when I went to use it today - so I stripped it down again and instead of using airbrush cleaner to give it another going over I thought I'd use IPA after the success with the clear stuff!! That seemed to do it - fluid coming out of the nozzle. Problem now was I ran out of time.
How come life is so busy when you're retired?? Not enough hours in the day at the moment.
 

Scratchbuilder

SMF Supporter
Joined
Jul 2, 2022
Messages
2,020
Points
113
Location
Luton
First Name
Mike
That worked a treat!! (Well a tiny plastic spatula did). I tried the airbrush cleaner but that was only a partial success. Left it a while, returned to attack with IPA and hoorah!!!
That led to my next problem!! After cleaning the airbrush twice last evening I found it was splattering when I went to use it today - so I stripped it down again and instead of using airbrush cleaner to give it another going over I thought I'd use IPA after the success with the clear stuff!! That seemed to do it - fluid coming out of the nozzle. Problem now was I ran out of time.
How come life is so busy when you're retired?? Not enough hours in the day at the moment.
Been retired for 7 years, and never stopped since, at least in the truck I could jump on the bunk and snatch a couple of hours kip while unloading - jump on the bed in this house and you get another job.....
 

Waspie

SMF Supporter
Joined
Mar 13, 2023
Messages
2,619
Points
113
Location
Portland - Dorset
First Name
Doug
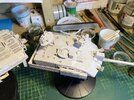
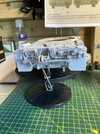
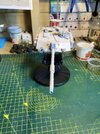
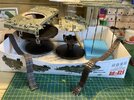
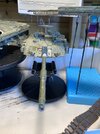
My Sunday job, (repairing the bath), turned into a Monday job!!!! However, I still managed to whack, (sorry - another technical term), some more primer on. Always remembering to thoroughly clean the airbrush afterwards. Glad I took pictures as I notice I still missed a couple of places.

I also remembered to coat the commanders glass with liquid mask before redoing that part of the turret. Methinks I will just follow advice on here and not run before I can walk and stick to the paint scheme supplied. Afterwards, I can start thinking about playing around with weathering.

Another dopey question. The primer I am using Vallejo 'polyurethane' primer. I believe is the reason my airbrush is behaving as it is, clogging!! Or is it me? Are other primers different?

Anyway, a few pics.

IMG_0863.JPG

A couple of place on the turret roof will need priming - brush for that methinks!!
IMG_0864.JPG

Another small patch on the spool at the rear!!
IMG_0866.JPG

IMG_0867.JPG

Lots learned doing this, next time I do some armour there are definitely a few things I would do differently. Order of spraying/fitting etc. Attention to track parts!!! Definitely more to this modelling lark than there was 40+ years ago!!!
Hasn't put me off - still enjoying it even though it has been and still is a bit of a 'challenge'. (Oooo - that's bad):rolling:
 

Tim Marlow

Little blokes aficionado
SMF Supporter
Joined
Apr 27, 2018
Messages
16,854
Points
113
Location
Somerset
First Name
Tim
Looking good in primer Doug.
As to the Vallejo stuff, I’ve found it needs thinning a bit and a couple of drops of flow aid to work well without clogging. It’s just too thick to spray properly straight out of the bottle. Not my favourite primer though.
 

langy71

SMF Supporter
Joined
Apr 27, 2018
Messages
1,564
Points
113
Location
Nottingham
First Name
Chris
Looking good in primer Doug.
As to the Vallejo stuff, I’ve found it needs thinning a bit and a couple of drops of flow aid to work well without clogging. It’s just too thick to spray properly straight out of the bottle. Not my favourite primer though.
Totally agree with Tim on this, tried it a few years ago, it's still sitting in my shed..unloved... switched to good old Halfords grey primer..works like a dream..
 

Waspie

SMF Supporter
Joined
Mar 13, 2023
Messages
2,619
Points
113
Location
Portland - Dorset
First Name
Doug
Looking good in primer Doug.
As to the Vallejo stuff, I’ve found it needs thinning a bit and a couple of drops of flow aid to work well without clogging. It’s just too thick to spray properly straight out of the bottle. Not my favourite primer though.
Totally agree with Tim on this, tried it a few years ago, it's still sitting in my shed..unloved... switched to good old Halfords grey primer..works like a dream..
Thanks Tim, Chris. After this experience I think it will be the last time I use it. Certainly in airbrush form. I did mix a bit up and brushed it into the places the airbrush/ME!!! missed!! Oh Tim, I did 'thin' it a bit, I used distilled water rather than tap water ss this area is a seriously hard water area.

Had much planned for today! Finish the priming. Put a first coat on then tracks then finish working on the 5 gall water and fuel cans for the rear stowage!! First coat of Nato Green is/was planned for tomorrow. Just to allow plenty of time for the primer to cure properly. (Evidently the green is mixed with white in a ration of 90% to 10%.)

I achieved? Finishing the primer!!
That's it!! No more!! Zip, zilch, nada, sweet FA!!!!
SWIMBO intervened - again. The joy of emptying all the kitchen cupboards, cleaning them, putting all the contents back. After checking every single 'Use by' date!!! I know she's asthmatic and hates dust, I can live with it. It's the last minute disaster planning!!!
I even volunteered to search for her logic circuit board and replace it. Declined!!
 
Last edited:

Tim Marlow

Little blokes aficionado
SMF Supporter
Joined
Apr 27, 2018
Messages
16,854
Points
113
Location
Somerset
First Name
Tim
Thanks Tim, Chris. After this experience I think it will be the last time I use it. Certainly in airbrush form. I did mix a bit up and brushed it into the places the airbrush/ME!!! missed!! Oh Tim, I did 'thin' it a bit, I used distilled water rather than tap water ss this area is a seriously hard water area.

Had much planned for today! Finish the priming. Put a first coat on then tracks then finish working on the 5 gall water and fuel cans for the rear stowage!! First coat of Nato Green is/was planned for tomorrow. Just to allow plenty of time for the primer to cure properly. (Evidently the green is mixed with white in a ration of 90% to 10%.)

I achieved? Finishing the primer!!
That's it!! No more!! Zip, zilch, nada, sweet FA!!!!
SWIMBO intervened - again. The joy of emptying all the kitchen cupboards, cleaning them, putting all the contents back. After checking every single 'Use by' date!!! I know she's asthmatic and hates dust, I can live with it. It's the last minute disaster planning!!!
I even volunteered to search for her logic circuit board and replace it. Declined!!
The VJ primer works best with their airbrush thinner and flow aid rather than tap water in my experience Doug. Sprays fine then, but I don’t like it because I can’t sand it afterwards if I need to do remedial work later. I find it just tears under the paper.
 

Mini Me

SMF Supporter
Joined
Jun 1, 2018
Messages
10,162
Points
113
First Name
Rick
Good info. there Tim. I always use an enamel base as it "bites" into the plastic a little for better adhesion. ;)
 

Tim Marlow

Little blokes aficionado
SMF Supporter
Joined
Apr 27, 2018
Messages
16,854
Points
113
Location
Somerset
First Name
Tim
Good info. there Tim. I always use an enamel base as it "bites" into the plastic a little for better adhesion. ;)
I use a lacquer (cellulose to the Brits) based primer for exactly the same reason Rick. It sands to a feather edge as well.
 

Waspie

SMF Supporter
Joined
Mar 13, 2023
Messages
2,619
Points
113
Location
Portland - Dorset
First Name
Doug
I actually managed to have good day today. No chores, just a whole day with a paint brush. I have decided to give the airbrush a rest, only in that I decided it may be good experience giving the brush some exercise!!!
Started with the tracks, a few coats of Mig Track Black, which is more a rusty brown to my eyes but who am I. Followed by a tea break then attacked with some suitable rubber coloured paint. (I say that because I forgot the colour!!!!) Three coats applied to the rubber blocks. After that - more tea and decided on order of painting for the actual vehicle itself. Nato Green with a splash of white as per the instructions. I'm rather glad I decided to brush paint rather than A/B. Lots of nooks and crannies that I found were difficult to access with the primer.

A few pics of todays progress.

After second coat of the track blocks. Bottom track dry, top track still slightly wet, one more after that!!
IMG_0868.JPG

First rough coat of nato green, (barrel has had a second coat applied, simply to use up the last drops on the palette).
IMG_0869.JPG

IMG_0870.JPG

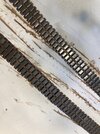
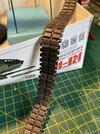
Closer pic of one of the tracks (3 coats on rubber blocks), I have experimented with a drop of a rust coloured paint on the link ends but tbh, I can't see any difference!
IMG_0872.JPG

Won't get any bench time tomorrow, which will give the paint a good while to dry properly. For some reason they say to paint the platform sand colour! No idea why but that shall be done!!
I see there is some tidying up of the tracks, between the links which will be addressed next time a window of opportunity pops up.
Quite a pleasant day what with achieving something, cups of tea and music whilst I brushed. Roll on next chance!!

One thing for Jakko, since you pointed out the link connectors having some upside down!! They stick right out now I know!!! Something I won't forget for the next armour with linked tracks!! Thanks for that! :thumb2:
 

Jim R

SMF Supporter
Joined
Apr 27, 2018
Messages
13,815
Points
113
Location
Shropshire
First Name
Jim
Just had a good catch up, Doug, and you're doing a great job. I don't like Vallejo primer for the reason Tim gives, it doesn't sand to an edge.
As for weathering a model. Despite there being hundreds of "must have" products desperately trying to part you from your money there is little that can't be achieved with oil paint and pigments.
Keep up the good work.
 

Waspie

SMF Supporter
Joined
Mar 13, 2023
Messages
2,619
Points
113
Location
Portland - Dorset
First Name
Doug
Pigments aren’t strictly necessary either Jim. Artist students cheap Pastel chalks and some 400 wet and dry will cover most bases.
Strangely, I have been looking at pastel chalks after reading about some chap who made his own pigments. Seems a very cheap option too.
Right now, I'll stick to the basics!!!!! :thumb2: :smiling2:
 

Tim Marlow

Little blokes aficionado
SMF Supporter
Joined
Apr 27, 2018
Messages
16,854
Points
113
Location
Somerset
First Name
Tim
Strangely, I have been looking at pastel chalks after reading about some chap who made his own pigments. Seems a very cheap option too.
Right now, I'll stick to the basics!!!!! :thumb2: :smiling2:
Ground up pastels and an old brush are great for generating rust, smoke, and exhaust stains in my opinion. Far more controllable than paint or washes and very easy to modify with a damp brush.
 

Scratchbuilder

SMF Supporter
Joined
Jul 2, 2022
Messages
2,020
Points
113
Location
Luton
First Name
Mike
Doug,
Just caught up to your progress so far.
Do not worry about missing bits with the primer, all of us do it, except usually it is in the place where we cannot reach and it sticks out like a sore thumb and we cannot rotate the model to get at it.
Going back to the brush for applying the NATO green, good practice, but if it looks uneven then get out the a/b and just have a quick spray over with a thiined coat to even out the brush marks.
Tracks are superb, and do not worry about the connectors, a quick look reveals nothing because it will be the main vehicle that people look at.
Pigments, store bought or pastels are good for the final dressing. If I cannot get anything close from my pigment collection, then I dig out the pastels ground out some of the colours and mix my own - but remember not to sneeze, its a bu^^^r trying to clean up after.
Mike
 

Waspie

SMF Supporter
Joined
Mar 13, 2023
Messages
2,619
Points
113
Location
Portland - Dorset
First Name
Doug
Well, thank you guys for your comments and positive remarks.
SWIMBO keeps asking when It'll be finished. I reply, 'when it is' usually. Which really ummm - annoys her!! It's a hobby I keep saying not a project with a completion target. The times I have rushed have been the times I have messed up so 'steady as she goes' as they say.

Mike, I think I may well wear a face mask if it comes to grounding my own pigments. I had visions of a multi coloured workshop/bench/wherever!!!!!! You always want to sneeze at the most inconvenient time!!:sick::smiling5:
 
Top