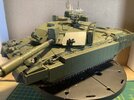
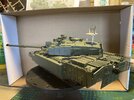
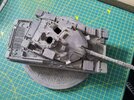
Another First - 1/35 CH2 TES.

Waspie

SMF Supporter
Joined
Mar 13, 2023
Messages
2,480
Points
113
Location
Portland - Dorset
First Name
Doug
Yup, 'ats a tank alright! Fine looking beast Doug. :thumb2:
Thanks Rick, I feel happy now it's progressed to the point it actually looks like what it's meant to be! A plus for me!!
Looking good Doug.
Thanks Tim.
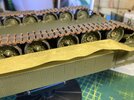
That’s always one of the downsides of workable track … Even when you know you need to pay attention to this, you think you got paint all the way between them, and still you’ll notice unpainted bits when you put the track around the wheels :sad: A paint bath for them would be nice to have, but I can’t think of a way to do that both without obliterating all of the detail and wasting a ton of paint.
No arguments from me Jakko. I did some more track painting today!! The end of a pin here and the odd bit of uncovered plastic there!! I'd love to say I've got it all but I bet something will jump out at me next time I look at it! Nature of the beast I'm learning!
Well done on the paint finish.
And do not worry about the low end airbrush, I now use a cheapie (NEDECO) with the top end ones in their boxes and in the drawer. Plus an old Badger for other work.
Now you have it all together it looks like any other model displayed by all of us, no different, in the finish or the workmanship and before we get to work with the weathering which is your next step. Take it steady and do not go overboard is the best rule.
Mike, I took your advice and sprayed the 4th coat. Glad I did, a way better result.
No, I'm not bothered about the airbrush. I seem to be getting the mixes right with the paint so it's going on better.
Great job so far Doug, dont know why you didn't use the airbrush in thr first place ,nothing wrong with what you've got ,you can have the most expensive set of golf clubs but it won't make you play any better ,once you get your head around thinning your paint and correct air pressure you've cracked it ,then the confidence factor kicks in. I use all my cheapo's more than my expensive one. Enjoy using it even when it goes wrong we've all been there and I still go there sometimes. Dave
David. I decided against using the airbrush initially as this is only my second kit for a vast number of years and wanted to have a go with a normal hairy brush. I think with acrylics, the airbrush is the better option for me until my experience gains pace.
I can't complain about the airbrush really, it cost me nothing and to date is giving me pretty good result. (Other than the primer - which I'm sure was due to the polyurethane part of it. Made it thicker and gooier!!!

Thank you all for looking in and giving me encouragement. It has helped - trust me. I went through a stage where I thought maybe I had bitten off more than I could chew but a few wise words from you guys and I worked through my doubts. After all, it's only plastic, glue and a bit of colour!!!!!!

I'll post today progress a wee bit later. I had a little dabble with colours!!!!
 

Jim R

SMF Supporter
Joined
Apr 27, 2018
Messages
13,730
Points
113
Location
Shropshire
First Name
Jim
There's absolutely nothing wrong with that paint job Doug. Looks fine.
 

Waspie

SMF Supporter
Joined
Mar 13, 2023
Messages
2,480
Points
113
Location
Portland - Dorset
First Name
Doug
Doug,
Just had a good catch up. That is looking very nice indeed mate.
Cheers Paul.
There's absolutely nothing wrong with that paint job Doug. Looks fine.
Thank you Jim. Got there in the end, it was looking pretty dire earlier on though.

OK then, todays progress. very little as far as looks are concerned but I was busy for much of the day.
It was all a bit of a muddle really with no real plan. Put an initial sand colour on the electronics platform. Then fitted the rear end cage pieces. That was a little bit time consuming as I has sprayed all the attachment points, so I scrapped off the paint to expose the plastic, then glued and attached the parts. It was then after checking the plans I noticed I had omitted to fit a small piece! So more scrapping so as to fit that.

Then!!!!! Sitting wondering when my tea was going to be delivered, (only to find it wasn't - so she's sacked). I decided to paint the tow cables. However, I didn't have the right paint! But I did have some gun metal and also some silver. Mixed a little in equal proportions. Looked good so I used it to paint the two tow cables. I was quite pleased with the result, later on, I applied a small amount of liquid rust courtesy of Model Air.

As I touched on earlier, applied paint to the parts of the track I thought in need. Then realised I hadn't painted the two track sections fixed to the rear of the hull. Now done, rubber blocks and metal parts!

The orange lights on the front of the vehicle were now fitted, I used PVA more as an experiment than anything. I observed PVA takes a considerable time to harden so wrote a note reminding me to liquid mask them!! I just know if I didn't I would spray over them inadvertently!!

Bit more touching up of green, cages at rear from where they came off the sprue and the off nook that I noticed.

Like I said; a lot of nothing but it filled the day.

Pic time!! (Only two.)

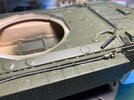
Newly painted cables, transparent lights. I did forget to mention I painted the rubber front mudguard and also added a mix of dark black/grey to the rubber on the hull behind the turret!! Come on? Someone will know what it's called, (I don't).
IMG_0891.JPG

Experimented with a bit of dirt around the exhausts, as you see the rear cages fitted.
IMG_0890.JPG
Here endeth todays session!!
Thank you one and all for helping me along.

Edited to add, closer image of the cable!!
IMG_0887.JPG
 
Last edited:

Scratchbuilder

SMF Supporter
Joined
Jul 2, 2022
Messages
1,943
Points
113
First Name
Mike
Those rubber stops are to stop the barrel bouncing on the engine deck and putting the barrel out of true allignment. Bit of a pig zeroing in the barrel again.
Keep the good work coming.
 

Waspie

SMF Supporter
Joined
Mar 13, 2023
Messages
2,480
Points
113
Location
Portland - Dorset
First Name
Doug
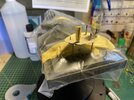
Not a lot done lately. I did get a few minutes the other day. The most I could manage with the time I had was to glue the road wheel caps onto the wheels. You'll see in the image from the two on the right which are still to be done. I placed the tape over the paintwork to protect it in case I inadvertently dropped some glue. You never know!!!! (Also - lessons learnt from a few days earlier!!
Having problems getting the comms platform to my liking, (paint wise), so I may remove it and mask off the odd antenna. Seems easier than masking off most of the turret and find I have lifted paint. Any suggestions???

IMG_0893 copy.JPG
 

Scratchbuilder

SMF Supporter
Joined
Jul 2, 2022
Messages
1,943
Points
113
First Name
Mike
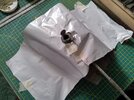
Use kitchen towel or even tiolet tissue to mask off the turret and then spray the comms tower, but dust on the paint, do not try a one coat job or the paint will soak the tissue and stick it to the turret - OR - use a square of plastic bag and cut slits in it so that you can move the bag around the legs. Use tape to seal the bag slits and then spray and work from the back of the turret to the front when placing the plastic bag, that way you will not be knocking bits off. Pic to follow.20230814_102711_HDR.jpg
Before....
20230814_102639_HDR.jpg
After...
 
Last edited:

Waspie

SMF Supporter
Joined
Mar 13, 2023
Messages
2,480
Points
113
Location
Portland - Dorset
First Name
Doug
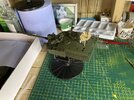
Spent a short while this morning masking up the electronics platform with a plastic bag I had just asking to be used. Taped off a couple of the smaller aerials on the platform.
IMG_0904.JPG

A little bit of spray crept past small area I evidently didn't manage to seal well enough. If anything, one thing I get out of this exercise is if something is a different colour - either don't fit it until it is painted or pre paint on the sprue!! Learning - learning, always learning. The bit of overspray will be removed and touched up later. Meanwhile - a pic of the platform as it is now!
IMG_0905.JPG


A bit of touch up on the legs and repaint a couple of the aerials and hopefully, that'll be the platform done.
Just a few more bobs and bobs to complete and I'll be ready to give the whole thing a coat of clear varnish. Then decals!!
 

Waspie

SMF Supporter
Joined
Mar 13, 2023
Messages
2,480
Points
113
Location
Portland - Dorset
First Name
Doug
Thank Pete, I'd like it progress a wee bit faster but the acres of block paving has taken up all my time lately! Either cleaning, re-sanding and sealing and now SWIMBO's eagle eye has spotted a few blocks that have sunk and water is pooling so I guess that's another entry on her never ending list!!! :rolling: :sad:
 

Scratchbuilder

SMF Supporter
Joined
Jul 2, 2022
Messages
1,943
Points
113
First Name
Mike
Yyyyyeeeeeaaaaahhhhhh!!!!!!! that looks the biz....
Block paving, you are so lucky, mine has gone into all carpets gone and viynl flooring throughout.... Now desperatly fighting her off and guarding the bedroom carpet.
 

Waspie

SMF Supporter
Joined
Mar 13, 2023
Messages
2,480
Points
113
Location
Portland - Dorset
First Name
Doug
Yyyyyeeeeeaaaaahhhhhh!!!!!!! that looks the biz....
Block paving, you are so lucky, mine has gone into all carpets gone and viynl flooring throughout.... Now desperatly fighting her off and guarding the bedroom carpet.
Outside stuff fer me!!!! Reeeaaaly not looking forward to today!!
 

Waspie

SMF Supporter
Joined
Mar 13, 2023
Messages
2,480
Points
113
Location
Portland - Dorset
First Name
Doug
Block paving done!! Knackered!!
What I thought was a 2 foot by 2 foot area turned into a 4 foot by 6 foot area!! (I knew I shouldn't have taking my big spirit level out with me!). :rolling: :sad:
So that's SWIMBO happy, another tick off her never ending list. :thumb2::blow-kiss-2:

May be now I can do what I want to do!!! (Fingers crossed).
 

Waspie

SMF Supporter
Joined
Mar 13, 2023
Messages
2,480
Points
113
Location
Portland - Dorset
First Name
Doug
Quick question!
Before I put a clear coat on, should I remove the Humbrol Maskol from lights etc?
Or does it matter?
TIA, Doug
 

The Smythe Meister

Born to be WILD....... until about 9pm
SMF Supporter
Joined
Jan 30, 2019
Messages
5,731
Points
113
Location
Devon
First Name
Andy
Hi Doug,
I use Eduard paper masks, spray the clear right over ,and remove them afterwards,so it doesn't give a film over clear parts.... not sure if Maskol comes away as easily though as I've never used it:thinking:.
 

Tim Marlow

Little blokes aficionado
SMF Supporter
Joined
Apr 27, 2018
Messages
16,780
Points
113
Location
Somerset
First Name
Tim
I would leave it on until after the paintwork is finished Doug. If you take it off early you could get paint on the clear parts. I’m sure the extra paint won’t adversely affect the maskol.
 

The Smythe Meister

Born to be WILD....... until about 9pm
SMF Supporter
Joined
Jan 30, 2019
Messages
5,731
Points
113
Location
Devon
First Name
Andy
Hi Doug,
I use Eduard paper masks, spray the clear right over ,and remove them afterwards,so it doesn't give a film over clear parts.... not sure if Maskol comes away as easily though as I've never used it:thinking:.
Yeah, sorry,I didn't make myself very clear there,by "afterwards" I meant after all the painting, decals,and the final coat of Semi gloss,or satin :thumb2:
 
Top