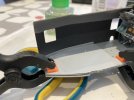
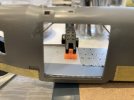
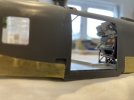
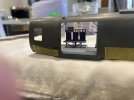
Doug's 1/48 Airfix Sea King

Waspie

SMF Supporter
Joined
Mar 13, 2023
Messages
2,621
Points
113
Location
Portland - Dorset
First Name
Doug
Despite the modelling gods throwing me a curve ball I achieved a fair bit today!!
My Sky system went down big style last evening. Then Sky decide they would send an engineer today - there goes my bench time I thought!!
New dish, bracket - Q Box + setup, less than an hour.
Bench time!! Whoooo Hoooooo!!

Death by image I'm afraid. Picture says it all!!
Pic 1
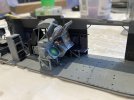
Firstly - yesterday's work. The colouring of the inner cabin area, two tone. The lighter grey represents the plastic covered padding which may have helped with sound proofing!! There again - it may not!!!!
IMG_1250.JPG

Pic 2/3/4
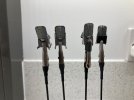
My seats, back and front. Etch harness' added. Lesson learned from that. Lap straps would have been better attaching prior to adding the back and seat pans!!!. Fiddly little blighters!!! Only have to fit some delicate hand holds which fit over the seat retains the shoulder harness in place.
IMG_1247.JPG
IMG_1248.JPG
IMG_1249.JPG

Pic 5
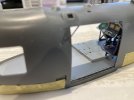
Cockpit area with IP installed, jump seat aka Pilots navigation bag holder!!
Even painted the fire extinguisher and Pee Tube!! Note electronics cabinet empty!
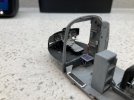
IMG_1252.JPG

Pic 6.
Small refinement in the working area of the King in the shape of T transducer raise/lower T Handle painted red. Also - sonar foot brake painted and dirtied!
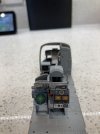
IMG_1253.JPG

Pic 7
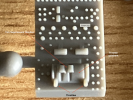
Electronics cabinet now has 'black boxes'!!
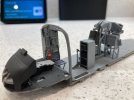
IMG_1254.JPG

Pic 8
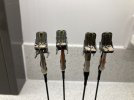
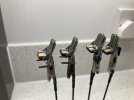
Troop seat assembled, painted and suitably dirtied to represent the myriad of boots clambering over them to get from front to back and visa versa!! I'm a little bit stumped at how to add definition to the troop seats to show the indentation in the fabric material. Need to research that before they are installed.
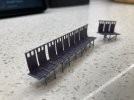
IMG_1255.JPG


Well, 'that's all folks', hope you're not suffering from picture overload.

Comments and criticisms all welcome. Tis the only way to improve!!
Thanks again for looking in.
Doug
 

Jakko

Way past the mad part
SMF Supporter
Joined
Apr 28, 2018
Messages
10,928
Points
113
First Name
Jakko
I'm a little bit stumped at how to add definition to the troop seats to show the indentation in the fabric material.
Add a wash¹ of a darker shade of the base colour over them, then when that is dry, drybrush with a lighter shade of the base colour. Don’t hesitate to make the difference between these three shades quite pronounced, especially since these seats will be inside a relatively dark fuselage.

¹ Take a brushful of water-soluble paint, put it on a palette, and then mix a few brushfuls of water into it. You want coloured water, not thinned paint.
 

Waspie

SMF Supporter
Joined
Mar 13, 2023
Messages
2,621
Points
113
Location
Portland - Dorset
First Name
Doug
Doug,
some seriously nice work going on there.
Thank you Scottie, I have to admit a certain pleasure in the crew seats.
Excellent work doug , looking very detailed , cheers tony
Thank you Tony. Although I do reckon Westlands would have built one quicker than me. Hopefully, as the weather improves I'll be able to grab more time for it!
Add a wash¹ of a darker shade of the base colour over them, then when that is dry, drybrush with a lighter shade of the base colour. Don’t hesitate to make the difference between these three shades quite pronounced, especially since these seats will be inside a relatively dark fuselage.

¹ Take a brushful of water-soluble paint, put it on a palette, and then mix a few brushfuls of water into it. You want coloured water, not thinned paint.
Thank you Jacko, as ever your advice is most welcome, I will follow it and put the results on here. I was going to have a bash at using the fine setting on the H&S Ultra AB but will give the method you describe a bash.
 

Jim R

SMF Supporter
Joined
Apr 27, 2018
Messages
13,816
Points
113
Location
Shropshire
First Name
Jim
You're making a fine job of this Doug. The pe and your detail painting makes the interior really stunning. Keep up the good work.
 

JayCee

SMF Supporter
Joined
Aug 13, 2019
Messages
1,008
Points
113
First Name
John
Doug, following along from the Eastern Med. This is one fine whirly bird. Superb work, especially as you are a relative newby to the black arts. :smiling: .
John
 

Waspie

SMF Supporter
Joined
Mar 13, 2023
Messages
2,621
Points
113
Location
Portland - Dorset
First Name
Doug
@Mickc1440 , @Tworrs , @Jim R , @JayCee . Many thanks for your very kind words. The words of encouragement are superb tools for getting me to push to achieve what I am. It does help having a bit of insider knowledge, but trying to remember details from over 30 years ago is getting harder. I only wish instead of taking pictures from the helicopter, I wish I had taken some inside!!!

I have set myself another challenge!! One that is 100% my fault. In my rush to remove detail on the upper cockpit panel prior to etch being applied I removed the manual throttle quadrant and fire suppressant operating handles!! So today will be spent sourcing a suitable piece of sprue, measuring and drawing a diagram of what I want!!! I don't have to worry about the two, one left and one right, manual throttle levers as they are part of the Eduard etch!! however, the two engine fire handles!!! That's going to be the problem!! Tiny with a capital 'T'!!!

Pic 1
Copied from Rick's SK build to show throttle set up!
Screenshot 2024-02-14 at 10.32.27.png

Onwards and upwards.
 

Scratchbuilder

SMF Supporter
Joined
Jul 2, 2022
Messages
2,029
Points
113
Location
Luton
First Name
Mike
Doug,
Just caught up again on your build, and as before it is going great guns, plenty of work still to do, but you can do it even with a 'mad dog' around - we have three to contend with, although one is a reet mummys boy....
Whisper (Gannet arrives Friday).....
 

Waspie

SMF Supporter
Joined
Mar 13, 2023
Messages
2,621
Points
113
Location
Portland - Dorset
First Name
Doug
Doug,
Just caught up again on your build, and as before it is going great guns, plenty of work still to do, but you can do it even with a 'mad dog' around - we have three to contend with, although one is a reet mummys boy....
Whisper (Gannet arrives Friday).....
Re the Gannet!! Mums the word!!
 

Waspie

SMF Supporter
Joined
Mar 13, 2023
Messages
2,621
Points
113
Location
Portland - Dorset
First Name
Doug
More progress albeit not working on the quadrant as I thought!!
Today was 'sea tray' day!!
I have been putting this off for a while as I didn't have a clue how I was going to tackle it!!
Enough blabbing, more pictures!!

Pic 1.
Continuing on from yesterday's seats. I took Jackos' advice and gave the seats a wash, then dry brushed once dry with a lighter mix, think I managed to get a dirty look with a worn feel about it!!
IMG_1258.JPG

Pic 2
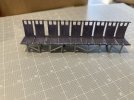
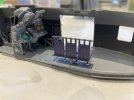
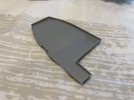
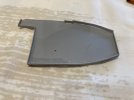
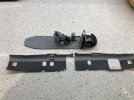
Started on the sea tray, I had the basic shape all cut out but it was the short side walls that bothered me. Out plastic card, (0.3mm), and sliced a few strips to a suitable length to form the sides. The small spigot top right of the tray is to mark the hole the rear three man seat locates into.
IMG_1256.JPG

Pic 3
From the starboard side showing the cut out for the cabin door.
IMG_1259.JPG

Pic 4
Cabin door looking slightly fwd. Sea Tray sides look a bit rough but will tidy up before spraying then weathering.
IMG_1267.JPG

Pic 5
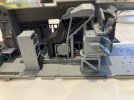
Rear troop seats dry fitted to check alignment and fit!!
IMG_1268.JPG

Pic 6, (last one for the day!!!)
All the troop seats fitted to check alignment again regards sea tray!!!

IMG_1269.JPG

That's it for me for the day.
C&C;s all welcome.


Hope it's drier where you are???

Doug
 

Waspie

SMF Supporter
Joined
Mar 13, 2023
Messages
2,621
Points
113
Location
Portland - Dorset
First Name
Doug
A few more pics of todays work.
Pic 1
Sea tray completed
IMG_1260.JPG

Pic 2
There is no raised section next to the cabin door. The finished tray will have a metal plate across the cabin door entrance to keep the sea tray secure when the door is open to stop air from going underneath the tray in flight!
IMG_1261.JPG

Pic 3
Shot of starboard side troop seats dry fitted
IMG_1262.JPG

Pic 4
Another pic of cramped internals.
IMG_1263.JPG

Pic 5
Through the cabin doorway with troop seats in place and sea tray clear of the legs. The end seat by the cabin door is usually kept for the stick leader if carrying Marines or SF as it has a Mic/Tel lead above the seat so they can stay in communication with the crew. He will then relay instructions to the rest of the passengers/stick!!
IMG_1265.JPG

Definitely done now!!

Donning cooks apron as I type!!!

Doug
 

Waspie

SMF Supporter
Joined
Mar 13, 2023
Messages
2,621
Points
113
Location
Portland - Dorset
First Name
Doug
Mark. Thank you very much.

Stefan. Yup, first hand experience does help, saves on a great deal of research and helps add that layer of realism you wouldn't necessarily be able to achieve.
 

Jakko

Way past the mad part
SMF Supporter
Joined
Apr 28, 2018
Messages
10,928
Points
113
First Name
Jakko
I only wish instead of taking pictures from the helicopter, I wish I had taken some inside!!!
If, at the time, you had been building models of these aircraft, you would have. But as you weren’t, you didn’t, and no point in beating yourself up over it :smiling3:
 
Top