Doug's 1/48 Airfix Sea King

Waspie

SMF Supporter
Joined
Mar 13, 2023
Messages
2,481
Points
113
Location
Portland - Dorset
First Name
Doug
Sorry guys, no progress at the moment. Bad back!! So sitting in a cold old damp garage isn't going to improve it so I'm at a standstill but enjoying reading all your progress, tips and advice on other builds. So keep on building. :thumb2:
 

Waspie

SMF Supporter
Joined
Mar 13, 2023
Messages
2,481
Points
113
Location
Portland - Dorset
First Name
Doug
Question for Rick. (@rickoshea52 ).
When you were preparing to paint your Airfix Sea King, I noticed you used the one piece door, (Port side) as a mask prior to painting. Can I ask how you secured the door in place. As in the finished model you, like me have the port pax door open!
TIA, Doug
 

Waspie

SMF Supporter
Joined
Mar 13, 2023
Messages
2,481
Points
113
Location
Portland - Dorset
First Name
Doug
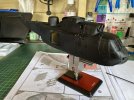
Huzzah!!!! At last I made contact with my SK!! (Thank goodness for family keeping SWMBO busy!!!!)

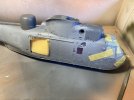
I managed to successfully spray some clear green over the upper cockpit windows!! That led on to the fitting of the whole port access door prior to paint!! Feeling good, I then decided to continue with as much as I could. Upper cockpit consul installed complete with throttle quadrant and rotor brake handle. Then the cockpit glass. A bit of bunging up holes and I was ready to experiment with a new Primer, (Hycote matt black). Black rattly can thing!!! Stinks a bit, not a bad thing as SWMBO is asthmatic so stayed well clear!!!!!

Pics time!
Pic 1
Cockpit clear bits fitted. Whole thing had been wiped over with IPA prior to painting and hopefully getting rid of the horrible Lt Grey Primer.
Rear cabin door bunged up!!
IMG_1314.JPG

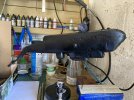
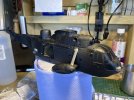
Pic 2
Primer Applied! Looks better already and it's not even dry yet!
IMG_1316.JPG

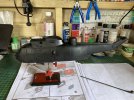
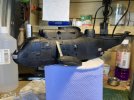
Pic 3
Touch dry and sitting on new vice via the sonar well!!!
IMG_1319.JPG

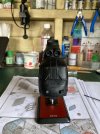
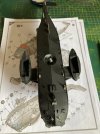
Pic 4
IMG_1320.JPG

Pic 5
Final shot. Now leave for 24 plus hours. (Or whenever SWMBO dictates!!!)
IMG_1321.JPG

Comments good - bad, all welcome. The aim is improvement - isn't it???????
 

boatman

SMF Supporter
Joined
Nov 8, 2018
Messages
12,920
Points
113
Location
NORFOLK UK
First Name
christopher
Huzzah!!!! At last I made contact with my SK!! (Thank goodness for family keeping SWMBO busy!!!!)

I managed to successfully spray some clear green over the upper cockpit windows!! That led on to the fitting of the whole port access door prior to paint!! Feeling good, I then decided to continue with as much as I could. Upper cockpit consul installed complete with throttle quadrant and rotor brake handle. Then the cockpit glass. A bit of bunging up holes and I was ready to experiment with a new Primer, (Hycote matt black). Black rattly can thing!!! Stinks a bit, not a bad thing as SWMBO is asthmatic so stayed well clear!!!!!

Pics time!
Pic 1
Cockpit clear bits fitted. Whole thing had been wiped over with IPA prior to painting and hopefully getting rid of the horrible Lt Grey Primer.
Rear cabin door bunged up!!
View attachment 505457

Pic 2
Primer Applied! Looks better already and it's not even dry yet!
View attachment 505458

Pic 3
Touch dry and sitting on new vice via the sonar well!!!
View attachment 505459

Pic 4
View attachment 505460

Pic 5
Final shot. Now leave for 24 plus hours. (Or whenever SWMBO dictates!!!)
View attachment 505461

Comments good - bad, all welcome. The aim is improvement - isn't it???????
WELL Doug i like very much nice build
chrisb
 

Waspie

SMF Supporter
Joined
Mar 13, 2023
Messages
2,481
Points
113
Location
Portland - Dorset
First Name
Doug
Few bits done today, not a great deal as I had some basic errors to reconcile!!! Whist priming the King I forgot to add some liquid mask to some of the holes and points I would need to connect a few external bibs and bobs to. So I spent some time reboring holes and scraping out grooves that take aerials and sponsors etc.
Once that was done I managed to get some sensors fitted as well as the sponsons for the U/C.

Piccy time.
Pic 1 Starboard side. The grey box like bits are part of the Orange Crop sensor. (Detects radars etc).
IMG_1323 copy.JPG

Pic 2
Port side - same system! With the addition of the nose VHF aerial.
IMG_1324 copy.JPG

Comments/criticisms good or bad most welcome!!
 

Waspie

SMF Supporter
Joined
Mar 13, 2023
Messages
2,481
Points
113
Location
Portland - Dorset
First Name
Doug
Stole a few minutes this morning before the rain came down again.
Today was a day for adding the aerials, transponder, fuel dump pipe and such.
Left off the clear parts. Hopefully I'll remember to mask the locations off before painting again.
No big additions, just getting more ancillaries fitted prior to last primer coat and base colours - sometime!!!!
IMG_1327.JPG
 

rickoshea52

SMF Supporter
Joined
Dec 20, 2011
Messages
3,973
Points
113
Location
North West
First Name
Rick
One of the things I wish I had done before painting was adding the upper and lower anti collision lights. The bases are the airframe colour and it was a pain to do them later after forgetting them.
 

Waspie

SMF Supporter
Joined
Mar 13, 2023
Messages
2,481
Points
113
Location
Portland - Dorset
First Name
Doug
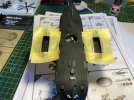
How come some of the little jobs take so long? Masked off the wheel wells ready for a coat of white. Took longer than anticipated. As I had white in the airbrush I also painted the struts for the wheels.
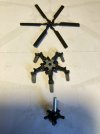
In between that lot I decided to hand paint the rotor head. (No pics of that as the head isn't completely finished).

Pic 1
Masked off the offending area!
I did add an addition cover over the fuselage prior to spraying!!
IMG_1333.JPG

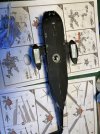
Pic 2
With the black primer it looks suitable wheel soiled.
I also took the opportunity to experiment with adding the stress lines on the tail section. I applied a few diagonal white lines with the AB on a fine setting. If I remember I will try and take a picture tomorrow. Hopefully that will show up as a simple shadow once the top coats are applied.
IMG_1334.JPG
 

Waspie

SMF Supporter
Joined
Mar 13, 2023
Messages
2,481
Points
113
Location
Portland - Dorset
First Name
Doug
Coming along nicely Doug :thumb2:

Geoff.
Thank you Geoff. Slowly - slowly. I'm getting used to not rushing into things. Spending a lot more time prepping stuff prior to fitting and alway but always dry fitting twice before glueing. Itching to get the final colour on but a bit more work before I get to that stage.
 

Waspie

SMF Supporter
Joined
Mar 13, 2023
Messages
2,481
Points
113
Location
Portland - Dorset
First Name
Doug
One of the things I wish I had done before painting was adding the upper and lower anti collision lights. The bases are the airframe colour and it was a pain to do them later after forgetting them.
Today I painted the underside of the lights chrome in readiness for fitting!!! (Thanks for the prompt!)
 
Top