Ian M's Mitsubishi F1M2 Zero PETE. Hasegawa 1/48

Ian M

Administrator
Staff member
Administrator
Moderator
SMF Supporter
Joined
Dec 14, 2008
Messages
19,800
Points
113
Location
Falster, Denmark
First Name
Ian
Love that cockpit Ian
Thanks Neil. The Fuselage is now closed up. Guess how much of it can be seen...lol
20230703_102141.jpg
So its raining still lol
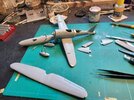
I had intended to cut all the control surfaces free and do my normal trick of having them a bit more relaxed than they other wise are. but the top surface is not the same as the bottom and makes it hard to find where the cut goes. Might have been easier if the wing was not glued up but alas to late, lol
 

Ian M

Administrator
Staff member
Administrator
Moderator
SMF Supporter
Joined
Dec 14, 2008
Messages
19,800
Points
113
Location
Falster, Denmark
First Name
Ian
Cheers chaps. It has bucketed down with rain for the last couple of days. We need the rain as there has been a drought (again) so the first rain for 6 weeks! Our rain barrels where pretty near empty but are now half full already. So while it has rained I have played indoors.
So the situation:
Things are looking black:
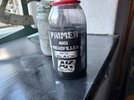
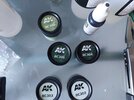
I am trying a new, to me, primer from AK:
After reading that a lot on here swear by it, I thought I would give it a go. All I have done is swear AT it. Primer and Micro filler...? Dries to a matt finish. Dry to the touch after 30 mins. Fail, fail and fail. Oh! And it smells and cleans up with cellulose thinners. Not my ideal choice. I am trying to break the habit.
20230704_083726.jpg
It dries flat and is thin but Thick you guys are using some other AK primer.
Their Real Colours paint on the other hand is rather good. AS could be seen on the cockpit, it goes down nice and gives a nice finish.

20230704_083709.jpg
Dries matt?
20230704_083642.jpg
So far not a huge fan.

These are my Japanese colours...
20230704_083801.jpg
The instructions say the underside surfaces are green grey (RC303) Other sources say grey. (RC032). I rather like the green.
The top surfaces etc Mitsubishi dark green... so either 304 or 305 I guess 304.
Mitsubishi interior green is the RC306
What I have used so far is promissing...Lets hope they go down well on the Airframe.
 

Andy T

SMF Supporter
Joined
Apr 26, 2021
Messages
2,039
Points
113
Location
Sheffield
First Name
Andy
Great feedback on the wet stuff. I'm tempted to try some of the real colours myself as they do a great range compared to my usual mr color.
Primer sounds less impressive so I doubt I'll be swayed from the amazing mr surfacer.
 

Ian M

Administrator
Staff member
Administrator
Moderator
SMF Supporter
Joined
Dec 14, 2008
Messages
19,800
Points
113
Location
Falster, Denmark
First Name
Ian
Slow down lovely work so far Ian, that cockpit looks brilliant
The funny thing is I am only doing an hour here and there. Just in the space of days and not weeks. I is quite a simple but enjoyable build. No fit issues. almost shake and bake dare I say...

I'm tempted to try some of the real colours myself
AS paint goes they are good. I was spraying for almost an hour last night. Almost no tip dry. Maybe twice in that hour.
I might have got a "thin" bottle of primer, will try one more if nothing better turns up.
So you swear by Mr. Surfacer. I might have to try that one day.

Any how:
20230705_084542.jpg
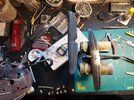
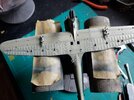
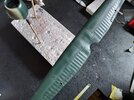
Went for the darker of the two greens for the tops. Just a little post shade on the top of the fuselage to give it a little sun bleached look. The rest is single colour one panel at a time!
20230705_084548.jpg
Top wing.

20230705_084601.jpg
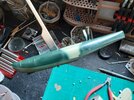
The undersides in green grey, again one panel at a time and letting the paint do the work.

20230705_084642.jpg
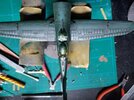
Sorry blurry picture! No I did not mask off. I just went for it. Maybe I should have lol.

At the moment the floats are attached and the glue's drying. Learned that Lacquer paints and glue not as forgiving as acrylics.
With Vallejo I fine that the glue just goes through the paint. With this the glue removes the paint.... Hmm where did I put that touch up brush...
More later.
Oh! One other thing. I found that in 1943- '44 Yamato's spotters had the tail code AI-1, AI-2 etc. so AI-1 it is then I think I might be able to paint that! Might do the white stripes on the tail wings as well while I am at it.
Edit: I made a mistake in those dates but hey ho. I found my white serials decal sheet so it can get the correct code; 212-01.
Comments welcome more later.
 
Last edited:

Ian M

Administrator
Staff member
Administrator
Moderator
SMF Supporter
Joined
Dec 14, 2008
Messages
19,800
Points
113
Location
Falster, Denmark
First Name
Ian
OK then so far I have tried stretched sprue: What is up with plastic these days. It is almost impossible to make a good bit of stretched these days! Either they break and curl up as you pull them = useless.
Pull out but with lumps in = useless.
Pull out far to quick and thin. = yep useless.
Found some 0.5 mm piano. 30cm later still not got one to the correct length!
That Lycra stuff is way to thin
Found some smooth coated sewing thread. will play with that a while.
 

Tim Marlow

Little blokes aficionado
SMF Supporter
Joined
Apr 27, 2018
Messages
16,850
Points
113
Location
Somerset
First Name
Tim
OK then so far I have tried stretched sprue: What is up with plastic these days. It is almost impossible to make a good bit of stretched these days! Either they break and curl up as you pull them = useless.
Pull out but with lumps in = useless.
Pull out far to quick and thin. = yep useless.
Found some 0.5 mm piano. 30cm later still not got one to the correct length!
That Lycra stuff is way to thin
Found some smooth coated sewing thread. will play with that a while.
Agree about stretching sprue. It simply doesn’t work like it used to. More like stretching chewing gum these days. Almost certainly it’s because something has been removed from the mix due to safety concerns. For stretchy thread, try a sewing shop. Lycra or elastic sewing thread comes in loads of thicknesses and colours. They don’t just make it for us you know……
 

Jack L

SMF Supporter
Joined
Jul 25, 2018
Messages
1,009
Points
113
First Name
Jack
Looking good Ian. Another vote her for Mr Surfacer and Mr Finishing Surfacer. Even the rattle can version dries really fine, I've had a 'perfect' finish each time using.
 

Ian M

Administrator
Staff member
Administrator
Moderator
SMF Supporter
Joined
Dec 14, 2008
Messages
19,800
Points
113
Location
Falster, Denmark
First Name
Ian
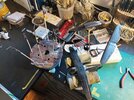
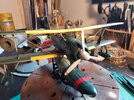
After several total fails at trying to rig this little bugger, I think I got something I can live with.
I found some 0.5 brass which being a lot softer and easier to work with than Piano wire, I managed to get some braces sorted.
Now I have some holes to fill and some serious paint touch-up work to sort out.
AK Real colours DO NOT LIKE CA de-bonder. As me how I found that out...
20230710_094418.jpg
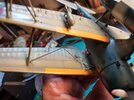
The tails are a bit 'bent' but the best I could (be asterisk) to do. Sorry. Right now they are painted black and drying along with the rear seats machine gun.

20230710_094434.jpg
CA de-bonder and AR real colours do not play nice together! Bummer!
Top strut near the fuselage for the visually impaired.
So as can be seen there is not a lot left to do for this one. Bit of touching up and a dot of gloss varnish on the lights... S'bout it.
Watch this space.
 

The Smythe Meister

Born to be WILD....... until about 9pm
SMF Supporter
Joined
Jan 30, 2019
Messages
5,789
Points
113
Location
Devon
First Name
Andy
Blimey that's looking good Ian :cool:
... The plane itself, obviously.... But that rigging is interesting too,(and Ill be taking notes if course!!)
... Not that I'd be "Cheating" you understand!!
 

Waspie

SMF Supporter
Joined
Mar 13, 2023
Messages
2,603
Points
113
Location
Portland - Dorset
First Name
Doug
What an amazing read/build. I agree with Neil, the cockpit is fantastic. Crisp and precise as is the detail you have put into it.
First Zero I have seen in that configuration.
 

Ian M

Administrator
Staff member
Administrator
Moderator
SMF Supporter
Joined
Dec 14, 2008
Messages
19,800
Points
113
Location
Falster, Denmark
First Name
Ian
Blimey that's looking good Ian :cool:
Why thank you Sir! It is a pity that they (Hasegawa) did not include a plastic version of the end covers for the brace wires.

What an amazing read/build. I agree with Neil, the cockpit is fantastic. Crisp and precise as is the detail you have put into it.
First Zero I have seen in that configuration.
Thank you.
The Japanese had more zero's than a footballers paycheck!
 

The Smythe Meister

Born to be WILD....... until about 9pm
SMF Supporter
Joined
Jan 30, 2019
Messages
5,789
Points
113
Location
Devon
First Name
Andy
Looks quite a big beastie sat on the mat there Ian? :thinking:
Like the overall paint/decal scheme.... and the light weathering on the yellow strip along the top wing is a great touch:thumb2:.
Looking forward to seeing the detailed photos :cool:
 
Top