My first diorama - WWII battle

T

twitch_tweak

Guest
Hello all, this is my first post on the site. My history with dioramas and models doesn't go very far back. I used to never have the patience for them, but have been developing a big interest towards both of them lately.

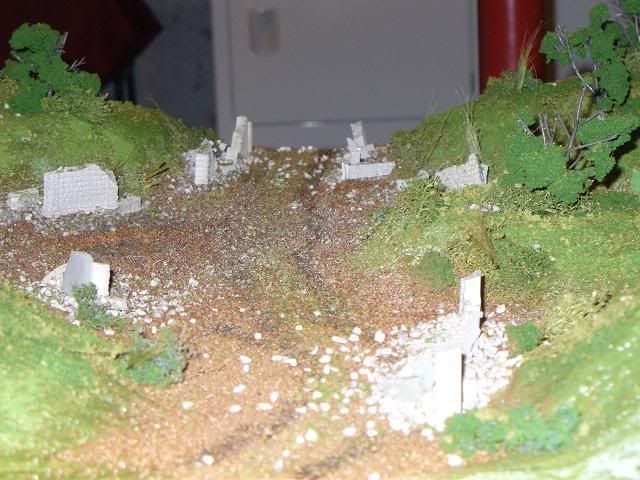
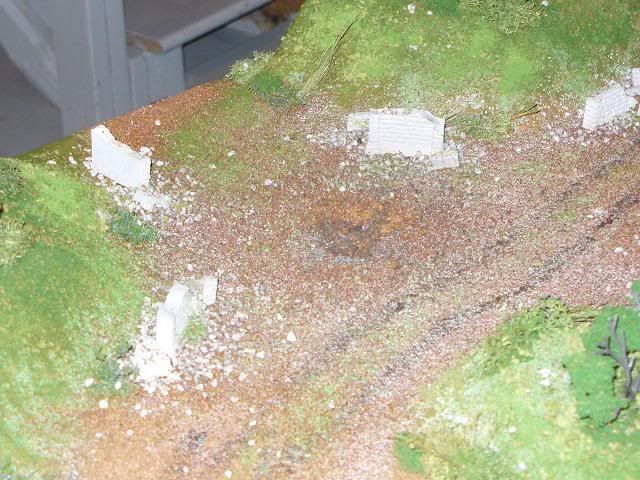
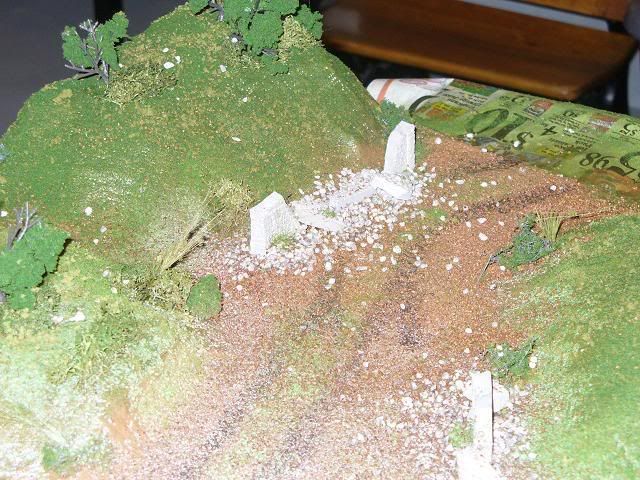
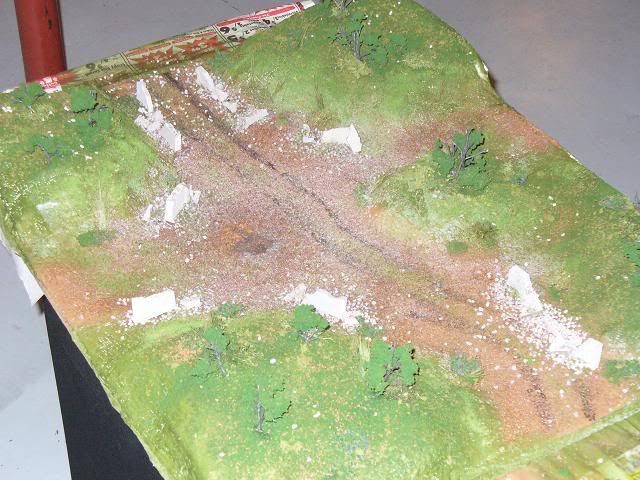
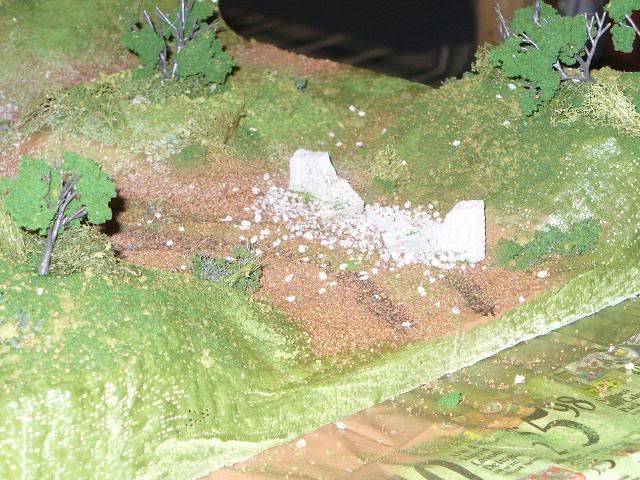
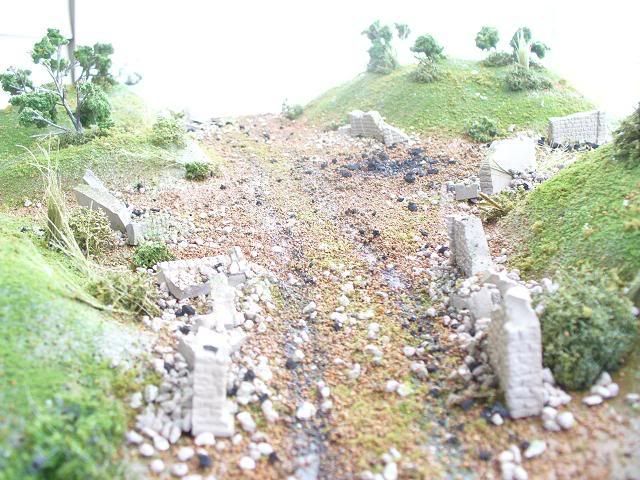
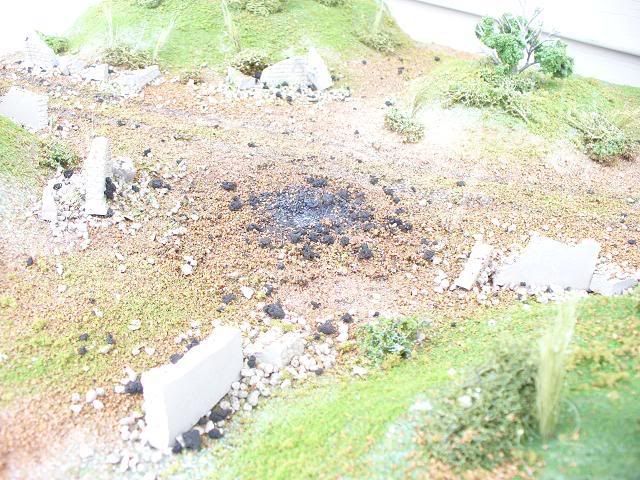
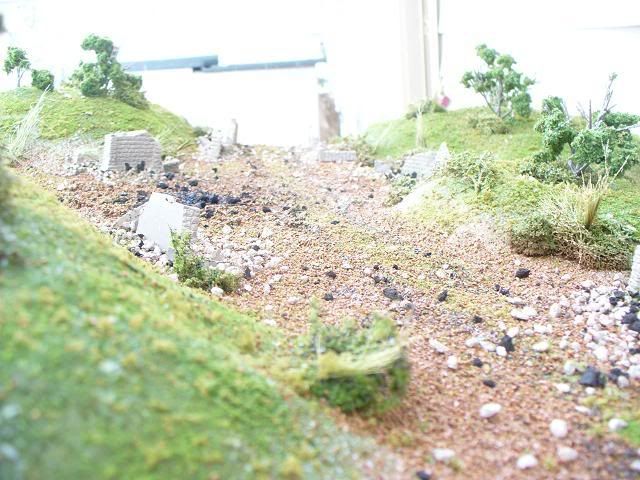
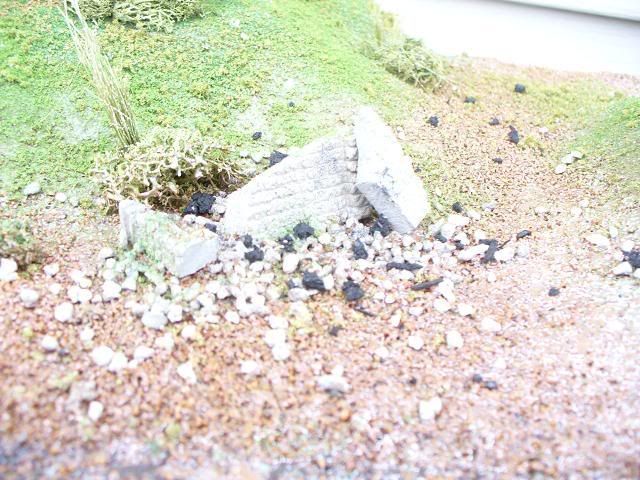
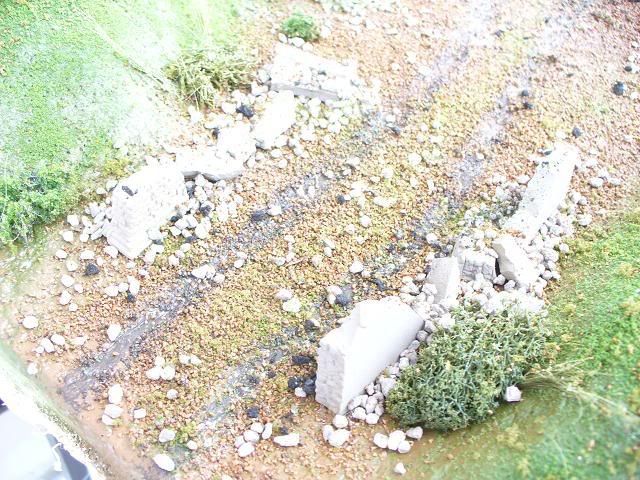
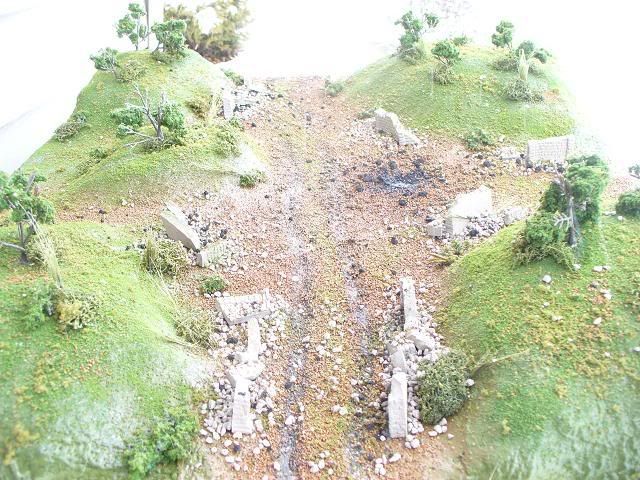
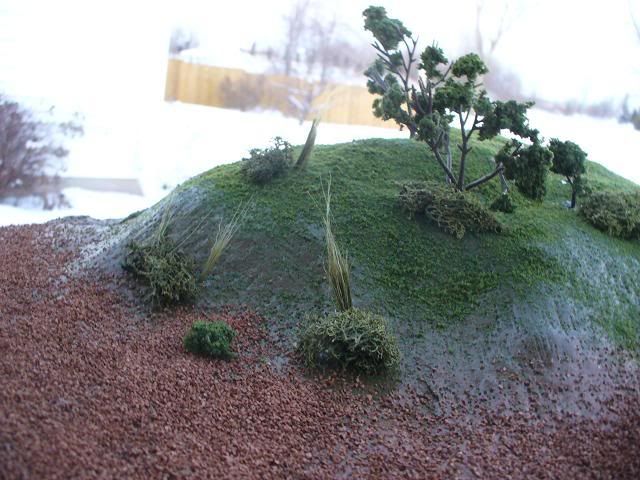
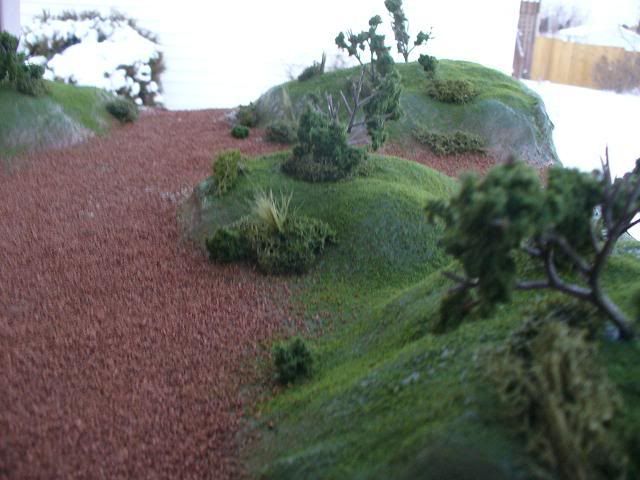
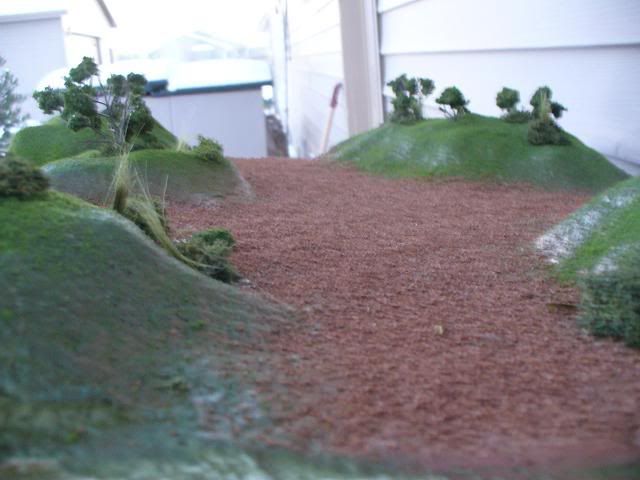
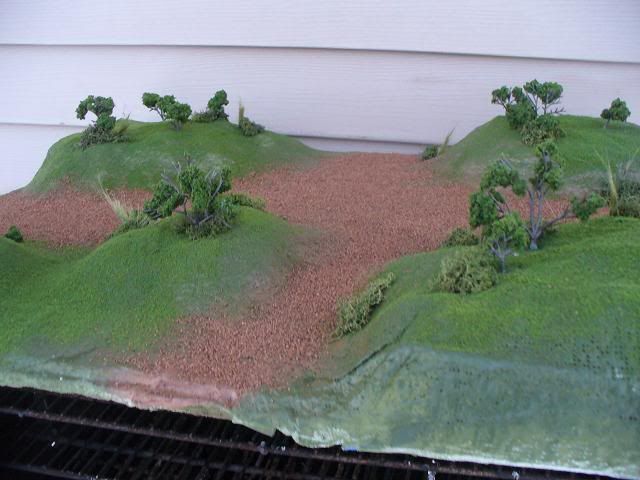
Lately I have been working on my first diorama. I am basically into anything that concerns WWII, which is why I chose to create this diorama. As of right now I only have the terrain partially finished. I am going to add much more lichen and grass, and probably more trees.

The scene will be in 1/72 and will depict a german patrol, consisting of a Jagdtiger and a Jagdpanzer, along with a large number of german infantry, being ambushed by another large group of 101st airborne paratroopers.

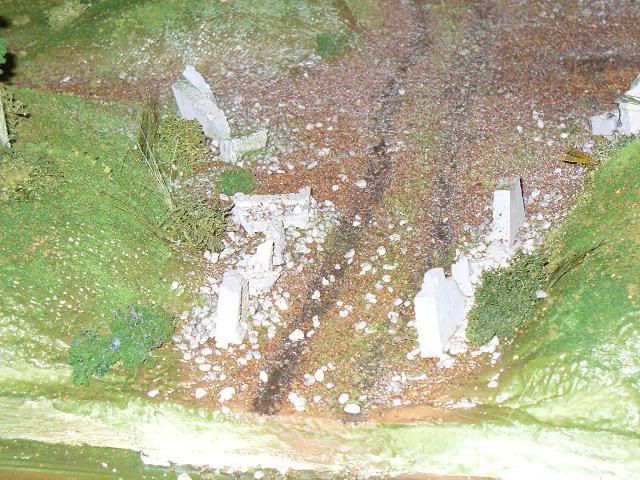
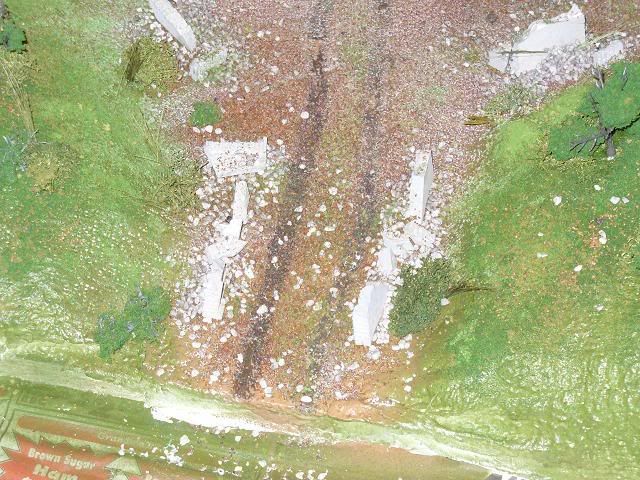
I have named the project "The Crossroads" because as you can see in the pictures, the terrain depicts the cross section of two dirt roads.

The jadgtiger and jadgpanzer are both in the works, and the infantry hasnt even arrived at my house (in the mail) so I will post pictures of both of them later.

Please look at the pictures and let me know what you think. Any suggestions and comments is greatly appreciated.

5.jpg


http://i94.photobucket.com/albums/l106/twitchtweak/5.jpg

4.jpg


http://i94.photobucket.com/albums/l106/twitchtweak/4.jpg

3.jpg


http://i94.photobucket.com/albums/l106/twitchtweak/3.jpg

2.jpg


http://i94.photobucket.com/albums/l106/twitchtweak/2.jpg

1.jpg


http://i94.photobucket.com/albums/l106/twitchtweak/1.jpg
 
Last edited:
A

alan2525

Guest
It's looking good so far - What you might want to do though - Gamesworkshop sell something which you can use to represent grass - it's like a fine hair - can be used to build up a bit more vegetation and make for a bit more interest. Also there's a basing material which looks like tiny scale leaves - I think it's actually a type of dried herb but is sold for modellers - it can be used around the vegetation to represent a bit of leaf mould. Get some different colour scatter materials and break up the green a bit too.

I'd use some small chunks of cork or even stone to add a few little rocks protruding from the ground...just to break it up a bit, also I'd think of using a different colour scatter material on the path to add variety, maybe have some smoother areas too that would give the impression that some parts have been wet and then dried out into a hard packed surface. Also think about making some hollows and filling with the water clear resin for some puddles.

It's a good idea to get some old tank tracks and then push them into wet plaster or modelling putty to make it look like tank tracks, if you slide them around as the plaster is wet so it makes a ridge at the edge it'll look like the tank was skid steering in the mod and churned it up!

Lastly I'd consider exactly where the tanks are going to go and then sink them in the ground and build up the diorama around them - when driving on soft ground you can barely see the tracks of a tank. Nothing destroys the impression of realism like a tank which doesn't seem to be fixed to the ground!

How about some little fences or sign posts in one of the corners, or an old dry stone wall, perhaps it's broken and falling down. If you add little details like that in a corner it helps the composition and makes you think there is a surrounding area next to the part you've modelled.

Anyhow just a few suggestions - keep up the good work and of course welcome to the forums! Hope you get a lot of hints and tips here to help develop your modelling , so far it's looking good!

Alan
 
R

rjwood_uk

Guest
a lovely diorama so far mate!!

as alan says there are some things that could turn it into a super diorama!! the fences are a good idea and buidling some mud/dirt whatever around the tanks tracks is a good idea as well.

do you own an airbrush? if so, try shading the grass with different tones of green and maybe some brown patches where the grass has worn thin?

i tried that kind of effect for the first time. take a look here;

http://www.scale-models.co.uk/showthread.php?t=4734&highlight=netting

i used the games workshop "grass" there as alan also suggests.

let us know what you think. cant wait to see it progress!
 
G

GEEDUBBYA

Guest
Howdy twitch,

Welcome to the site, we are glad to have you here!

I am impressed!, Looks great to me. I dont have a clue what to offer in the way of 'tips", except a link to a diaroma basic tips site found here: http://www.swannysmodels.com/Dioramas.html . This useful page was provided by Matt Swann .

The above site and many other tips and useful modeling info can be found here: http://www.craigcentral.com/models.asp .

Now this is not to take away from the advice given by these guys and its not to get you to visit other sites instead of this one, its just a website i know of that has really useful information on it.

I/we look forward to see more of your work and if you have any questions, we love to give advice here if you cant tell by now lol.

Have a good day and keep up the good work,

Greg aka GEEDUBBYA (GW)
 
T

twitch_tweak

Guest
Hey guys thanks for the tips. I've started making tank treads in the trails, and have added some bits of grass into the trails to show a little bit of overgrowth. I also sprinkled some dirt into the grass to add some more color. I'm gonna try and get to the store soon to get some new shades of green and look for that workshop grass you mentioned to add a little more color to the hills. I'll post some more pics when I get a little further along. Thaks for the tips :D
 
B

Bunkerbarge

Guest
For a first diorama that is looking very good. I can't think of anything more useful to add to the comments alrady posted except to maybe suggest breaking up the colour and tone of the dirt track a bit. It looks very even at the moment and so a bit unrealistic.

I have used real dirt from the garden in the past which worked really well. Dry it out completely and you will have a rich source of textures and colours at your disposal which will bring your model to life.

Have a read through this thread as well, the early pictures seem to have dissappeared, which is a shame, but the later ones are there and the text is very interesting anyway:

http://www.scale-models.co.uk/showthread.php?t=3430&highlight=diorama+tiger
 
T

twitch_tweak

Guest
Hah funny thing bunker, I actually looked at that post awhile back before I even started my diorama. So you could say it kinda inspired me :P but I will have to try your idea of using real dirt. Thanks!
 
T

twitch_tweak

Guest
Well I just added in some segments of busted up retaining walls with some debris. I also added some new shades of green to the grass to break up the single color. Plus I added a lot more vegetation. Im still workin on making the tank treads stand out a little more because they are hard to notice. I'll try to post some pics tomarrow because ts dark out, and my camera takes crappy pics indoors.. Flash makes it too bright, and w/o flash you cant see anything... :sad:
 
A

alan2525

Guest
One thing that you always get with dirt roads - where the vehicle treads go, cartwheels etc, you always end up with deep ruts, there's very often a little ridge down the middle where some grass and weeds grow - it'd be a good idea to try to give that kind of impression, however with tank activity I'm sure those ruts would soon end up being very deep!
 
T

twitch_tweak

Guest
well im workin on the treads right now.. (glue is dryin) and im givin the weeds n grass in the middle a try.. not 2 happy with it right now, but once it dries im sure it'll look better.
 
R

rjwood_uk

Guest
get us some more pics up!

we love to see the work thats going on!! lol

dosnt matter about quality!
 
T

twitch_tweak

Guest
Okay well took some pics. The flash made the dirt look kinda funny, and the glue aint completely dry, but you get the point. I'll take some better ones 2morrow.

13.jpg


http://i94.photobucket.com/albums/l106/twitchtweak/13.jpg

12.jpg


http://i94.photobucket.com/albums/l106/twitchtweak/12.jpg

11.jpg


http://i94.photobucket.com/albums/l106/twitchtweak/11.jpg

10.jpg


http://i94.photobucket.com/albums/l106/twitchtweak/10.jpg

9.jpg


http://i94.photobucket.com/albums/l106/twitchtweak/9.jpg

8.jpg


http://i94.photobucket.com/albums/l106/twitchtweak/8.jpg

7.jpg


http://i94.photobucket.com/albums/l106/twitchtweak/7.jpg

6.jpg


http://i94.photobucket.com/albums/l106/twitchtweak/6.jpg

You can see I'm working on making a mortar hole in the 2nd pic. and I plan on adding some weeds poppin outta some of the debris n such. And I'm still tryin 2 get the tank treads to look better, cept I cant go much deeper cuz I'm hittin the wood.. let me know what you think. Thanks!
 
B

Bunkerbarge

Guest
Now that is looking a lot more efective. If you paint the wals and rubble with a number of different colours you should get a very realistic finish and the whole thing will come to life. That is definately something you should use a wash on to bring out the shadow detail. If you haven't done this before practise on a spare piece but you will be amazed at how easily they can look good.

Great job, are you pleased with it?

By the way if you've hit wood you can't go any further so there's no point in worrying about it!!
 
R

rjwood_uk

Guest
looking nice!

that mortor hole looks good, maybe add some black pastel dust to it, then blow off the excess. that will give it a nice charred effect!

as Richard says, painting the walls would make it look much better as it will tone them down a bit and blend them in. a nice wash would also look good.

but this is a great starting point for something amazing!

keep up the good work!
 
T

twitch_tweak

Guest
hey guys thanks for the support. truth be told the walls are painted, but like I said my cam takes bad pics indoors so they look pretty plain from the flash. They do need to be painted a little more, but at the moment they have a base coat of a light gray, lightly misted with a tan. I'll have to try your black pastel idea rj. thanks
 
R

rjwood_uk

Guest
no problemo. maybe add some pastel colours to the walls as well, being out in the country with tanks and what not driving past they are going to be pretty mucky!
 
T

twitch_tweak

Guest
Well I got some pics outside, but let me remind you its snowing so they came out pretty bright. I broke up a charcoal brick into small pieces and dust and scattered it around the roads, and also used it to darken up the mortar hole. I also cut a small blast template out of a paper plate and placed it over the hole and sprayed it with a flat black paint. tell me what you think.

20.jpg


http://i94.photobucket.com/albums/l106/twitchtweak/20.jpg

19.jpg


http://i94.photobucket.com/albums/l106/twitchtweak/19.jpg

18.jpg


http://i94.photobucket.com/albums/l106/twitchtweak/18.jpg

17.jpg


http://i94.photobucket.com/albums/l106/twitchtweak/17.jpg

16.jpg


http://i94.photobucket.com/albums/l106/twitchtweak/16.jpg

15.jpg


http://i94.photobucket.com/albums/l106/twitchtweak/15.jpg

14.jpg


http://i94.photobucket.com/albums/l106/twitchtweak/14.jpg
 
R

rjwood_uk

Guest
wow, now that is comming to life!!

isnt it amazing how a little bit of colour can really bring things out!

nice!
 
B

Bunkerbarge

Guest
That is looking a lot better already and is coming to life very nicely.

My only suggestion now would be to darken the walls. If you have a look at outside stone walls you will see how dark and muliticoloured they actually are. Just to simply paint them with a mix of browns, dark greys and greens, for the mosses, then a wash to flow into the joints to enhance the shadows would look very effective.

Have a look at some pictures of real outside stone walls for guidance and inspiration. Here's a couple of mine:

View attachment 15929

View attachment 15930

23-04-00-15EmbsayWalk3.jpg

23-04-00-16EmbsayWalk4.jpg
 
Top