You are using an out of date browser. It may not display this or other websites correctly.
You should upgrade or use an alternative browser.
You should upgrade or use an alternative browser.
Revell 1/24 Ferrari F 310B 1997 Formula 1
- Thread starter Dave Ward
- Start date
peterairfix
SMF Supporter
I have the same type of revell f1 kit (and it's a ferrari).Next problem will be adding decals to those 'rubber' tyres
I have been having a go at the tyre decals I have tried a few different ways but it looks like they just go on the tyre in the normal way (mine did) I will find out in the morning when they are dry.
One thing I do know, is to put the decals on after fitting the hubs into the tyres! Just slightly distorting a tyre to fit over the hub can cause the decal to crack....................... ( bitter experience with some white wall tyres! )
Dave
peterairfix
SMF Supporter
After a bit of wriggling, top & bottom joined - although, I lost one of the radiators - which I find is almost impossible to spot, without a borescope!

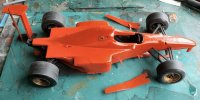
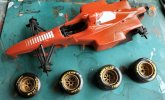
I've roughly sanded the tyres, after fitting the painted hubs, a little more needed to remove the joint line & dry fitted to see if they touch the ground ( they do! ). The front & rear wings can be assembled & decalled off the model. There are quite a few decals, so I'll do them in several sittings, largest first, maybe leaving them overnight before going onto the small ones. The front wheel hubs steer, but I'm going to fix them in a straight line - they've fallen off so many times & the track rod has taken a positive dislike to being confined!
Dave
And so the decals start......................

I did a thin coat of gloss varnish on the rims of the tyres last night & added the decals this morning - I used decal solution - to avoid any silvering - looks OK so far. I did the insides of the tyres first, so any process errors won't show too much! - I may give a satin varnish over the tyre walls, haven't decided yet.
The Revell decals are rather thick, and need persuasion with cotton buds & decal solution to sit down, I can see this being a slow process!
Dave
Jim R
SMF Supporter
therapy
SMF Supporter
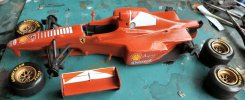
More decals added - Quite happy with the wheel decals, although I don't think that they will resist much handling................

The decal on the rear wing is a real pig - the top section folds around onto the underside of the wing. The decal is quite thick, and takes a lot of decal solution to force it to stick to both sides.
Not much more to go, so the next pictures will be in the completed section.
Dave

The decal on the rear wing is a real pig - the top section folds around onto the underside of the wing. The decal is quite thick, and takes a lot of decal solution to force it to stick to both sides.
Not much more to go, so the next pictures will be in the completed section.
Dave
