Rick’s 1/48 Airfix Sea King HAS5

Jakko

Way past the mad part
SMF Supporter
Joined
Apr 28, 2018
Messages
10,809
Points
113
First Name
Jakko
What is the exhaust decal trying to accomplish? Is it really for a different colour scheme, to create a grey patch there? In any case, I think I would see about removing it, then masking and spraying it if it does need to be a different colour from the grey of the rest of the aircraft.
 

rickoshea52

SMF Supporter
Joined
Dec 20, 2011
Messages
3,973
Points
113
Location
North West
First Name
Rick
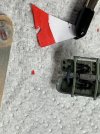
Doing some of the smaller details. The High intensity strobe light needs a bit of sanding down of the sprue gate, I stuck it to a blob of Blu Tak while I did this to keep it in position and from pinging across the room.
IMG_2246.jpeg

The tail fold joint is well detailed but one thing missing is the unlock warning flag. This is a spring loaded device and pops out when the aft pylon locking pins are withdrawn via a built in ratchet handle on the tail. I’m going to have a go at replicating this with painted paper cut to shape - it will be added when the folded tail assembly is fitted.
IMG_2247.jpeg
 

rickoshea52

SMF Supporter
Joined
Dec 20, 2011
Messages
3,973
Points
113
Location
North West
First Name
Rick
Just about done. A touch of silver for the pilots mirrors, some thread for the HF aerial and personnel door restraint. I’m contemplating adding a hold open strut for the upper personnel door and a grab handle on the cabin door frame,
IMG_2253.jpegIMG_2254.jpegIMG_2255.jpegIMG_2259.jpegIMG_2258.jpeg
 

rickoshea52

SMF Supporter
Joined
Dec 20, 2011
Messages
3,973
Points
113
Location
North West
First Name
Rick
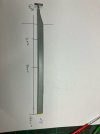
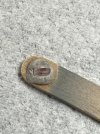
Going back a step to the main rotors, these have a couple of decals on each side. I pinched the marking out sketch from the Airfix Model World magazine build article. These lines are used to align the blade lifting sling at the centre of balance of the blades during removal and installation.
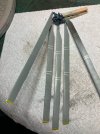
Once sealed with varnish I applied a Mig Ammo neutral wash and wiped off in the direction of airflow then glued them to the rotor head.
One of the blades (number3) has some additional soot weathering applied. This is unique to this blade. With the blades folded, the number one engine (LH) is started first in accessory drive so the exhaust from this engine deposits soot on the blade. In accessory drive the blades are spread before the number two engine is started, hence no soot on the number four blade from the other exhaust. Royal Air Force Sea Kings were unlikely to see this type of weathering as they rarely, if ever, were stowed with their blade folded.
25C17891-EEC2-455A-9764-0D46B47C9FAC.jpegD4F845E6-7ED6-412E-A9C6-E05A94B01A9A.jpeg
 

rickoshea52

SMF Supporter
Joined
Dec 20, 2011
Messages
3,973
Points
113
Location
North West
First Name
Rick
I forgot to say, this will be on the IPMS Wirral club table at Telford this weekend. Come see it for yourself and say hello. I’m there on Saturday only.
 

Waspie

SMF Supporter
Joined
Mar 13, 2023
Messages
2,479
Points
113
Location
Portland - Dorset
First Name
Doug
Nice one Rick, excellent build. (Bet your glad they didn't supply a Forth Road Bridge for the blades!!!) Used to hear a few disgruntled maintainers when the boss man said to fit it!!
On the rare, if any, occasion the RAF did fold their blades, did you use blade walkers to ensure the rotor didn't scuff the deck?
 

rickoshea52

SMF Supporter
Joined
Dec 20, 2011
Messages
3,973
Points
113
Location
North West
First Name
Rick
@Waspie
I only ever did two blade fold tasks and one of those was without the blades fitted for a functional check after a MRGB and head change. Walkers were in place for the other fold, our “deck” was tarmac and uneven.
Thanks for your kind comments and advice throughout the build.
 
Top