Most of it is pretty much general knowledge Andy, it’s just the way I throw them together that might entertain……Just seen this Tim!!
I'm obviously in... Looking forward to learning lots
You are using an out of date browser. It may not display this or other websites correctly.
You should upgrade or use an alternative browser.
You should upgrade or use an alternative browser.
Small scale figure Step by step (SBS). A 1/48 freebie Paul Hicks sculpt is the victim.
- Thread starter Tim Marlow
- Start date
Never thought of looking there…..I just went by memory……cheers PeteFrom Wikipedia:
The white metals are a series of often decorative bright metal alloys used as a base for plated silverware, ornaments or novelties, as well as any of several lead-based or tin-based alloys used for things like bearings, jewellery, miniature figures, fusible plugs, some medals and metal type.[1] The term is also used in the antiques trade for an item suspected of being silver, but not hallmarked.
A white metal alloy may include antimony, tin, lead, cadmium, bismuth, and zinc (some of which are quite toxic). Not all of these metals are found in all white metal alloys. Metals are mixed to achieve a desired goal or need. As an example, a base metal for jewellery needs to be castable, polishable, have good flow characteristics, have the ability to cast fine detail without an excessive amount of porosity and cast at between 230 and 300 °C (446 and 572 °F)

Cheers Bob.Not my bag Tim, but good of you to post for others to learn
My main goal here is to show there’s nothing to be scared of when painting small scale figures. Figures seem to daunt a lot of people, but it’s really just application of a few principles, developing some brush control, and thinking ahead. You wont get the smarts to produce the superb one off art figures you see on here, but should gain the confidence to tackle figures for things like 1/35 dioramas and be happy with the results.
PaulinKendal
SMF Supporter
Just found this - I'm in, it's definitely my bag!
One thing not mentioned yet is how malleable white metal is. On my freebooters I was constantly bending their swords (accidentally), then bending them back into position (on purpose).
In the end stuff will fracture and drop off, but I was amazed at how forgiving the white metal was - both swords stayed whole and even the paint stayed stuck to them, despite all the manipulation.
Yep, missed that. Best way is bending slowly though, minimises the chance of fracture. Some white metals are harder and more brittle than others though, so be aware. Don’t think warming it up is the way to go either, get it too warm and you have a silver puddle…..Just found this - I'm in, it's definitely my bag!
One thing not mentioned yet is how malleable white metal is. On my freebooters I was constantly bending their swords (accidentally), then bending them back into position (on purpose).
In the end stuff will fracture and drop off, but I was amazed at how forgiving the white metal was - both swords stayed whole and even the paint stayed stuck to them, despite all the manipulation.
Didn’t mention filling or assembly either. This guy is one piece, so didn’t need any.
If you need to assemble white metal, then two part epoxy is best in my opinion, especially if the piece is to be handled. Parts can be heavy, so support will be needed as it dries. If the part is large then CA can be used to “pin“ the part in place on some of the join, while the epoxy dries on the rest. For filling, then normal fillers will suit, but big gaps might need milliput.
Last edited:
OK, priming…….
On this guy I’m using Zenitel priming.
After clean up, and a good wash to get off finger grease and filings etc, he got a coat of all over black primer…
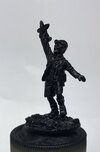
The primer I used was Vallejo 74602 polyurethane black primer. It goes on well once you add a little flow aid, but I haven’t got it to sand well so only use it for figures. Basically I’m a cheap skate. I have a big bottle and I’m going to use it one way or another
When this is dry I give him the first Zenitel coat. This is a mid grey, applied from above at about a 45 degree angle.
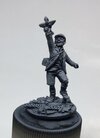
As you can see, this is starting to bring out the detail. However, looking from underneath…..
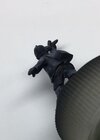
….he’s still black…..
To do this I just used a mid grey Vallejo air colour paint, again with a little added flow aid so it sprays without tip drying. I then flush the brush with water, then load it with Vallejo air colour white for the last stage.
The white is applied from directly above the figure, and gives us this….
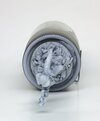
Which looks like this from the side (sorry about the blur…..)
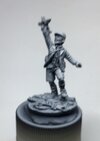
Look from below though, and he’s still black…..
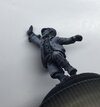
Let him dry overnight, and he’s ready for paint.
I don’t really do this so I can use the shading, I just do it so I can see the detail. I used to give the figures a black wash to do this, but when you are preparing around ten at a time, as I do, the airbrush is much quicker.
Next bit will be a quick talk about brushes and painting tools, such as they are, then we will be throwing paint around, so stick with it…..
On this guy I’m using Zenitel priming.
After clean up, and a good wash to get off finger grease and filings etc, he got a coat of all over black primer…

The primer I used was Vallejo 74602 polyurethane black primer. It goes on well once you add a little flow aid, but I haven’t got it to sand well so only use it for figures. Basically I’m a cheap skate. I have a big bottle and I’m going to use it one way or another
When this is dry I give him the first Zenitel coat. This is a mid grey, applied from above at about a 45 degree angle.

As you can see, this is starting to bring out the detail. However, looking from underneath…..

….he’s still black…..
To do this I just used a mid grey Vallejo air colour paint, again with a little added flow aid so it sprays without tip drying. I then flush the brush with water, then load it with Vallejo air colour white for the last stage.
The white is applied from directly above the figure, and gives us this….

Which looks like this from the side (sorry about the blur…..)

Look from below though, and he’s still black…..

Let him dry overnight, and he’s ready for paint.
I don’t really do this so I can use the shading, I just do it so I can see the detail. I used to give the figures a black wash to do this, but when you are preparing around ten at a time, as I do, the airbrush is much quicker.
Next bit will be a quick talk about brushes and painting tools, such as they are, then we will be throwing paint around, so stick with it…..
Just realised, he’s still in the same state, so here’s a better shot than the blurry one…..
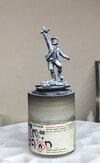
The old Tamiya pot has blue tack on it and is used to hold him while painting. Holding the figure itself is a bad idea. It can put grease on the surface, which water based acrylic paint doesn’t like, and it can also rub off the paint.

The old Tamiya pot has blue tack on it and is used to hold him while painting. Holding the figure itself is a bad idea. It can put grease on the surface, which water based acrylic paint doesn’t like, and it can also rub off the paint.
- Joined
- Sep 4, 2019
- Messages
- 9,517
- Points
- 113
- First Name
- Andrew
And you have done that in spades for me, so thanks again!!!!Cheers Bob.
My main goal here is to show there’s nothing to be scared of when painting small scale figures. Figures seem to daunt a lot of people, but it’s really just application of a few principles, developing some brush control, and thinking ahead. You wont get the smarts to produce the superb one off art figures you see on here, but should gain the confidence to tackle figures for things like 1/35 dioramas and be happy with the results.
No probs John. It’s all from time served rather than innate ability, so anyone should be able to do it……at any time if I haven’t been clear, or missed something out, just shout and I’ll try again.Very good SBS, Tim. One can never have too much information. Especially when it is from someone as skilled as yourself.
John.
OK, on with the paint……
I have a philosophy when painting. It goes like this….
Paint inside to outside.
Basically this means I paint the figure as if it was getting dressed. Skin first, then underclothes, then top layers, then equipment……I do this because I find it easier to get clean edges between the clothing items and so get better definition into the figure.
Additionally, if I am painting in layers I will paint from dark to light, so the bottom layers get paint before the top layers. Again, I find this gives a cleaner, better defined, result.
Sometimes I break these rules, depending upon the sculpture of the figure itself, but most of the time I use it. Nothing is set in stone, but I find having a forward plan certainly helps me.
In this case, then, we will start with the skin. It’s the lowest layer we can see, and unless you are painting some sort of transparent alien, always will be. If you are looking to paint Mr Clear, by the way, you are on your own
Right, time to stop rambling…..
These are the paints I used….
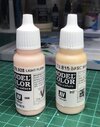
I gave him two coats of basic skin tone to get a fairly solid colour to work with…..
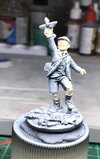
Not the best picture I’m afraid, but you should get the idea. Don’t worry too much about overpainting, that will be sorted out as we go along. I also find most of the Vallejo flesh colours a bit yellow, but the following stages sort that out.
After this dried, I gave him some highlights using light flesh. This is pinker so gives him some warmer tones. Places to work on are the top of the knees and calfs, top of the fingers, upper parts of the hand, nose, cheekbones, ear tips, point of chin, forehead, top lip…..in fact, anything that looked white after priming…..
You then get this…..
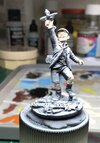
…another crap picture LOL. Hopefully you can see where the yellow has been attenuated. Trust me, he’s quite small and hard to photograph, but its there.
Last stage is bring on the secret sauce……I know you’ve been waiting for it, so here it is…..
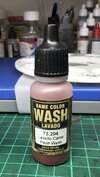
If you struggle with figures, and want to spice up the definition and contrast in your faces, then give it a whirl. It really is like alchemy!
you just blob it on and let it dry…..
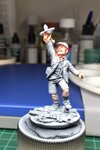
You can see here (just about, blurry again) I’ve used a good blob on each skin area. I find this does several things. It defines the shadows. It ties the highlights together, smoothing the transitions, and it warms up the yellow tinged Vallejo flesh colours, curing the figure of jaundice.
After it dries, you get this……
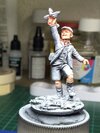
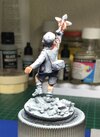
As you can see, the shadows are quite gradual. This is shown best on the knees because the highlights on the head have been blown out by my crude photography.
That is the basic skin painting sorted out. For the next session I will start on the face detailing, including eyes if you are lucky…..
Caveat alert…..this works on small stuff, but anything above 1/35 will need proper painting because this will look too crude in larger scales.
Remember, this is all just my way of doing the job…..take what you want, modify it or discard it as needed…..there are no fixed rules…
Cheers all
Tim
I have a philosophy when painting. It goes like this….
Paint inside to outside.
Basically this means I paint the figure as if it was getting dressed. Skin first, then underclothes, then top layers, then equipment……I do this because I find it easier to get clean edges between the clothing items and so get better definition into the figure.
Additionally, if I am painting in layers I will paint from dark to light, so the bottom layers get paint before the top layers. Again, I find this gives a cleaner, better defined, result.
Sometimes I break these rules, depending upon the sculpture of the figure itself, but most of the time I use it. Nothing is set in stone, but I find having a forward plan certainly helps me.
In this case, then, we will start with the skin. It’s the lowest layer we can see, and unless you are painting some sort of transparent alien, always will be. If you are looking to paint Mr Clear, by the way, you are on your own

Right, time to stop rambling…..
These are the paints I used….

I gave him two coats of basic skin tone to get a fairly solid colour to work with…..

Not the best picture I’m afraid, but you should get the idea. Don’t worry too much about overpainting, that will be sorted out as we go along. I also find most of the Vallejo flesh colours a bit yellow, but the following stages sort that out.
After this dried, I gave him some highlights using light flesh. This is pinker so gives him some warmer tones. Places to work on are the top of the knees and calfs, top of the fingers, upper parts of the hand, nose, cheekbones, ear tips, point of chin, forehead, top lip…..in fact, anything that looked white after priming…..
You then get this…..

…another crap picture LOL. Hopefully you can see where the yellow has been attenuated. Trust me, he’s quite small and hard to photograph, but its there.
Last stage is bring on the secret sauce……I know you’ve been waiting for it, so here it is…..

If you struggle with figures, and want to spice up the definition and contrast in your faces, then give it a whirl. It really is like alchemy!
you just blob it on and let it dry…..

You can see here (just about, blurry again) I’ve used a good blob on each skin area. I find this does several things. It defines the shadows. It ties the highlights together, smoothing the transitions, and it warms up the yellow tinged Vallejo flesh colours, curing the figure of jaundice.
After it dries, you get this……


As you can see, the shadows are quite gradual. This is shown best on the knees because the highlights on the head have been blown out by my crude photography.
That is the basic skin painting sorted out. For the next session I will start on the face detailing, including eyes if you are lucky…..
Caveat alert…..this works on small stuff, but anything above 1/35 will need proper painting because this will look too crude in larger scales.
Remember, this is all just my way of doing the job…..take what you want, modify it or discard it as needed…..there are no fixed rules…
Cheers all
Tim
Probably time for a bit about painting equipment as well…….this is the kit I currently use.
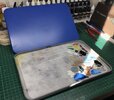
Wet palette…….this is the larger one from Redgrass games. The black colouration comes from the time of RA flares and group builds…..I didn’t use it for a while and being damp and closed, the sponge and paper developed a bad case of pin mould! The paper was discarded, and the sponge and container have been dilute beach washed and rinsed. They no no longer have the problem, but the staining remains….
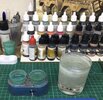
Water pots. The small ones are used to rinse brushes and dilute paint, the large one is mostly for the cat to drink out of when she gets thirsty….I regularly change the small ones when painting, and leave the large one with fresh water at the end of every session…..
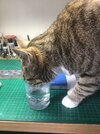
Here’s the large one in use…..
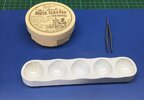
Other tools…..dry palette for washes etc. Tweezers to remove stray hairs from the paint job, which always seems to happen….and brush cleaner. This is the most important thing you can buy in my opinion. Many years of trying other things, such as washing up liquid and bar soap have convinced my of this. I get much more life out of my brushes after moving to this stuff.
Next interminable episode will be about brushes…..
Cheers all
Tim

Wet palette…….this is the larger one from Redgrass games. The black colouration comes from the time of RA flares and group builds…..I didn’t use it for a while and being damp and closed, the sponge and paper developed a bad case of pin mould! The paper was discarded, and the sponge and container have been dilute beach washed and rinsed. They no no longer have the problem, but the staining remains….

Water pots. The small ones are used to rinse brushes and dilute paint, the large one is mostly for the cat to drink out of when she gets thirsty….I regularly change the small ones when painting, and leave the large one with fresh water at the end of every session…..

Here’s the large one in use…..

Other tools…..dry palette for washes etc. Tweezers to remove stray hairs from the paint job, which always seems to happen….and brush cleaner. This is the most important thing you can buy in my opinion. Many years of trying other things, such as washing up liquid and bar soap have convinced my of this. I get much more life out of my brushes after moving to this stuff.
Next interminable episode will be about brushes…..
Cheers all
Tim
Andy the Sheep
SMF Supporter
I almost missed this, Tim. Very interesting. I'll follow from the gallery.
Love the cat!
Andrea
Love the cat!
Andrea
Yo Tim, I have found that a few drops of Hydrogen Peroxide in the wet pallet keeps the mold away.......mine will sometimes sit for a couple of months with no ill effects or discoloring.....don't remember where I picked this tip up from, works the Bomb! 

Cheers Andy. She’s a good lass, except on the frequent occasions she brings in livestockI almost missed this, Tim. Very interesting. I'll follow from the gallery.
Love the cat!
Andrea

Might be worth a try Rick. The sponges are supposed to be mould resistant……..proved that wrong didn’t I LOL….Yo Tim, I have found that a few drops of Hydrogen Peroxide in the wet pallet keeps the mold away.......mine will sometimes sit for a couple of months with no ill effects or discoloring.....don't remember where I picked this tip up from, works the Bomb!
No probs Tony. No need to be a non figure painter, it’s really are not that hard to get acceptable results, as I’m hoping to show.Excellent SBS tim , very useful tips for us non figure painters , cheers tony
OK, face details…..
These are not strictly necessary, but I think they add life, and once you are used to it, they don’t take very long…..
Mouth details -
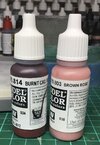
The burn‘t cadmium red is used to paint the interior of the mouth. Even if the mouth isn’t open I put a small line down between the lips. It helps define the face. Remember to thin the paint well, only pick up a little, and test flow on your left thumbnail, or vice versa if you are a southpaw. If the paint doesn’t flow well off the brush on to the nail it won’t flow onto the model either. The thumb test will also unload the brush so you don’t flood paint off the bristles. The observant amongst you will notice that this breaks the inside out rule LOL…..if you do this first, the flesh wash will obliterate it…..
I then paint the bottom lip with brown rose. I don’t paint the top lip unless it is clearly sculpted, because it isn’t usually visible.
if you overpaint other areas while doing either of these, just tidy them up with the relevant colour, which should still be active on the wet palette.
I use a fine 2/O brush for this, and for other face details, and usually rinse between strokes because that size of brush is very prone to tip drying.
OK, most peoples’ bete noir next…..eyes…..
The eye socket should be clearly defined by the flesh wash……what you need is an oval shape inside that.
Here are the colours….
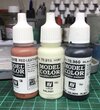
I use the ivory to paint the eyeballs. I find it flows better than pure white, and covers better as well. Again, 2/O brush, and well thinned paint, that you have tested flows properly……I also use that for teeth if they are sculpted (not in this case).
Once you have both eyeballs coloured in, you will probably need to tidy them up. That’s where the red leather comes in. It‘s a decent match for the flesh was so use it to cut the eyeballs back to shape and size if you need to.
Now the ticklish bit…..pupils. For this is use the black, again well thinned and checked for flow.
The cheat I use is this…..paint a thin line along the top of the eyeball to define it, then paint a fine vertical line down through the position of the pupils. This should leave you the whites either side. Any overpaint can be clipped back using either ivory or red leather. In effect you are painting a T shape centralised in the white of the eye.
Once you have done that he looks like this…..very enlarged and nowhere near as rough in real life……
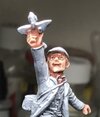
Be aware he’s about five mm across the head…..but if I can do this, so can you…..take it slowly, keep the brush clean, thin your paint, and check for flow before putting the brush in the figure…..all mistakes can be corrected in seconds by overpaint and starting again. Keep the paint thin and you shouldn’t get a build up.
Last point, you can tell the sculptor isn’t a painter…..that right arm made the right eye a real beast to paint…..it gets in the way of the brush
As always, any questions just ask…..there are a lot of words here, and I’ll try to demonstrate in a different way if you like…..
These are not strictly necessary, but I think they add life, and once you are used to it, they don’t take very long…..
Mouth details -

The burn‘t cadmium red is used to paint the interior of the mouth. Even if the mouth isn’t open I put a small line down between the lips. It helps define the face. Remember to thin the paint well, only pick up a little, and test flow on your left thumbnail, or vice versa if you are a southpaw. If the paint doesn’t flow well off the brush on to the nail it won’t flow onto the model either. The thumb test will also unload the brush so you don’t flood paint off the bristles. The observant amongst you will notice that this breaks the inside out rule LOL…..if you do this first, the flesh wash will obliterate it…..
I then paint the bottom lip with brown rose. I don’t paint the top lip unless it is clearly sculpted, because it isn’t usually visible.
if you overpaint other areas while doing either of these, just tidy them up with the relevant colour, which should still be active on the wet palette.
I use a fine 2/O brush for this, and for other face details, and usually rinse between strokes because that size of brush is very prone to tip drying.
OK, most peoples’ bete noir next…..eyes…..
The eye socket should be clearly defined by the flesh wash……what you need is an oval shape inside that.
Here are the colours….

I use the ivory to paint the eyeballs. I find it flows better than pure white, and covers better as well. Again, 2/O brush, and well thinned paint, that you have tested flows properly……I also use that for teeth if they are sculpted (not in this case).
Once you have both eyeballs coloured in, you will probably need to tidy them up. That’s where the red leather comes in. It‘s a decent match for the flesh was so use it to cut the eyeballs back to shape and size if you need to.
Now the ticklish bit…..pupils. For this is use the black, again well thinned and checked for flow.
The cheat I use is this…..paint a thin line along the top of the eyeball to define it, then paint a fine vertical line down through the position of the pupils. This should leave you the whites either side. Any overpaint can be clipped back using either ivory or red leather. In effect you are painting a T shape centralised in the white of the eye.
Once you have done that he looks like this…..very enlarged and nowhere near as rough in real life……

Be aware he’s about five mm across the head…..but if I can do this, so can you…..take it slowly, keep the brush clean, thin your paint, and check for flow before putting the brush in the figure…..all mistakes can be corrected in seconds by overpaint and starting again. Keep the paint thin and you shouldn’t get a build up.
Last point, you can tell the sculptor isn’t a painter…..that right arm made the right eye a real beast to paint…..it gets in the way of the brush

As always, any questions just ask…..there are a lot of words here, and I’ll try to demonstrate in a different way if you like…..
Just realised, that one should have been about brushes…….sorry….
I have lots of brushes….almost as many as I have paint. look after them well and they last a long time…..
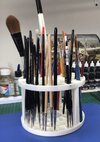
These are just the ones in use at the moment. I have a “reserve” stock on the shelf……..
Store them point downwards if you can, using the protective sleeves they come in. Any residual paint will then drain away from the ferrule and not damage the point. I think this has helped extend the life of my brushes, because even when they are quite worn I still find they point well.
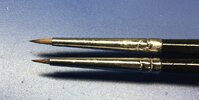
These are both the same make and size of brush. The top one is unused, and the bottom one is about four years old…..getting to the end of its life, but still holding a point.

Just in case you think I’m telling porkies
Here are my current tools of the trade…..
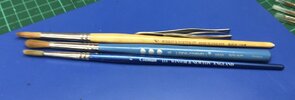
Cotman brush used for mixing paint and dry brushing….
the other two are used exclusively for varnishing….there are others on the rack, flats and cheap synthetics, but these are my go-tos most of the time.
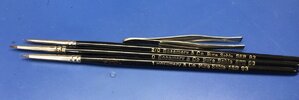
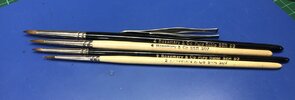
Workhorses…..Rosemary and Co series 93 sables and a couple of series 307 synthetics for rougher jobs. The number 2 set 93 doesn’t hold its point well when loaded, so doesn’t get used much. The number 4 is OK, but I probably wouldn’t repurchase series 93s above size 1 again.
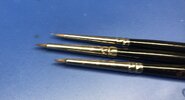
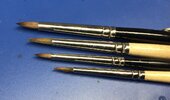
As you can see, they all have pretty good tips…….if a brush doesn’t hold a point it will just frustrate you, so relegate it to the second division, for washes, drybrushing etc……
Best use brushes…
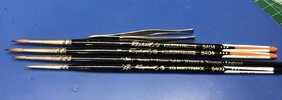
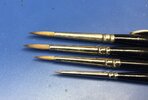
Raphael 8404 are the bees knees I think. Better than Series 7 W and N. As you can see they all have very sharp points. They are all at least a year old now, and are still in superb shape. The top three get regular use, but the finest is rarely used. They NEVER get used for dry brushing, stippling, or metallic paint. These things quickly age the brush, and kill the point. Very quickly! They are always moistened with clean water before being loaded. That stops the paint wicking up into the top of the brushes in the ferrule, which is the primary cause of splitting the point..
Just out of interest….all brushes are not equal when it comes to size…..
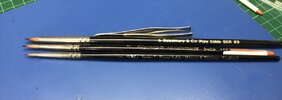
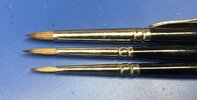
The top one is a number 4 R and C series 93 sable, the second is a Raphael 8404 number 1, and the bottom is a W and N series 7 number 1. As you can see they are all different……
Ive never seen the need for anything less than a 2/O sized brush, and to be honest, very rarely use anything below a size O brush. The most important thing I find is the sharpness of the brush tip, not the number of bristles. I could (and have done) paint an entire figure with the number 1 Raphael, eyes, lacework, and all. I just used the smaller brush on this guy because I could see the right eye was going to be awkward and the thinner ferrule would be easier to get in.
No hard and fast rules, use what brushes you like, but a good sharp point is pretty much essential for accurate work. Personally, unless you are a figure nerd like me, series 93 Rosemary and Co’s will more than cover your figure and model detail work painting needs, especially if you learn how to take care of them
I have lots of brushes….almost as many as I have paint. look after them well and they last a long time…..

These are just the ones in use at the moment. I have a “reserve” stock on the shelf……..
Store them point downwards if you can, using the protective sleeves they come in. Any residual paint will then drain away from the ferrule and not damage the point. I think this has helped extend the life of my brushes, because even when they are quite worn I still find they point well.

These are both the same make and size of brush. The top one is unused, and the bottom one is about four years old…..getting to the end of its life, but still holding a point.

Just in case you think I’m telling porkies

Here are my current tools of the trade…..

Cotman brush used for mixing paint and dry brushing….
the other two are used exclusively for varnishing….there are others on the rack, flats and cheap synthetics, but these are my go-tos most of the time.


Workhorses…..Rosemary and Co series 93 sables and a couple of series 307 synthetics for rougher jobs. The number 2 set 93 doesn’t hold its point well when loaded, so doesn’t get used much. The number 4 is OK, but I probably wouldn’t repurchase series 93s above size 1 again.


As you can see, they all have pretty good tips…….if a brush doesn’t hold a point it will just frustrate you, so relegate it to the second division, for washes, drybrushing etc……
Best use brushes…


Raphael 8404 are the bees knees I think. Better than Series 7 W and N. As you can see they all have very sharp points. They are all at least a year old now, and are still in superb shape. The top three get regular use, but the finest is rarely used. They NEVER get used for dry brushing, stippling, or metallic paint. These things quickly age the brush, and kill the point. Very quickly! They are always moistened with clean water before being loaded. That stops the paint wicking up into the top of the brushes in the ferrule, which is the primary cause of splitting the point..
Just out of interest….all brushes are not equal when it comes to size…..


The top one is a number 4 R and C series 93 sable, the second is a Raphael 8404 number 1, and the bottom is a W and N series 7 number 1. As you can see they are all different……
Ive never seen the need for anything less than a 2/O sized brush, and to be honest, very rarely use anything below a size O brush. The most important thing I find is the sharpness of the brush tip, not the number of bristles. I could (and have done) paint an entire figure with the number 1 Raphael, eyes, lacework, and all. I just used the smaller brush on this guy because I could see the right eye was going to be awkward and the thinner ferrule would be easier to get in.
No hard and fast rules, use what brushes you like, but a good sharp point is pretty much essential for accurate work. Personally, unless you are a figure nerd like me, series 93 Rosemary and Co’s will more than cover your figure and model detail work painting needs, especially if you learn how to take care of them

