Une Ferme Abandonnee.....and some squatters! Normandy, July 1944

spanner570

SALAD DODGER
SMF Supporter
Joined
May 26, 2009
Messages
13,031
Points
113
First Name
Ron
Onwards we go into the unknown.....

Just a note on the foam board. It's 5mm x A4 size. It's the sort that has a paper surface that needs to be removed to access the foam core. They cost around £1 a sheet.
I prefer this sort because the foam surface is smooth. Thus, you don't need to add cement render to any walls etc. It's already there! I find with other, more expensive board the surface is too coarse and 'holey'

The glue I'll use is either UHU POR or UHU None solvent. Either work fine on foam. The only difference being POR will stick after but a few seconds, whereas the none solvent needs to be pinned into position for a short time. Also, the POR is a lot more expensive!;)

As usual in our game it's all about preferences. :thumb2:

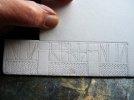
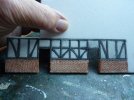
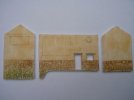
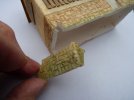
Here is the stable block wall.
P1370812.JPG


P1370813.JPG

Cheers.
Ron
 

JR

Member of the Rabble and Pyromania Consultant
SMF Supporter
Joined
May 26, 2015
Messages
17,334
Points
113
Location
lincs
First Name
John
570:seat please at the front , I've been checked for all combustible materials on the way here.
What ever foam board you prefer, I agree with your saying it's all about preferences.

453
 

spanner570

SALAD DODGER
SMF Supporter
Joined
May 26, 2009
Messages
13,031
Points
113
First Name
Ron
Thanks Chris and 453. :thumb2:

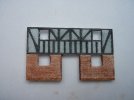
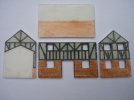
The still to be worked on, house front elevation.
P1370815.JPG


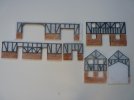
The bits so far....
P1370818.JPG


...all laid out around the to be built courtyard base.
P1370817.JPG


One can't have a stream without a waterwheel, without a mill building, can one?!;)
Here is the start of a design I'm concocting.
P1370819.JPG


Cheers all.
Ron
 

spanner570

SALAD DODGER
SMF Supporter
Joined
May 26, 2009
Messages
13,031
Points
113
First Name
Ron
Thanks chaps.

453. The good thing about 1/72 is I can get away with murder where detail is concerned. Whereas you doing 1/35 have to include a darn sight more! So a 'Tip of the Hat' to you good buddy. :thumb2:

Ian. It ain't easy, but because I don't get bogged down with all the must have 'techniques and various washes and god knows what', it's reasonable straight forward. If that makes sense.

Thanks Garry.

Jim. I forgot how I made the wheel, but luckily I still have pictures of the diorama I originally built it for.....Including the build of thing.

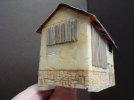
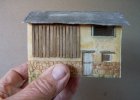
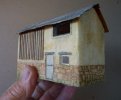
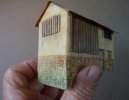
Apart from a bit of titivating, the mill building is finished. I will be adding 'things' later.


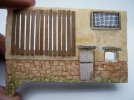
The front elevation. The vent slats are cut down coffee stirrers. I don't like balsa for this. The grain is too 'lumpy' Whereas the stirrer grain is nice and tight.

Painted with children's water colours. I ain't wasting my 'Good' paints on this kind of work - No need.

P1370841.JPG


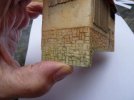
This end bit is needed as a drop down to the stream, but it proved to be a pain in the a**e as I couldn't put the thing flat on the base, so.....
P1370842.JPG

Off it came! I cut it off along a stone joint line
P1370844.JPG

P1370845.JPG


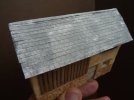
The finished mill with the bit stuck back on and paper slates stuck on to a card under bit. The ups and downs and uneven slate rows are done on purpose. The back of the mill is completely plain as it won't be seen.
P1370872.JPG

P1370873.JPG

P1370874.JPG


I still have the ridge tiles to make and fix. One or two slates need bending back up too!
P1370847.JPG

Cheers.
Ron
 
Last edited:

spanner570

SALAD DODGER
SMF Supporter
Joined
May 26, 2009
Messages
13,031
Points
113
First Name
Ron
Thanks for the encouraging posts chaps. :thumb2:

Windows to go in then the house is ready for gluing together.
P1370820.JPG

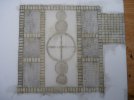
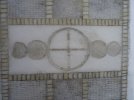
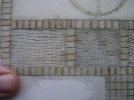
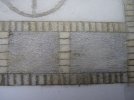
I've decided an ornamental courtyard would be fun to have a go at.

Totally overboard and wacky, with no attempt at neatness. I just had me some fun. It'll probably all be covered with muck anyway.....

The buildings will follow the paviors around the edge. The whole thing is less than A4.
P1370823.JPG

P1370825.JPG

P1370828.JPG

P1370824.JPG


Cheers.
Ron
 

spanner570

SALAD DODGER
SMF Supporter
Joined
May 26, 2009
Messages
13,031
Points
113
First Name
Ron
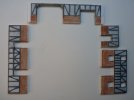
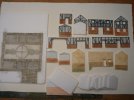
All safely gathered in and ready to be stuck together.

Bit out of sync. as the mill is stuck together....Sorry. :upside:

I've made 8 internal cross walls to support any roof bits. I'll slot these in where required, once I start on any exposed roof members.....
P1370830.JPG

Cheers.
Ron
 
Last edited:
Top