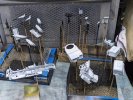
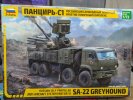
Zvezda 1/72 SA-22 Greyhound

Andy T

SMF Supporter
Joined
Apr 26, 2021
Messages
1,977
Points
113
Location
Sheffield
First Name
Andy
I remember Dave Ward starting the 1/35 version of this before my sabbatical. This is it's baby brother. It sports a lower parts count and subsequently not as much detail, but should be a bit less unwieldy. Still, 264 parts in a 1/72 truck ought to keep my busy for a while!

Nice box art on the front but what I really like about Zvezdas presentation are the pictures of an assembled model on the back. In previous Zvezda builds I've referred to these often:
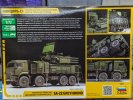
1000004997.jpg

1000004998.jpg

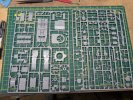
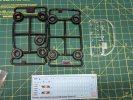
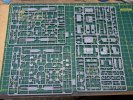
There are 5 main sprues (one duplicated), a small clear sprue, rubber tyres and a few decals
1000005002.jpg

1000005004.jpg

1000004999.jpg

Instructions are the usual B&W booklet type that can be hard to follow for a first timer, but easy once you get going. Another great inclusion is the full colour painting guide. I'd be more than happy to pay a few extra groats if all manufacturers did this.

Three schemes are included:
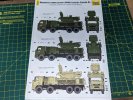
1000005000.jpg

But this is the one that really caught my eye:
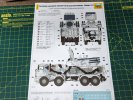
1000005001.jpg

I haven't done an arctic camo before so I think it's a no brainier. The colour call outs recommend quite a blue grey, but the few pictures I've seen are much more neutral, so will concoct something.

I've made a bit of a start. The destructions start off more like an aircraft - building the interior first, unlike many truck kits which are chassis first, but pictures will follow once it's looking recognisable.

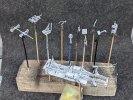
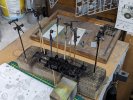
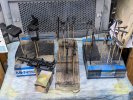
There's one thing I am trying to see if it helps. Rather than having my plastic scattered around like normal I'm making use of this dead corner at the end of my bench:
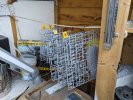
1000005005.jpg
 

Si Benson

SMF Supporter
Joined
Apr 27, 2018
Messages
3,324
Points
113
First Name
Si
Interesting vehicle, wouldn’t mind building one myself. The braille Zvezda kits tend to be pretty good so will watch your build to see how it goes.
Artic camo scheme does look good to me too:cool:
 

Jim R

SMF Supporter
Joined
Apr 27, 2018
Messages
13,751
Points
113
Location
Shropshire
First Name
Jim
There's a lot to this 1/72 truck. I like your choice of scheme. Should be interesting.
 

Andy T

SMF Supporter
Joined
Apr 26, 2021
Messages
1,977
Points
113
Location
Sheffield
First Name
Andy
Welcome along everyone, I'm looking forward to this myself.

The Arctic camo is very hard edged so will need masking. I'll have to consider that as I build, not adding too many lumpy bits to the exterior.

264 parts, and it doesn’t even have tracks … wow :smiling3:
But missing a few obvious parts like the windscreen wipers. Conspicuously absent from the built model, no mention in the instructions, and I can't see any on the sprue.

I did find an etch detail set for this by SG modelling that includes wipers, amongst other upgrades, which I would have liked but can only find retailers in Russia.
 

Jakko

Way past the mad part
SMF Supporter
Joined
Apr 28, 2018
Messages
10,837
Points
113
First Name
Jakko
But missing a few obvious parts like the windscreen wipers.
You could make them from something like thin strip or stretched sprue — or even just paint them onto the windscreen?
 

Andy T

SMF Supporter
Joined
Apr 26, 2021
Messages
1,977
Points
113
Location
Sheffield
First Name
Andy
My lad had his mates around today so I was banished to the shed for most of it, which means a fair bit of progress.

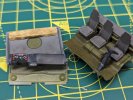
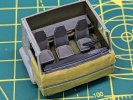
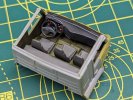
I finished off the interior painting and started assembly. It's totally out of the box apart from the dashboard decals. They were all individuals but had loads of carrier film so I blobbed some paint around instead:

1000005028.jpg

The cab is a six sided box with tiny joint areas so took a bit of jiggling. It all fitted together nicely though, with a bit of tape to keep the very visible joints tight while the glue dried:

1000005031.jpg


1000005030.jpg

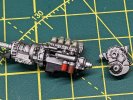
Next the engine & transfer case were assembled and sprayed with Mr Metal Color aluminium before a bit of detail painting & washes:

1000005032.jpg

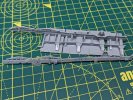
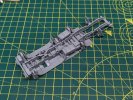
The chassis is made up of just three main parts, a moulded plate and two rails complete with the front springs, which makes getting it all square less of a trauma:

1000005033.jpg

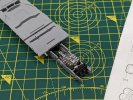
The engine & radiator were test fitted just to check we were all good. The instructions would have you fit these and the transfer case at this point but I didn't fancy that much masking, so have worked out a way to fit them a bit later:

1000005022.jpg

Same with the exhaust, I'll fit that after painting the chassis. I think it has impressive detail for this scale, even including the sleeve joint clamps!

1000005034.jpg

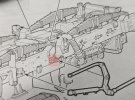
I'm really happy with this kit so far but here's one little detail they got wrong. The steering linkage that connects the two front axles should locate on a stub fixed to the chassis (where it would rotate on the real thing). Here's the illustration (my highlight):

1000005026.jpg

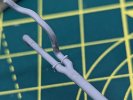
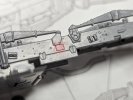
And the plastic:

1000005027.jpg

Since it's a very flimsy part with only two other fixing points I might have to fashion something rudimentary from tube or rod. It's well hidden so I should get away with it.
 
Last edited:

adt70hk

I know its a bit sad but I like quickbuild kits!!!
SMF Supporter
Joined
Sep 4, 2019
Messages
9,507
Points
113
First Name
Andrew
Made some progress! That's an understatement!!

Coming on nicely Andy!
 

Andy T

SMF Supporter
Joined
Apr 26, 2021
Messages
1,977
Points
113
Location
Sheffield
First Name
Andy
Cheers Andrew :smiling3:

I got some more done today. The axles are made up in front & rear pairs. Made up of 8 or 9 parts per pair, they still need the glue lines cleaning up in this picture:

1000005050.jpg

Here is the chassis as far as I'm taking it for now. As I mentioned, the engine should be in by now but I'd rather prime & paint it like this for ease:

1000005057.jpg

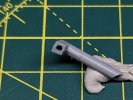
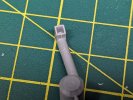
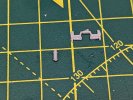
The air cleaner intake was moulded with a solid end so I drilled it first then opened it out with various tools:

1000005056.jpg

1000005054.jpg

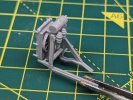
I'm not exactly sure what this part is but it was damn fiddly to put together! I'm assuming the exhaust & cooling system for an additional engine running the weapon side of things:

1000005058.jpg

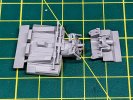
And here are all the various chassis parts. This kit should work nicely as 4 sub assemblies; chassis, cab, rear body & turret. Even though the instructions would have it as one lump I think breaking it down will make spraying the camo pattern easier:

1000005060.jpg

1000005061.jpg
 

adt70hk

I know its a bit sad but I like quickbuild kits!!!
SMF Supporter
Joined
Sep 4, 2019
Messages
9,507
Points
113
First Name
Andrew
Now that's coming on nicely Andy!
 

Jakko

Way past the mad part
SMF Supporter
Joined
Apr 28, 2018
Messages
10,837
Points
113
First Name
Jakko
Looking good, it seems to be going well.
 

Andy T

SMF Supporter
Joined
Apr 26, 2021
Messages
1,977
Points
113
Location
Sheffield
First Name
Andy
Thanks all.

Yes, loads of detail for the size, and so far everything has fitted together beautifully.

A couple of parts wouldn't sit right but once I'd cleaned them up properly (instead of being lazy) they just slipped into place.

It's hard to tell from the pictures but it can be posed as if in transport, but I'm going for the legs down, wheels up mode as though it's ready for action.
 

Andy T

SMF Supporter
Joined
Apr 26, 2021
Messages
1,977
Points
113
Location
Sheffield
First Name
Andy
Sorry, yet another update :smiling5:

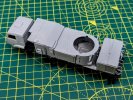
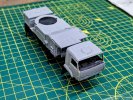
The major bodywork parts are done now but nothing is glued to the chassis just yet until I decide how I'm going to paint it:

1000005076.jpg

1000005077.jpg

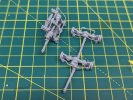
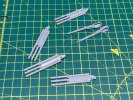
Making a single barrel for a tank can be problematic enough when it's made out of two halves, so here's 16!

1000005075.jpg

There were some very tiny parts to make up the main radar assembly:

1000005072.jpg

It seemed to go together well though. 14 parts in all and it's free to rotate or elevate, but I think I'll decide on a position and glue it in place for a bit more durability:

1000005079.jpg
 

Andy T

SMF Supporter
Joined
Apr 26, 2021
Messages
1,977
Points
113
Location
Sheffield
First Name
Andy
The build phase is complete, although I have a bazillion sub assemblies at the moment. I chose my usual black primer, which might seem an odd choice for a mainly white camo, but I had a plan.

1000005088.jpg

After priming I decided to completely change my mind :smiling5:

Originally I was going to reverse mask, so apply the black, mask those sections out and do the grey, then mask again and spray the white. Fairly straightforward but I figured I'd challenge myself a bit more and try to brush paint the camo instead.

Easy for many I know, but I've never been any good at getting a decent brush finish on larger areas so it's about time I got some practice in.

So on went a basecoat of white. I tried out some Tamiya lacquer on this (LP2) which sprayed and covered very well, but I didn't realise it was gloss. This will only hamper the brush painting even more for me so it might get a quick blast of satin or matt varnish to give the AK acrylics a chance of staying where I (try to) put them.

1000005087.jpg
 
Top