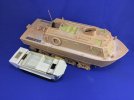
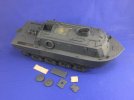
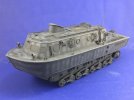
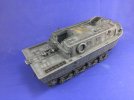
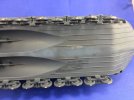
Land-Wasser-Schlepper No. 1071

RonGlass

SMF Supporter
Joined
Apr 30, 2018
Messages
620
Points
93
Location
United States
First Name
Ron
It’s a common mistake — it’s actually a life preserver :smiling3: That’s why I painted it yellow-orange, rather than as metal or canvas.

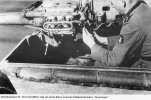
After comments made elsewhere by someone who knows a lot more about this than I do, I painted a skill badge on the left-hand crewman’s upper sleeve to represent his being a Steuermann (lit. “Steerman”, approximately “coxswain”), and I also promoted him to Unteroffizier (Sergeant) with some more white paint:

View attachment 451785

That done, I taped up the hatch openings in the roof and the rear door:

View attachment 451786

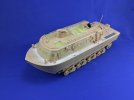
… and then glued the cabin to the hull:

View attachment 451787

This was a little tricky, but as I had dry-fitted it lots of times it wasn’t really a problem. Once it was fully in place, I ran liquid cement into the joint and let it set. The fit, once the two are pressed together, is good enough that it doesn’t need clamping.
Ahhhh ! I see it now once I zoomed in closer
 

Jakko

Way past the mad part
SMF Supporter
Joined
Apr 28, 2018
Messages
10,844
Points
113
First Name
Jakko
Beautiful job. I take it the sgt. goes down w/the ship as only one preserver?
He’s just the guy at the rudder, I guess the officer was expected to go down with the ship ;)

Ahhhh ! I see it now once I zoomed in closer
Here’s a good photo of the real badge, with thanks to the person who mentioned its existence to me:

Steuermann.jpg

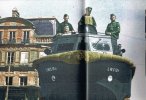
And he also passed on this (colorised) photo of my subject:

LWS 1071.jpg

This was taken at Le Havre, by the way.
 

adt70hk

I know its a bit sad but I like quickbuild kits!!!
SMF Supporter
Joined
Sep 4, 2019
Messages
9,507
Points
113
First Name
Andrew
Coming on very nicely Jakko. The figures to add a certain something!

ATB.

Andrew
 

minitnkr

Rabble & escape committee member
SMF Supporter
Joined
Apr 27, 2018
Messages
6,725
Points
113
Location
Dayton, OH
First Name
Paul
But here he is hogging the only preserver. This view of the bumper looks easier to model than the ropey one.
 

Jakko

Way past the mad part
SMF Supporter
Joined
Apr 28, 2018
Messages
10,844
Points
113
First Name
Jakko
The figures to add a certain something!
I want to also put one or two on deck, preferably dressed like in the photo of the real vehicle at the start of the thread. One in an overall is not a problem, but an officer in long coat is not something I have parts for in my figures stash (yet).

But here he is hogging the only preserver.
Well, he is the one most at risk of falling overboard, I suppose, up in that little observation point in front of the funnel.

This view of the bumper looks easier to model than the ropey one.
You can tell it’s knotted rope, but I’m now thinking a good representation can probably be made with something like rolled-up bandages, or maybe finer mesh than that.
 

Jakko

Way past the mad part
SMF Supporter
Joined
Apr 28, 2018
Messages
10,844
Points
113
First Name
Jakko
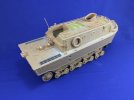
It’s now finished as far as I want to build it before spraying, I think:

CD429F59-0151-44A1-ACEA-5DE9F5A88AC0.jpegC70953DC-C01B-4A3A-B741-CDA42415725A.jpeg

As I suspected, it goes together very quickly once you’ve gotten past the interior :smiling3:

Here’s a quick comparison with another amphibian under construction:

64F3EA55-A455-4274-B81F-4A190CBD7D0D.jpeg
 

Mini Me

SMF Supporter
Joined
Jun 1, 2018
Messages
10,161
Points
113
First Name
Rick
That's just what I was thinking........very "tugboatish" indeed. Is the smaller amphib. a Weasel? From the looks of it appears to be mostly scratch built.
 

Jakko

Way past the mad part
SMF Supporter
Joined
Apr 28, 2018
Messages
10,844
Points
113
First Name
Jakko
It's very boat like ;)
Just like a tug boat on tracks ;)
That's just what I was thinking........very "tugboatish" indeed.
Motorboat on tracks is what’s come to my mind more than once. It really does seem to be like they put a boat designer and a tracked vehicle designer together and said, “Make us an amphibious vehicle.” I mean, it’s even got portholes rather than vehicle-style windows, as if they expected it to spend most of its time in the water.

Is the smaller amphib. a Weasel? From the looks of it appears to be mostly scratch built.
It is, but it’s a resin kit to be precise :smiling3:
 
Last edited:

adt70hk

I know its a bit sad but I like quickbuild kits!!!
SMF Supporter
Joined
Sep 4, 2019
Messages
9,507
Points
113
First Name
Andrew
Nicely done Jakko. As you say, take off the tracks and you have a boat. Keep up the good work.

ATB

Andrew
 

Jakko

Way past the mad part
SMF Supporter
Joined
Apr 28, 2018
Messages
10,844
Points
113
First Name
Jakko
With a coat of Mission Models Panzergrey RAL 7021 applied:

IMG_8756.jpg

The insides of the hatches were apparently the same ivory colour as the interior, so I sprayed them first with more of the Portland Stone before applying the grey to the outside; some touching up will be required, though. I forgot to paint the inside of the door, so that will need to be brushed as well.
 

Jakko

Way past the mad part
SMF Supporter
Joined
Apr 28, 2018
Messages
10,844
Points
113
First Name
Jakko
It is, which is why I asked a greater authority about this particular one :smiling3: My own conclusion, based on the photo at the start of this thread, was that the insides of the front hatches were probably light in colour (and thus, almost certainly ivory like the interior) but because they’re hard to see I wasn’t sure. The fellow who supplied me with the colour picture of LWS 1071 and the photo of the badge said that they seemed to be pale in colour in several other photos too, so I decided to go with that.

You’re right that most hatches of vehicles are painted the outside colour on the inside, though not absolutely always. American LVTs, for example, had white on the insides of the driver’s hatches too. (Which, of course means absolutely nothing with regards to the colour of those on the LWS, but it’s an odd parallel between two amphibious vehicles :smiling3:)
 

Jakko

Way past the mad part
SMF Supporter
Joined
Apr 28, 2018
Messages
10,844
Points
113
First Name
Jakko
Today, I sprayed lighter patches into all of the panels to highlight them:

7428BA44-E5E2-425E-9C91-25899E369A07.jpeg4EECDEAA-DB31-4100-95B7-DC8A86D1E41C.jpeg

Simply with the base colour from Mission Models with some Vallejo Model Air white mixed in to give a medium grey. It turned out I had mixed exactly enough for what I needed to spray, so that was fortunate :smiling3:

Less fortunate is that the Mission Models paint doesn’t seem to like water much. Before spraying the lighter blotches, I had tested a couple of washes on the underside to see which would look better. This is what happened:

A0DC634D-D2EE-4CAB-9D21-3AF07FDBA7EF.jpeg

Ignore the lighter grey, that was a test to see if it had the right shade. Below the lighter grey is Mig Dark Wash straight from the bottle, above it is the same wash but thinned with some water, and at the bottom is Tamiya flat black thinned with water. As you can see, with both of the ones I thinned with water, the paint was removed from the ribs and also a bit around them. At the very top is where I then tried just brushing with water, no paint, and the same thing happened :sad:

I think I’ll need to put a coat of varnish over this model before trying to add any kind of wash or other effects, else it looks like the grey base coat might well wear off.
 

Tim Marlow

Little blokes aficionado
SMF Supporter
Joined
Apr 27, 2018
Messages
16,801
Points
113
Location
Somerset
First Name
Tim
Me too Jim. I would also be extremely careful about future handling…..did you dilute the mission model paint at all Jakko? Might be that the paint structure has broken down with dilution so it doesn’t bind to the surface like it should.
 

Tim Marlow

Little blokes aficionado
SMF Supporter
Joined
Apr 27, 2018
Messages
16,801
Points
113
Location
Somerset
First Name
Tim
Don’t think I’ll be using it Steve. That page seems to suggest that unless you have a pristine airbrush then sooner or later you will get problems…..in effect you need a new airbrush, and to only use it for MM paint, to have the paint perform issue free? Not a great selling point. Pity really, my closest LHS stocks this as one of their major ranges.
 
Top