You are using an out of date browser. It may not display this or other websites correctly.
You should upgrade or use an alternative browser.
You should upgrade or use an alternative browser.
1/32 Me262A-1a/U4 (JV44 Hunters and Protectors Project)
- Thread starter AlanG
- Start date
Good luck Al.
I assume there are lots of good reference pics for this?
Yes there is. Obviously there are search engines but i found a page where a person called Chris Wimmer took detailed pictures of the Jumo 004 engine. It's not fully comprehensive but it's a great starting place
Jumo 004 Plumbing Guide | Large Scale Planes
Large Scale Planes, the home of large scale aircraft modeling.
The wiring/tubing is looking really good Alan!!! Looks like it will be fun to paint it all too. Thanks for the Jumo link. I never found any when I did my BMW-003e, only a couple of pics...
Prost
Allen
Prost
Allen
Jim R
SMF Supporter
Really raising the bar with this. I'm impressed with your patience and dedication. Looking stunning.
scottie3158
SMF Supporter
Superb
- Joined
- Apr 28, 2018
- Messages
- 6,250
- Points
- 113
- First Name
- Bob
Excellent work Al, give yourself a big pat on the back
Looks like it will be fun to paint it all too
Think i have got that sorted. I was worried about trying to paint the pipes and getting it on parts that i didn't want it to. But i found that i can slip kitchen grease proof paper under the individual pipes to protect the engine surface and paint them that way. Saves much swearing me thinks

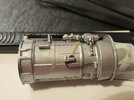
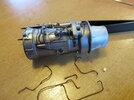
Blimey that looks great AlanMore pipework added. Some new ones made. I really shouldn't have painted before hand but i can always re-spray after if needed.
View attachment 475152View attachment 475153

Excellent stuff mate.. a proper tribute to an iconic aircraft
Think i have got that sorted. I was worried about trying to paint the pipes and getting it on parts that i didn't want it to. But i found that i can slip kitchen grease proof paper under the individual pipes to protect the engine surface and paint them that way. Saves much swearing me thinks
Sounds like a plan Alan. You can also use strips of index cards. They are thick enough so the paint won't soak through them. Keeps the swear jar empty too!!!...
- Joined
- Apr 28, 2018
- Messages
- 6,250
- Points
- 113
- First Name
- Bob
I have used post it notes, ripped into strips, nice and thin
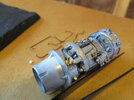
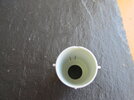
I'm actually enjoying thinking outside of the box on this build. Obviously many details are missing from the Revell mold due to it not being seen afterwards (unless like me, you are opening it all up). So i've had to try and think how to make certain things like pumps and blanking plates. My latest one was this blanking plate on the rear of the exhaust cone. I have nothing i can use to make circular items other than a paper hole punch. Not really any use. But then i had an idea. The mold tabs that i cut off were just about the size i wanted. So after slicing off a little bit from the tab, i've glued it to the cone and can now lightly sand down to the thickness i need.
So basically what i am trying to say is that we don't always need to go out and buy extra items/supplies. They are sitting there right in front of you waiting to go into the recycling bin
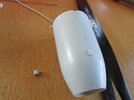
So basically what i am trying to say is that we don't always need to go out and buy extra items/supplies. They are sitting there right in front of you waiting to go into the recycling bin

scottie3158
SMF Supporter
Alan, you are so right thinking outside the box is one of the fun things about this hobby.

