1/35 Sd.Ah 56/57 Flak ammunition trailer (3D printed)

Panzerwrecker

SMF Supporter
Joined
Mar 2, 2022
Messages
362
Points
93
First Name
Los
Los,
That is outstanding work mate. I am always impressed with the detail that can be achieved with 3d printing. Particularly impressive is the fine cross bracing in the interior.
Cheers Paul. Yes those partitioning grills do look awesome
 

rtfoe

SMF Supporter
Joined
Apr 29, 2018
Messages
7,538
Points
113
Location
Malaysia
First Name
Richard
Lovely work Los even with those little nuggly issues. For most modellers these issues are hidden with muck and paint but for perfectionists such as yourself I can understand your disappointment. The future doesn't look good for resin and rubber molding with 3D now...it's gradually taking over sculpting and figures too. Looking forward to your second trailer and dio.

Cheers,
Richard
 

Panzerwrecker

SMF Supporter
Joined
Mar 2, 2022
Messages
362
Points
93
First Name
Los
Thanks for that Richard. I guess I'm feeling a little let down with myself seeing as it was all going so well. The printing anomalies I can deal with but those self inflicted issues I didn't see coming. Maybe thats the issue. Maybe I didn't notice them at all. Maybe it's time to face up to the fact that I would greatly benefit from using a magnifier.

I would hate to make the same mistake twice and it might very well be preventing progress with both my building and painting.

Either that or I'm on a backwards trajectory regards my quality of work.

We shall see;)
 

rtfoe

SMF Supporter
Joined
Apr 29, 2018
Messages
7,538
Points
113
Location
Malaysia
First Name
Richard
Thanks for that Richard. I guess I'm feeling a little let down with myself seeing as it was all going so well. The printing anomalies I can deal with but those self inflicted issues I didn't see coming. Maybe thats the issue. Maybe I didn't notice them at all. Maybe it's time to face up to the fact that I would greatly benefit from using a magnifier.

I would hate to make the same mistake twice and it might very well be preventing progress with both my building and painting.

Either that or I'm on a backwards trajectory regards my quality of work.

We shall see;)
Ah the magnifier issue...that's the same with me. I tend to forego them during the stages before priming thinking that all's well and then see the horrors of my errors. :smiling6: I use reading glasses that need magnifying upgrades...can't seem to keep the focus for more than 10 seconds.
As for photography, the close ups can be scary.
So don't be too hard on yourself, we all get there at some point.

Cheers,
Richard
 

Panzerwrecker

SMF Supporter
Joined
Mar 2, 2022
Messages
362
Points
93
First Name
Los
With the hot temps abating, progress continues. After some additional tidying up and with all the additional accessories prepped I give it another coat of primer. This time Mr Surfacer 1500 and it laid down much better.

The 3D printed detail really pops under paint but it also clearly shows a few areas that still need cleaning up. Notably the front face of both road wheels. These small nubs really are extremely difficult to see before adding paint. Thats my excuse anyway ;)

The rear faces of the wheels will also need flattening to ensure the wheels mate to the hubs. CA glue has spilt through whilst attaching the individual wheel bolts.

As I suspected, adding additional accessories to the roof box has bent it a little out of shape so final attachment to the body will need extra care to align.

The detail on the ammo boxes and ammo is excellent. The loose 8 clip rounds fit perfectly into the open boxes provided. There are plenty of options to display spent rounds, rounds on clips, empty clips and you can even add individual rounds to the clips after painting if brave enough!

The other accessories are a mixture of plastic and resin items. They include the excellent Bronco Jerry cans, some Miniart oil and petrol cans and a 3D printed spare wheel. There is also a little stack of Sd.Kfz 7 track pads and some additional resin items like the basket and food cannister. The tarps are all made using VMS modelling paper.

Progress so far.


20220722_223236.jpg20220722_223311.jpg20220722_223336.jpg20220722_223440.jpg20220722_223508.jpg20220722_224337.jpg20220722_224316.jpg20220722_224333.jpg20220722_225700.jpg20220722_230416.jpg20220722_230548.jpg20220722_230553.jpg20220722_231151.jpg20220722_231311.jpg20220722_231323.jpg20220722_231326.jpg
 
Last edited:

prichrd1

SMF Supporter
Joined
Apr 27, 2018
Messages
614
Points
93
First Name
Paul
Los,

Amazing result, even with the minor faults that you have highlighted - you can still have those on a mass market kit!!
I for one would be proud of that result :thumb2: :thumb2: .
Can you tell me what printer you are using?
I have been looking into them and have noticed the prices recently have lowered slightly.

Paul.
:smiling:
 

Mini Me

SMF Supporter
Joined
Jun 1, 2018
Messages
10,162
Points
113
First Name
Rick
The detail on this model is magnificent!!.......I could never expect to find that in 1-87 scale,......someday perhaps. One can only dream ;)
 

Tim Marlow

Little blokes aficionado
SMF Supporter
Joined
Apr 27, 2018
Messages
16,854
Points
113
Location
Somerset
First Name
Tim
That really is a fabulously detailed kit, and you are more than doing it justice. The issues you mention are simply part of the learning curve required for working in a relatively new material. Now you know about them you will start identifying them much earlier in the build and they will become less of an issue. Stunning work.
 

Neil Merryweather

SMF Supporter
Joined
Dec 29, 2018
Messages
4,454
Points
113
Location
London
First Name
Neil
The detail on this model is magnificent!!.......I could never expect to find that in 1-87 scale,......someday perhaps. One can only dream ;)
It's well within the bounds of possibilities, Rick,right now. The files are available to buy for less than £4 and all you need to do is rescale them and print away!
You would need to make adjustments to thickness in most areas probably, (especially as some parts are too thin even at 1/35 scale...)but with one's own printer and the relevant software ability one could experiment infinitely.
To be fair, you would lose some of the fine details,but who would be able to see them anyway?
This is the future, folks!
 
Last edited:

Mini Me

SMF Supporter
Joined
Jun 1, 2018
Messages
10,162
Points
113
First Name
Rick
It's well within the bounds of possibilities, Rick,right now. The files are available to buy for less than £4 and all you need to do is rescale them and print away!
You would need to make adjustments to thickness in most areas probably, (especially as some parts are too thin even at 1/35 scale...)but with one's own printer and the relevant software ability one could experiment infinitely.
To be fair, you would lose some of the fine details,but who would be able to see them anyway?
This is the future, folks!
As you say anything is possible ........just not sure about the scale I work in. I contacted a friend who was having some stuff printed in 1-87 scale and he asked me if I needed some detail parts. I gave him an order for some 20 liter WW2 jerry cans......even sent a photograph. He sent me a sample and it was more like a 40 liter can and the details were more than a little muddy. Think I'll stick with the injected mold stuff for a bit longer.
 

Jakko

Way past the mad part
SMF Supporter
Joined
Apr 28, 2018
Messages
10,927
Points
113
First Name
Jakko
Measurements of jerrycans are not that hard to come by (I could go into the garage and measure up a post-war version of the German/British type if I wanted to) so there’s really no excuse for 3D-printing them far too large, IMHO …
 

Mini Me

SMF Supporter
Joined
Jun 1, 2018
Messages
10,162
Points
113
First Name
Rick
I already went down that street with the friend who offered to have them printed......when he said that was as small as they could be made and still have the three separated guards and handle at the top I politely told him.....No thanks.
 

Panzerwrecker

SMF Supporter
Joined
Mar 2, 2022
Messages
362
Points
93
First Name
Los
Simply incredible detail and such a superb build…keep it coming
Cheers Joe
Los,

Amazing result, even with the minor faults that you have highlighted - you can still have those on a mass market kit!!
I for one would be proud of that result :thumb2: :thumb2: .
Can you tell me what printer you are using?
I have been looking into them and have noticed the prices recently have lowered slightly.

Paul.
:smiling:
Thanks Paul. I don’t actually have a printer…….yet. I asked the designer if he could print me one and he kindly did. In fact he sent me two, with a selection of wheels too. The 3D file is incredibly good value at under £4 so if you have a printer you could print as many as you wanted, maybe even change the scale etc.
That really is a fabulously detailed kit, and you are more than doing it justice. The issues you mention are simply part of the learning curve required for working in a relatively new material. Now you know about them you will start identifying them much earlier in the build and they will become less of an issue. Stunning work.
Hi Tim. thank you and and I 100% agree. I have already started building the second trailer and from the off I’m ensuring I don’t make the same mistakes. More delicate handling, more patience with removal of all the supporting nubs etc. But most importantly giving the larger parts a coat of primer to better see and identify all the areas that need cleaning up. I have also used far less CA than I would think is required without issue too.
 

Panzerwrecker

SMF Supporter
Joined
Mar 2, 2022
Messages
362
Points
93
First Name
Los
Outstanding
Thanks Paul.
Ps, what a great build,Los.!
Not my thing but fascinating and impressive none the less
Appreciated Neil. It’s the future and one I probably wouldn’t have tackled unit I convinced myself of the benefits and had already invested in a 3D printer. I think maybe 1/16 scale would have been a smoother introduction to this new medium and most definitely much easier to build. The scale thickness of some of these 1/35 parts is crazy thin!

It has thankfully highlighted the fact my tired old eyes require some artificial assistance. An optivisor, an LED 1600 lumen bifocal magnifying lamp and a new 2600 lumen desk lamp have just been ordered. It’s going to be a real eye opener:tongue-out3:
 
Last edited:

Panzerwrecker

SMF Supporter
Joined
Mar 2, 2022
Messages
362
Points
93
First Name
Los
A quick update after a late session.
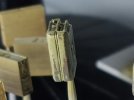
Although I'm  still finding more of those pesky printing support nubs which is starting to drive me crazy it was time to choose colours for the base coat. As it will be pulled by a Sd.Kfz 7 self propelled Flak 43 which is already completed in plain Dunkelgelb I decided to keep it simple.

Starting with a homebrew mix of Tamiya Red Brown through shades to Dark Yellow XF60 it was finished off with Mission Models excellent late 1945 Dunkelgelb. The base coat was then given a coat of Tamiya semi gloss clear mixed with a drop of clear yellow to seal it for the upcoming weathering steps.

All the different colours on the accessories were blocked in by paintbrush with Vallejo acrylics. The ammo containers were airbrushed with the same Dunkelgelb mixes only they didn't receive the final highlight colour so as to give them a different tone to the trailer. Random acrylic washes further enhanced them with some colour variation. A stippled mask was also used to give the paint a distessed and worn look.

20220726_022204.jpg

20220726_022340.jpg

Jerry cans and fuel tins were first airbrushed with steel and grey acrylics and then treated to a fine mist of hairspray. After base coating them the paint was then distessed and scratched exposing the underlying paint or bare steel.

20220726_022737.jpg

20220726_022641.jpg

The tyres were given a coat of Tamiya tyre grey which is now my go to tyre colour since I ran out of Vallejo's Dark rubber. Once dry a tyre mask allowed the wheel to be painted the same colour as the rest of the vehicle Any overspray will contribute to future weathering as to my eye, it always gives a nice feathered dust like appearance around the rim.

20220726_014429.jpg

The bottles in the box in the roof rack were picked out in Vallejo Green Taillight acrylic and IMO does a pretty convincing job.

20220726_022947.jpg

The uniforms in the wicker basket look all washed out as I only glazed over some Vallejo German Field Grey over the Black and white Zenethal modulated primer coat. These along with the basket will be finished off with oils.

20220724_170021.jpg

Sadly the original primer coat on the main assembly which was painted during the hot weather still makes the paintwork look pretty crusty in places. There are just too many fragile parts attached now to allow any further smoothing out. We will just have to see how I can best disguise these areas.

Another issue which has come to light since the primer was laid down is a couple of wonky wheel bolts. Instead of being included in the wheel print these were provided separately. The bolts are all on a small block and have to be cut off individually. Cutting them off square is difficult and doesn't help alignment in the holes on the extremely thin wheel face. Tapering them would have been a better solution. Designing stud holes in the hub face could allow them to mate with the wheel without any raised surface, and could also have the benefit of just attaching some wheel studs showing a removed wheel.

The 3.7cm ammo shell containers came in a variety of colours and late in the war they appeared to be in a kind of Field Grey colour. Lubrication grease sometimes gave them and all together different appearance.

Screenshot_20220726-040858_Chrome.jpg

I'll give the varnish a day or so to harden then it's time for a relaxing bout of highlights and shadows care of some oils and a pin wash.
 

Attachments

  • 20220726_022737.jpg
    20220726_022737.jpg
    143.4 KB · Views: 0
Last edited:
Top