Airfix 1/48 Coyote

Steve Brodie

SMF Supporter
Joined
Sep 17, 2014
Messages
3,732
Points
113
Location
Shropshire
First Name
Steve
Started adding the brass;


IMG_1258.JPG

IMG_1265.JPG

IMG_1266.JPG


And just ordered this stowage set -


http://www.redzebramodels.co.uk/#!Coyote1/zoom/ciaa/i45y9q


Not the best photos, will sort out more at weekend


Steve.
 

Steve Brodie

SMF Supporter
Joined
Sep 17, 2014
Messages
3,732
Points
113
Location
Shropshire
First Name
Steve
Brass all added to the model, except for seat belts - to be added once painted. Some of the brass is quite small, but happy with the result;


FullSizeRender.jpg

FullSizeRender1.jpg


The Red zebra stowage set has arrived and after a bit of sanding the main bulk fits into the rear cargo bed nicely;


FullSizeRender2.jpg

IMG_1297.JPG


Replacement side bags with straps, to replace the awful moulded on flat thing's Airfix have on the kit, the resin set comes with loads of Jerry Cans, Bags, Ammo Boxes - 3 sizes and carboard boxes;


FullSizeRender3.jpg


will be adding some tow shackles to the front and electrical wiring were visible (mainly on the gun and middle aerial mounts on the frame. Hoping to get a primer coat on at the weekend if family and time permit.


Thanks for looking in !

IMG_1296.JPG
 
Last edited by a moderator:
Joined
Jan 14, 2015
Messages
99
Points
33
\ said:
Maybe the green ones are for gasoline and those black ones are for water....
Anyway they seems to be made of plastic, isn't it??
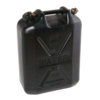
Hopefully to shed some light yes you are correct the black ones in the reference photo are the army's standard water Jerry can and are black plastic where as fuel goes into metal green ones, as you can see they also have two lids to allow air in.


image.jpeg
 
D

Deleted member 4539

Guest
You are putting some great work into this Steve(I have been watching)and it's look great.
 
F

Fenlander

Guest
Great work on this, I was tempted by one in my local Hobbycraft last week but I resisted. Might have to reconsider....
 

Steve Brodie

SMF Supporter
Joined
Sep 17, 2014
Messages
3,732
Points
113
Location
Shropshire
First Name
Steve
Thanks for the kind comments, 1st coat of top colour on tonight, need to give a 2nd light ghosting tomorrow night. What started out as a quil OOB build has turned into something a lot more detailed !!
 
J

Judas.1044

Guest
You are really enhancing this model Steve! It has lost that "toy look" that Airfix models usually have
 
A

andyrobs

Guest
That's looking very good Steve, all those extras really do make a difference.


Cheers, Andrew
 

Steve Brodie

SMF Supporter
Joined
Sep 17, 2014
Messages
3,732
Points
113
Location
Shropshire
First Name
Steve
Started on the weathering last night, tried out on a couple of panels ; AK DAK wash, AK dust effects plus pigments (wheels). Not the best photo but taken on iphone at 7am - thats my excuse, will put some better shots up soon ( I hope)


IMG_1322.JPG
 
Last edited by a moderator:

Steve Brodie

SMF Supporter
Joined
Sep 17, 2014
Messages
3,732
Points
113
Location
Shropshire
First Name
Steve
While fixing the drivers door to the cab, the etch handle decided to make a run for it and leapt into the unknown :mad:, only been about 3mm long its a nightmare to try and find it, mind I reckon if i leave it for a few days the carpet monster will throw it back up:smiling3:; lost another small bit of brass last week, spent 20 minutes on my hand and knees with magnifier and no where to be seen, two days later and their it was, where i had already searched !!, only difference was my wife had hoovered the room ;)
 

Steve Brodie

SMF Supporter
Joined
Sep 17, 2014
Messages
3,732
Points
113
Location
Shropshire
First Name
Steve
Satin varnish on last night, wasnt sure the AB was working as couldnt see anything coming out, had a little touch of the kit and slightly sticky, so all working fine. Nice and dry this morning and a nice slight sheen, let the weathering begin !
 

Steve Brodie

SMF Supporter
Joined
Sep 17, 2014
Messages
3,732
Points
113
Location
Shropshire
First Name
Steve
So, with the satin coat dry, i moved onto weathering the underside of the coyote, to start with i made a paste of Tamiya matt varnish to which was added various pigments (Mig iraq sand, Europe earth, Humrbrol sand and white, pastel sand dust and some AK rust - to add depth) this was then dabbed into all the recesses and bottom of the coyote and left to dry. Once dry some of the sand pigment mix was dropped onto the model and fixed wih drops of pigment fixer, this stage took 3 goes as had to ensure the vertical sides were horizontal so the pigment didnt fall off.


With the Wheels, AKSand wash was applied to each wheel and then the sand pigment mixture was dabbed onto the treads and left to dry. Once dry and using a large stiff flat brush, i removed 90% of the pigments and also removed some of the wash from the tyre walls. Just hope it was all worth it.


1.JPG

2.JPG

3.JPG


Couldnt resist 'trying the wheels for size'


4.JPG

5.JPG

6.JPG


4.JPG
 
F

Fenlander

Guest
Really tying it together now Steve. The weathering brings them to life.
 
D

Deleted member 4539

Guest
Real nice work with the powder's.


Makes the vehicle become more alive.


So yes it was worth it. :smiling3:
 
Joined
Mar 2, 2015
Messages
3,410
Points
113
First Name
Robert
Ive just caught up with this one and I watched Lauries build a while ago. I've never built this new kit but it seems to get a lot of raves about it.


You have defo made a very good rendition of this and il defo be watching to see the end results.


The detail looks very good and love all the ref behind the build notes.


Looking very good


Regards


Robert
 
Top