And another slow build - Antar Mk.3 + Trailer....

Scratchbuilder

SMF Supporter
Joined
Jul 2, 2022
Messages
1,943
Points
113
First Name
Mike
Have dug this one out of the stash and decided it was high time I got on with it. With the Centurion bridgelayer I will soon be onto the bridge and constructing 8 sides all the same plus all those rivets and bolts will soon drive anyone to the rubber room. So to run along side it and swapping from one to the other I can keep a modicum of sanity... Yes I know Sanity Claus etc etc.....
So here we go...
20221026_110256_HDR.jpg
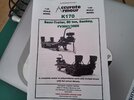
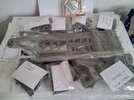
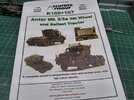
To start with this is a full blown resin and etched brass kit and will require a certain amount of experience - not to build the kit but to identify parts, correlate them to the miniature photo instructions and hope you have got the correct part in the correct place as Accurate Armour instructions leave a lot to be desired, as those who can remember my Chieftain bridgelayer build it was a case of open box - throw away contents.... Let's hope this will not be the same.
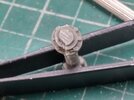
Starting with the chassis front suspension - you have to clean up the engine first, add filler to the bottom of the sump and clean up - clean up is a word you will get tired of on here.... BUT, later you will be required to fit the engine from the underside of the chassis and then to paint it a shade of Robins Egg Blue - and at a later stage paint the chassis Green.... So I went the other way and cut away the cross member/engine location from the engine itself, and scratch built a new cross member on the chassis. This has now allowed me to fit the engine after the chassis is painted.
20221026_110224_HDR.jpg
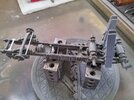
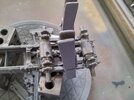
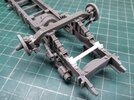
As you can see I have progressed with the front susspension and steering arms and brake back plates, again cut from their sprues and clean up. I did find that there was a crossing of the part numbers for the brake cylinders and some confusion about where the steering links from the power steering were located on the back of the brake back plates. These (part 14) fit in the centre of the back plate where on the instructions the numbers 5&6 are, but the way it reads is that it is the steering link that goes there.
So all in all it took about three hours to get to where I am now...
20221026_110203_HDR.jpg
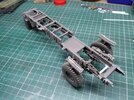
I have still got the add the steering link and the other link for the right side of the pwer steering shaft and links. A close look at the chassis you will see there was plenty of cleaning upp to do - in fact so much that at one time I considered scratchbuildin a new one - but we shall see how this goes.The wheels by the way are just dry fitting.
More later
Mike
 

Jakko

Way past the mad part
SMF Supporter
Joined
Apr 28, 2018
Messages
10,819
Points
113
First Name
Jakko
TBH, there’s another thing I don’t want to build: a resin kit of a softskin vehicle :smiling3: Armoured ones aren’t too bad, but I already don’t much like plastic softskins for the difficulty of getting the chassis square, their overall fiddliness, and multitude of parts. So it’s very nice to see you build this one :smiling3:
 

scottie3158

SMF Supporter
Joined
Apr 27, 2018
Messages
12,709
Points
113
Location
Spalding
First Name
Paul
Mike, count me in mate. Never had a go at a AA kit. But they do have some interesting vehicles.
 
  • Like
Reactions: JR

Jim R

SMF Supporter
Joined
Apr 27, 2018
Messages
13,735
Points
113
Location
Shropshire
First Name
Jim
I've never built a full resin kit but have used AA conversion stuff. Their instructions do leave a lot to be desired. Interested to see how this goes. Scratching the cross member was a good call.
 
  • Like
Reactions: JR

Panzerwrecker

SMF Supporter
Joined
Mar 2, 2022
Messages
362
Points
93
First Name
Los
TBH, there’s another thing I don’t want to build: a resin kit of a softskin vehicle :smiling3: Armoured ones aren’t too bad, but I already don’t much like plastic softskins for the difficulty of getting the chassis square, their overall fiddliness, and multitude of parts. So it’s very nice to see you build this one :smiling3:
I was intimidated by having a go at a resin soft skin until I went for Model Victoria's Fiat 626 kit. There was no decent alternative, so resin it had to be. Imagine how amazed I was when it built up superbly well. It was my first resin kit and a most pleasurable build. Recommended 100%


I really must buy an Accurate Armour kit. Are they at Telford this year?

IMG-20120512-00094.jpg
 

Ian M

Administrator
Staff member
Administrator
Moderator
SMF Supporter
Joined
Dec 14, 2008
Messages
19,727
Points
113
Location
Falster, Denmark
First Name
Ian
Rather partial to a tank transporter I'll enjoy watching this one.
 

Scratchbuilder

SMF Supporter
Joined
Jul 2, 2022
Messages
1,943
Points
113
First Name
Mike
TBH, there’s another thing I don’t want to build: a resin kit of a softskin vehicle :smiling3: Armoured ones aren’t too bad, but I already don’t much like plastic softskins for the difficulty of getting the chassis square, their overall fiddliness, and multitude of parts. So it’s very nice to see you build this one :smiling3:
I can understand your reluctance, after just about scratchbuilding my Chieftain bridgelayer I steered well away from resin kits, But i have a couple of Plus Model vehicles with one sort of underway and the instructions are what you would expect. As for plastic softskins, jig the chassis using slow drying glue so that you have time to square everything up and then let it set overnight.
 

Scratchbuilder

SMF Supporter
Joined
Jul 2, 2022
Messages
1,943
Points
113
First Name
Mike
Mike, count me in mate. Never had a go at a AA kit. But they do have some interesting vehicles.
Welcome Paul,
Before you jump, think of the expense and the dust it will collect if you start it and do not complete it. The first one I built was their Chieftain Mk.10C, but even her I had to scratch the stowage baskets, but that was choice.
Mike.
 

Scratchbuilder

SMF Supporter
Joined
Jul 2, 2022
Messages
1,943
Points
113
First Name
Mike
I've never built a full resin kit but have used AA conversion stuff. Their instructions do leave a lot to be desired. Interested to see how this goes. Scratching the cross member was a good call.
Hello Jim,
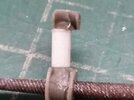
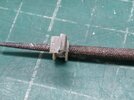
As an example, last night I spent two hours trying to find the location of just one part on the rear axles. I have one very indistinct photo that has no relation to the part, and by searching through the rest of the instructions did I come across another photo relating to something else and in the corner of the photo was the the object of my search. And as there are two rear axles you are given instructions for just one (other has differences) and the photo of another Mark of Antar axles....:tired:. Yes that cross member had to go - was not even square.....
Mike.
 

Scratchbuilder

SMF Supporter
Joined
Jul 2, 2022
Messages
1,943
Points
113
First Name
Mike
I was intimidated by having a go at a resin soft skin until I went for Model Victoria's Fiat 626 kit. There was no decent alternative, so resin it had to be. Imagine how amazed I was when it built up superbly well. It was my first resin kit and a most pleasurable build. Recommended 100%


I really must buy an Accurate Armour kit. Are they at Telford this year?

View attachment 465971
This is the dilemma, do you forget it, scratchbuild it or buy the resin. I have a Pavesi in my build line, just starting to complete the wheels, and have had this out and back in the stash for some time and on several occasions, but it is the only one around.....
 

Scratchbuilder

SMF Supporter
Joined
Jul 2, 2022
Messages
1,943
Points
113
First Name
Mike
Rather partial to a tank transporter I'll enjoy watching this one.
Welcome Ian,
But as the heading states it will not be a fast build, I would advise to drop in when you feel like it.
Mike.
 

Scratchbuilder

SMF Supporter
Joined
Jul 2, 2022
Messages
1,943
Points
113
First Name
Mike
Update,
So, still recovering from the loss of our Basset Hound Mavis on Tuesday which was a dash to the vets first thing and then another even more urgent dash just after lunch to take her back, she passed away in my hands peacefully aged 7. The cause was Colitus that manifested itself into Sepsis and once that happened there was no recovery. So as you can imagine there was not a lot done for the rest of the day.
Today I have managed to get back onto the work in progress and the front susspension and steering were completed last night and work on the rear susspension commenced..... I took away the centres of the two braces and replaced them with round rod as I have come again up against the shifted mould....
20221027_135422_HDR.jpg
20221027_135348_HDR.jpg
And as you can see 'round' is just a word in this case.... And the same with the rear prop shaft, but at least it was hidden.....
20221027_135936_HDR.jpg
.... So eventually I managed to get the rear suspension onto the chassis, and with a change of light direction came across the dreaded air bubble. These have been dug out, filled with a combination of tissue and c/a - left to dry and then a coat of filler to finish off. This is now drying so I will allow 24 hours and in the meantime get back on the Centurion to complete the fire extinguisher brackets and the commanders turret area...
20221027_142313_HDR.jpg
20221027_142527_HDR.jpg
All in all apart from some minor fit problems it appears to be the usual suspects....
More later
Mike.
 

stillp

SMF Supporter
Joined
Nov 17, 2016
Messages
7,225
Points
113
Location
Rugby
First Name
Pete
So sorry to hear about Mavis. :disappointed2:

More great work on the Antar. My favourite Dinky when I was a nipper was the Mighty Antar, with, of course, a Centuion on the back.
Pete
 

minitnkr

Rabble & escape committee member
SMF Supporter
Joined
Apr 27, 2018
Messages
6,723
Points
113
Location
Dayton, OH
First Name
Paul
Looks like a challenge. What's the trailer look like?
 

Jim R

SMF Supporter
Joined
Apr 27, 2018
Messages
13,735
Points
113
Location
Shropshire
First Name
Jim
Sorry to hear about Mavis. Such a young age too. I know how you must feel from my own experience of losing furry friends.
 

Jakko

Way past the mad part
SMF Supporter
Joined
Apr 28, 2018
Messages
10,819
Points
113
First Name
Jakko
I have come again up against the shifted mould....
I’ve not built many Accurate Armour kits, but in the ones I have, all have had parts whose moulds had shifted. Especially round ones like an Strv 103 gun barrel and the equilibrators on their T26E4 conversion kit.
 

scottie3158

SMF Supporter
Joined
Apr 27, 2018
Messages
12,709
Points
113
Location
Spalding
First Name
Paul
Michael,
Sorry to hear about Mavis. Accurate Armour as I said previously do put out some interesting kits, but it also appears from this build and others that I have seen that the moulds are well past their useful life given the finish on the parts. Luckily you have the skills and patience to put them right.
 

Scratchbuilder

SMF Supporter
Joined
Jul 2, 2022
Messages
1,943
Points
113
First Name
Mike
So sorry to hear about Mavis. :disappointed2:

More great work on the Antar. My favourite Dinky when I was a nipper was the Mighty Antar, with, of course, a Centuion on the back.
Pete
Remember it well Pete, now worth a fortune at the auction houses - anybody got a time machine I can borrow.....
 

Scratchbuilder

SMF Supporter
Joined
Jul 2, 2022
Messages
1,943
Points
113
First Name
Mike
Looks like a challenge. What's the trailer look like?
Paul, sorry I totally forgot about the trailer....
20221028_111814_HDR.jpg
20221028_111615_HDR.jpg
On first inspection carried out when I first got the kit, I think it was favouable. What you see here is all the parts have been seperated by me into bags for easy finding of parts. I had a quick scan through the instructions and they look like an improvement has been made as far as clarity of where parts actually go instead of getting the prayer mat out and hoping for the best.
Mike.
 
Top