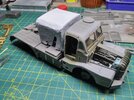
And another slow build - Antar Mk.3 + Trailer....

Joined
Oct 9, 2022
Messages
107
Points
43
Location
Purton
First Name
Bill
Going off at a complete tangent, please indulge me.
When on exercise in Germany in the early 70's a team of 8 of us changed an Antar engine overnight, in a wood in the dark with minimal use of torches. It came in at 8pm and was driven away at 7am next day. The brigadier was most impressed but we didn't even get a beer out of it.

Bill
 

Scratchbuilder

SMF Supporter
Joined
Jul 2, 2022
Messages
1,943
Points
113
First Name
Mike
Jim R & scottie,
Thanks for the comments - the kit is a bit of a pain but I am determined to finish it, the main problem is as always the instructions only tell you half the story. But will keep going and can change back to the Centurion avlb if I need a change.
 

Scratchbuilder

SMF Supporter
Joined
Jul 2, 2022
Messages
1,943
Points
113
First Name
Mike
Going off at a complete tangent, please indulge me.
When on exercise in Germany in the early 70's a team of 8 of us changed an Antar engine overnight, in a wood in the dark with minimal use of torches. It came in at 8pm and was driven away at 7am next day. The brigadier was most impressed but we didn't even get a beer out of it.

Bill
Bill,
I know the feeling, decided to stay behind when the rest of the battalion went on leave from Germany (Munster). Company Sgt Major came into the room and said I have just the job for you.... I ended up replacing all the platoons 432's tracks and then fitting the new SCAT mounts into each vehicle for the WOMBAT anti-tank guns - but it was great fun tearing around the barracks in the 432's with no one to stop you.
Mike.
 

Scratchbuilder

SMF Supporter
Joined
Jul 2, 2022
Messages
1,943
Points
113
First Name
Mike
Update,
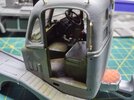
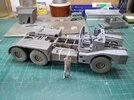
So the fuel tanks have had new securing straps added, the resin ones were a joke... and added the air tanks on either side as well. I was going to add the air pipes but as the whole lot would be later hidden I decided the extra work was not worth it. Going back to the cab inside colour, I found a photo of an Antar undergoing restoration and the inside colour was in fact a light green shade - so that is now the colour.
20221206_115556_HDR.jpg
20221206_115621_HDR.jpg
And a couple of pics to show the work so far - Herman is there to add scale to the vehicle and the wheels are on as a dry run. The cab has been primed along with the seats and it will be spray time after lunch...
Cheers
Mike.
 

Lee Drennen

Box Stock Builder with a Twist/ Rabble Member
SMF Supporter
Joined
Apr 29, 2018
Messages
5,653
Points
113
Location
Wortham Mo
First Name
Lee
Looks very smart Mike. Nicely done I’ll try to keep up.
 

Scratchbuilder

SMF Supporter
Joined
Jul 2, 2022
Messages
1,943
Points
113
First Name
Mike
Update,
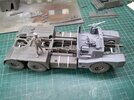
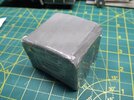
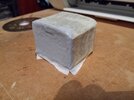
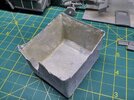
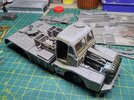
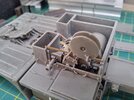
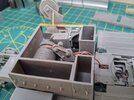
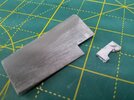
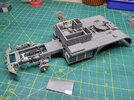
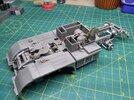
Forgot the pic, but the chassis is progressing along, fifth wheel, cable runs, winch all now in place. I am not a fan of the resin canvas cover over the winch area, so have decided to have a go at making my own. First was to cover the whole of the original with sellotape...
20221209_152759_HDR.jpg
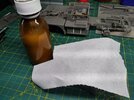
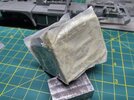
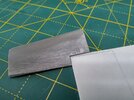
This will protect the original. Then I added some plain hand tissue I use for canvas and it is coated in my sprue/liquid cement concoction...
20221209_152828_HDR.jpg
20221209_154005_HDR.jpg
Looks a mess but once dry (minutes) is then trimmed down to shape and then another coat of tissue but with Mr Hobby 1000 as the adhesive which retains the texture of the tissue...
20221209_220354_HDR.jpg
This is as far as I have progressed, the top and other three sides still to do, then once it is dry to remoce it and then add the interior framework with open sides and rear - I hope... More later
Mike.
 

Scratchbuilder

SMF Supporter
Joined
Jul 2, 2022
Messages
1,943
Points
113
First Name
Mike
Update,
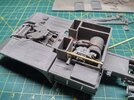
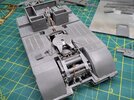
As said yesterday, here are the missing pics of the rear chassis...
20221211_163516_HDR.jpg
20221211_163531_HDR.jpg
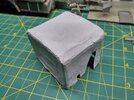
The replacement canvas cover came out better than expected, I did add some 'repair' patches using the same method except without the sprue solution, and trimming has to happen along with some details...
20221211_163547_HDR.jpg
Outside...
20221211_163558_HDR.jpg
Inside.
The cab interior has now been finished including the glazing....
20221211_163732_HDR.jpg
Bit blurred and dark....
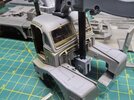
The cab top was joined to the lower part, and was fun with gallons of c/a to both glue and start to fill in the gaps.... then clamped for a few hours...
20221211_163701_HDR.jpg
And here are a couple of pics when test fitting the cab to the chassis.... more about this later...
20221211_164921_HDR.jpg
20221211_165005_HDR.jpg
Cheers
Mike.
 

Jakko

Way past the mad part
SMF Supporter
Joined
Apr 28, 2018
Messages
10,819
Points
113
First Name
Jakko
Very nice. I didn’t expect the canvas cover to be that big — when I saw the in-progress pics I thought it was for some relatively small piece of equipment, not for behind the whole cab.
 

Scratchbuilder

SMF Supporter
Joined
Jul 2, 2022
Messages
1,943
Points
113
First Name
Mike
Update,
Many thanks for all of your comments. Jakko, even just laying some tissue over the resin item made it bigger, so out came the ruler and knife to cut it down to size, pic to follow.
20221215_121159_HDR.jpg
20221215_121214_HDR.jpg
The winch bay is now finished as are the hooks for the canvas cover on all sides.
I cut the bonnet tops from the runners and discovered one of them had a great big air bubble.
20221215_121124_HDR.jpg
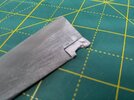
As you can see i did try to fill it with c/a and car stopper filler but it just gave way - so out came the saw and I cut away the offending bit...
20221215_121130_HDR.jpg
And c/a'd a bit of plastic card in its place...
20221215_121140_HDR.jpg
After overnight drying the excess was cut away and the card sanded down to meet the thickness of the bonnet.....
The chassis is now completed as far as construction goes, next it will be prime and then paint...
20221216_155543_HDR.jpg
In the front you can see the new bonnet filler.
20221216_155558_HDR.jpg
And that is where I am today... Tomorrow it will be out with the rattle can primer...
More later... Chers
Mike.
 

Jim R

SMF Supporter
Joined
Apr 27, 2018
Messages
13,735
Points
113
Location
Shropshire
First Name
Jim
Great looking winch. Nice fix with the bonnet. Bubbles are a common issue with resin - not just home castings.
 
Top