Another First - 1/35 CH2 TES.

Waspie

SMF Supporter
Joined
Mar 13, 2023
Messages
2,481
Points
113
Location
Portland - Dorset
First Name
Doug
I have never - ever even attempted to have a go at armour. But after working at Bovington, the home of the Armour Corp, I thought I would have a go at the clanky machine that deafened me every day!! (I must admit the TES variant hadn't arrived by the time I retired).
So here go's.
First impressions were favourable but since opening the box and getting started I have moved away from favourable to Mmmmmm!! Too much waste plastic getting in the way of the build. Also - too much to remove from individual parts, lots of filing, smoothing to establish a nice fit!! That said, I'm enjoying the additional work. Spending more time on this that the Sea King.
Couple of pics.
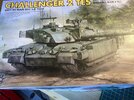
IMG_0746.JPG

Inside the box and the dreaded PE!!!!!
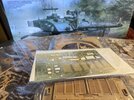
IMG_0745.JPG

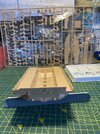
Hull started -

IMG_0747.JPG

I would have been further advanced but chasing a manic 14 week old puppy around whilst sorting bits out hindered progress!!!!


In case you missed it on another thread the surplus plastic - everywhere!!!!!!
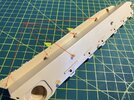
IMG_0744.JPG
 

Jakko

Way past the mad part
SMF Supporter
Joined
Apr 28, 2018
Messages
10,819
Points
113
First Name
Jakko
Those half-round bits on the inside are where the knock-out pins push against the part to remove it from the mould. If they’re not in the way, leave them be :smiling3: Chances are the ones at the very front and rear might interfere with the fit of the nose or rear plate, but you’ll find out quickly enough by just holding the parts together without glue. If they are in the way, just snip them off.

As for the etched bits, if you’re not feeling up to it, check the instructions carefully to see if they give you the option of plastic or etched bits.
 

langy71

SMF Supporter
Joined
Apr 27, 2018
Messages
1,559
Points
113
Location
Nottingham
First Name
Chris
You've gotta love a Challenger, I'm sure you'll wrestle this into a cracking build.. incidentally is this the TAKOM Chally 2...(been looking at getting this for a while...so it's all riding on you buddy... ;) )

(grabbed a chair near the door to keep an eye out for Maton.)
 

Mark1

SMF Supporter
Joined
Apr 17, 2021
Messages
3,555
Points
113
Location
South london
First Name
Mark
Like the look of this, and what jacko said, if your not confident with the etch and dont have to use it then dont bother, you can still turn out a nice build without it .
 

Dave Ward

Still Trying New Things
SMF Supporter
Joined
Apr 27, 2018
Messages
8,654
Points
113
Location
South Gloucestershire
First Name
David
The PE can be very intimidating, the larger pieces are easy to handle - it's the smaller pieces that give trouble! One thing - just because the PE part is on the fret, doesn't mean you have to use it! Ask yourself if the PE adds to the model - if it doesn't leave it. PE can be superb for grilles etc, but at times makers seem to add stuff just to fill the sheet up!
One thing you should do is prepare the PE, I always clean mine with IPA ( Isopropyl Alcohol ) to thoroughly degrease the part..............
Dave
 

Waspie

SMF Supporter
Joined
Mar 13, 2023
Messages
2,481
Points
113
Location
Portland - Dorset
First Name
Doug
Those half-round bits on the inside are where the knock-out pins push against the part to remove it from the mould. If they’re not in the way, leave them be :smiling3: Chances are the ones at the very front and rear might interfere with the fit of the nose or rear plate, but you’ll find out quickly enough by just holding the parts together without glue. If they are in the way, just snip them off.

As for the etched bits, if you’re not feeling up to it, check the instructions carefully to see if they give you the option of plastic or etched bits.
Thanks Jakko, I removed them all because it was easier to ensure it all fitted together. As for the etching!! I'll see how I get on with the limited tools I have. :thumb2:

You've gotta love a Challenger, I'm sure you'll wrestle this into a cracking build.. incidentally is this the TAKOM Chally 2...(been looking at getting this for a while...so it's all riding on you buddy... ;) )

(grabbed a chair near the door to keep an eye out for Maton.)
Chris, this kit is a Ryefields version of the Chally, Hope I will do it justice.
Like the look of this, and what jacko said, if you're not confident with the etch and dont have to use it then dont bother, you can still turn out a nice build without it .
Well Mark, I have a further 3 stages to go before I encounter any PE, don't think I'll be able to touch it tomorrow seeing the mem-saab's itinerary. Not going to rush it. If I mess up the PE then that's the way it goes but I don't intend messing up!!!!
The PE can be very intimidating, the larger pieces are easy to handle - it's the smaller pieces that give trouble! One thing - just because the PE part is on the fret, doesn't mean you have to use it! Ask yourself if the PE adds to the model - if it doesn't leave it. PE can be superb for grilles etc, but at times makers seem to add stuff just to fill the sheet up!
One thing you should do is prepare the PE, I always clean mine with IPA ( Isopropyl Alcohol ) to thoroughly degrease the part..............
Dave
Thanks for the advice regards the IPA Dave. I'll add that to my list of items required if I haven't already got it under a trade name or something!!!
 

JR

Member of the Rabble and Pyromania Consultant
SMF Supporter
Joined
May 26, 2015
Messages
17,275
Points
113
Location
lincs
First Name
John
Big change Doug from wingy things , but you take your time and enjoy.
Seat at the front please. Any chance of a tea please ?
 

Mark1

SMF Supporter
Joined
Apr 17, 2021
Messages
3,555
Points
113
Location
South london
First Name
Mark
Theres always loads of pe tutorials on utube if you want see how its done
 

Jakko

Way past the mad part
SMF Supporter
Joined
Apr 28, 2018
Messages
10,819
Points
113
First Name
Jakko
As for the etching!! I'll see how I get on with the limited tools I have. :thumb2:
You don’t need a lot of sophisticated tools for working with etched parts, though some of those can make your life easier. At a minimum, IMHO you need a good knife, flat long-nosed pliers and a small flat file. Something like a glazed tile, a steel ruler and medium-grit sandpaper will also help.

What I normally do is remove a part from the fret by cutting through the tabs that hold it to it with the knife. Do this carefully, and if necessary you can use the steel ruler to press the fret and part flat against your cutting mat when cutting through the tab. Once it’s free, hold it in the pliers so that just the tab and a fraction of a millimetre of the part sticks out, then carefully file off the tab.

If you need to fold parts into shape, you can hole them in the pliers too, with the fold line as close as you can get it to the edge of the pliers. Then bend over with your finger, or use the steel ruler. With a piece too large to fit in the pliers, put it on the tile and lay the steel ruler along the fold line, then press firmly down on that and lever the free end of the part up with the edge of your knife. This takes care and some practice too, BTW.

Usually, the idea is that the fold line goes on the inside of the bend, but check the instructions carefully in any case to make sure you’re bending parts the right way — you could end up assembling something as a mirror image of what it’s supposed to be, and it will then be hard to get it back the right way around. Chances are some fold lines will break, for example, and even if they don’t it will be difficult to make everything nice and flat again.

The sandpaper is to rough up the surfaces where the part will be glued. It’s often best to do that while it’s still on the fret, but be careful that you don’t bend the part or even adjacent ones or the whole fret!
 

The Smythe Meister

Born to be WILD....... until about 9pm
SMF Supporter
Joined
Jan 30, 2019
Messages
5,733
Points
113
Location
Devon
First Name
Andy
Don`t do Modern Armour myself,(although i do have a Chieftain in the stash!:nerd:),
But i`m always up for watching an AFV build,and this looks it will be interesting:thumb2:....... no biscuits for me mind thank you.......
........ i`m strictly "Pasty only" ;).
 

Jim R

SMF Supporter
Joined
Apr 27, 2018
Messages
13,735
Points
113
Location
Shropshire
First Name
Jim
I'll follow this build with interest Doug. The kit looks nice and I'm sure if you take it steady the PE will be fine.
 

Waspie

SMF Supporter
Joined
Mar 13, 2023
Messages
2,481
Points
113
Location
Portland - Dorset
First Name
Doug
You don’t need a lot of sophisticated tools for working with etched parts, though some of those can make your life easier. At a minimum, IMHO you need a good knife, flat long-nosed pliers and a small flat file. Something like a glazed tile, a steel ruler and medium-grit sandpaper will also help.

What I normally do is remove a part from the fret by cutting through the tabs that hold it to it with the knife. Do this carefully, and if necessary you can use the steel ruler to press the fret and part flat against your cutting mat when cutting through the tab. Once it’s free, hold it in the pliers so that just the tab and a fraction of a millimetre of the part sticks out, then carefully file off the tab.

If you need to fold parts into shape, you can hole them in the pliers too, with the fold line as close as you can get it to the edge of the pliers. Then bend over with your finger, or use the steel ruler. With a piece too large to fit in the pliers, put it on the tile and lay the steel ruler along the fold line, then press firmly down on that and lever the free end of the part up with the edge of your knife. This takes care and some practice too, BTW.

Usually, the idea is that the fold line goes on the inside of the bend, but check the instructions carefully in any case to make sure you’re bending parts the right way — you could end up assembling something as a mirror image of what it’s supposed to be, and it will then be hard to get it back the right way around. Chances are some fold lines will break, for example, and even if they don’t it will be difficult to make everything nice and flat again.

The sandpaper is to rough up the surfaces where the part will be glued. It’s often best to do that while it’s still on the fret, but be careful that you don’t bend the part or even adjacent ones or the whole fret!
Cor, thanks for taking the time to explain the process so well Jakko, very much appreciated. Whilst not getting to grips with the kit today, I did spend what little time I did manage to sort a few tools that would fit the bill nicely. (I hope). I don't have a metal rule but I do have a metal trimming tool for wallpapering that will suffice.. Also a nice set of snipe nose pliers, a Stanley knife blade.
I am developing a theory that I may put into practice. A 6 inch engineers square which I thought - clamp to bench forming a solid base. Then using the Stanley blade, carefully bend the PE!!
Let you know how I get on with that when I start the PE.
 

Waspie

SMF Supporter
Joined
Mar 13, 2023
Messages
2,481
Points
113
Location
Portland - Dorset
First Name
Doug
Don`t do Modern Armour myself,(although i do have a Chieftain in the stash!:nerd:),
But i`m always up for watching an AFV build,and this looks it will be interesting:thumb2:....... no biscuits for me mind thank you.......
........ i`m strictly "Pasty only" ;).
What do you think I am - A Cornishman!!:smiling2: I'm a Northerner just living in Darset!!! You have two hopes on a Pasty!! And one of them is dead!!! :rolling: :smiling2:
 

The Smythe Meister

Born to be WILD....... until about 9pm
SMF Supporter
Joined
Jan 30, 2019
Messages
5,733
Points
113
Location
Devon
First Name
Andy
What do you think I am - A Cornishman...
I certainly hope not mate... I don't do second rate Pasties...
... EVERYONE knows the best ones are made in Devon,(the original home of them!!), ;)
 

Waspie

SMF Supporter
Joined
Mar 13, 2023
Messages
2,481
Points
113
Location
Portland - Dorset
First Name
Doug
I certainly hope not mate... I don't do second rate Pasties...
... EVERYONE knows the best ones are made in Devon,(the original home of them!!), ;)
Having a flying visit to Devon end of the month!!! Dog sitting and acting local veterinarian!!! I'm 45 miles away but have to go 91 in the car. On a clear day we can see the place!!
 

JR

Member of the Rabble and Pyromania Consultant
SMF Supporter
Joined
May 26, 2015
Messages
17,275
Points
113
Location
lincs
First Name
John
Having a flying visit to Devon end of the month!!! Dog sitting and acting local veterinarian!!! I'm 45 miles away but have to go 91 in the car. On a clear day we can see the place!!
Do you still need a passport to get in Doug ?
 
Top