Steven
SMF Supporter
- Joined
- May 6, 2018
- Messages
- 489
- Points
- 93
- Location
- Frederiksberg Copenhagen, Denmark
- First Name
- Steven
Sounds great to me but as you know iam a sucker for lightingflickering fire e
Sounds great to me but as you know iam a sucker for lightingflickering fire e
... TOVARISCH Dzhon....and spasiba Tovarisch Stevensky.... hahahahahahhahahahhahaha I'm laughing here at loud.. Thanks what a great forum
 That's good ! And agree not one better.
Mister John up and running again! Finally im back so will join for the ride! Great beginning, this will be another stunning project of yours! Best regards Danny
John, I'm ok with a "small fire". It would certainly have a warm lighting effect.
Cheers, Rick H.
Yes will probely get it from JS miniature lighting again..There are HO scale "campfires", flickering electric light, available from model RR shops & on-line. PaulE
Lee.Danny could you please wipe the drool off of PaulE mouth he fell asleep while Mr Race was on sick leave
Steve...... If we lived nearer we could do a jointMind blowing stuff mate. Dio's are not my thing so I shall just watch on in awe as another one of your architectural masterpieces comes ptogether. Permission to carry on
Well it was due in part to your influence and John in Canada that " sparked " the interest.Sounds great to me but as you know iam a sucker for lighting


 - taking shape gradually
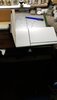
Unfortunately it doesn't come with the blonde hottieGood to see you back at it buddy. It clears the head and keeps us wanting to see more of your fine work. Oh, and I love your sexy hairdryer there too, Dude 2...
Prost
Dude 1
Thanks Jim.......I should have said that if you use KAPA board the paper peels off with out any heat.That would have been my first choice, but I had the other type in stock.Hi John
Looking good. Good progress. Lots of really useful tips on using this board.
So glad that Jack is going to be ok.
Jim
Greg... Thanks mate.WOW John that is super COOOL... love it...i could have done my diorama with this idea... for the next one... I'm really looking forward to see more...
Cheers Paul.John
Great work looking natural already.
Steven .... Don't you just love it, all great fun .At it with the foam again are we ? - me too - great work mate
Hi mate.... I found some half round tube as well for the guttering !!!Keep her moving John, you'll bee up to the rain gutters before you know it.
Cheers, Rick H.
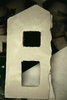
Steven.....How are you getting on with the vertical cuts ? I've found that several cuts going deeper each time makes it easier to produce a good 90 deg cut.Steven .... Don't you just love it, all great fun
It is lining up for the cut
Steve......thanks mate, I find it the best way to relax.Wonderful blog mate. So informative. It makes you want to go out and get some foam board and build something. Despite all your trials and tribulations lately you still have the skills to be able to turn out first class work such as this. Terrific stuff mate


Thanks mate.John,
Looking good the detailing is taking shape.
Steven.....How are you getting on with the vertical cuts ? I've found that several cuts going deeper each time makes it easier to produce a good 90 deg cut.
John.

 the paint and weathering will bring the hole thing to life.
For FULL Forum access you can upgrade your account here UPGRADE