Cheers Chris. Yours is also coming along excellently.I'll be sure to keep watching buddy, your build is turning out gorgeously
- Home
- Forums
- Group Builds
- The New Group Builds (2017 on)
- The User Created Group Builds
- 2022 Builds
- Peter's Spitfire GB: June - Nov 2022
You are using an out of date browser. It may not display this or other websites correctly.
You should upgrade or use an alternative browser.
You should upgrade or use an alternative browser.
Chris' ICM 1/48 Spitfire Mk.IX
- Thread starter langy71
- Start date
As a matter of interest, I've lust checked on prices for the ICM 1/48 Spitfires - even RRP is £14.99, and by shopping around can be found cheaper. As such, for a 1/48 aircraft must be the best value model at the moment!!
Dave
Dave
Great paint job. I really like the distressed look of the invasion stripes.
langy71
SMF Supporter
After a weeks break from this..(bloody work), the decals are finally on, I must say that despite seeing various comments around the web about ICM's decals being a pig to work with, I found them the easiest decals I've ever done, they might be a tad thick, but they settle down beautifully with just a touch of micro set....If i had to find one issue it would be that their decal placement guide is a little bit lacking ..but a quick wander around the web and problem solved....
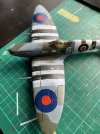
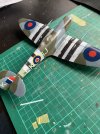
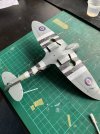
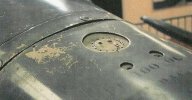
One question though, would the fuel filler cap on the upper fuselage be the same colour as the body or would it have been another colour ? maybe something like aluminium..ish ?


One question though, would the fuel filler cap on the upper fuselage be the same colour as the body or would it have been another colour ? maybe something like aluminium..ish ?
That’s looking very good Chris.
Geoffers
SMF Supporter
Jim R
SMF Supporter
langy71
SMF Supporter
Thanks guys, glad you like her..
Geoff they're just what I needed... cheers.
Geoff they're just what I needed... cheers.
Mark1
SMF Supporter
That's turning out very well. 

Playing ketchup Chris and loving what you've done so far. The scruffy look is fantastic and adds a great used look to her. I only hope I can achieve a similar result on my Mossie for the GB next month. I'll be nicking a lot of your work too, if you don't mind......
Prost
Allen
Prost
Allen
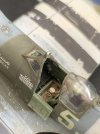
Well that picture has helped me as well Geoff. I wondered what that bit looked like. Mine just had a very hard to deal with fuselage joint in there. I filled it with filler then pushed a drill of approximately the right diameter in to reinstate the hole. Did the same for the keyhole shaped one there was behind it. Not perfect but it will do for me!
langy71
SMF Supporter
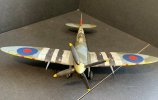
So, after a few touch-ups I'm calling this build finished, thanks once again to Andy @The Smythe Meister for graciously donating this kit.. cheers mate 


 , and thanks to one and all for following along and commenting as she progressed.
Here come the pics.
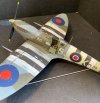
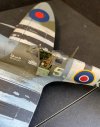
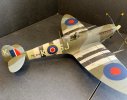
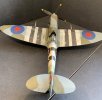
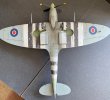
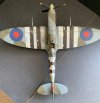
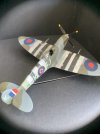
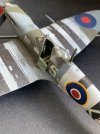
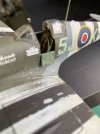
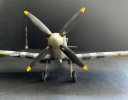
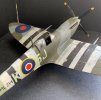
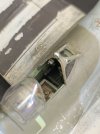


 , and thanks to one and all for following along and commenting as she progressed.
Here come the pics.


Mark1
SMF Supporter
Nice,that looks the part 

That's lovely Chris ....
A cracking finish indeed,love it
Andy
A cracking finish indeed,love it

Andy
Andy the Sheep
SMF Supporter
Very nice, indeed. I love the way the colours have been worn down.
Top modelling.
Andrea

Top modelling.

Andrea
Nicely worn out Chris
Jim R
SMF Supporter
Hi Chris
A great result. I like the used and abused look which I'm sure is a realistic look for a D-Day Spitfire.
Jim
A great result. I like the used and abused look which I'm sure is a realistic look for a D-Day Spitfire.
Jim
That is one of the best Spitfires I've seen. The tired well used look you have achieved is nothing short of brilliant. It looks so good, I can 'smell' the aircraft.

 I'm glad the