- Home
- Forums
- Group Builds
- The New Group Builds (2017 on)
- The User Created Group Builds
- 2023 Builds
- Jakko's Movie/TV star GB: Mar - May '23
You are using an out of date browser. It may not display this or other websites correctly.
You should upgrade or use an alternative browser.
You should upgrade or use an alternative browser.
DaveCov's "Starsky & Hutch Striped Tomato" - Revell 1/25 1976 Ford Torino (07038)
- Thread starter davecov
- Start date
Ernie
SMF Supporter
Yep, Huggy Bear!I remember the series fondly. I always reckoned it was worth watching for Huggy Bear.
Looks a fun kit.


Very nice build so far, I thought about getting this kit as this show was a never miss on Saturday nights when I was a kid! I am enjoying watching your build very much.
Airborne01
SMF Supporter
Was this the programme with the gorgeous girl in short, tight shorts?
Steve
Steve
Andy T
SMF Supporter
You may be thinking of Daisy from The Dukes of Hazzard.Was this the programme with the gorgeous girl in short, tight shorts?
Steve
So iconic that even all these years later her name is used to describe that (tiny) item of clothing

davecov
SMF Supporter
Airborne01
SMF Supporter
Ooooh, that was cruel! (Was that all the footage you could find?) I am deeply indebted, you have made an old man very happy!
davecov
SMF Supporter
Steve, there were so many videos clips that I was spoilt for choice but I haven't the time right now to ensure that they are all suitable for those who may be of a fragile nature. It is going to take me weeks of painstaking "research". I'll let you know how I get on - assuming that I survive the experience!
Dave
Dave
davecov
SMF Supporter
Another update.
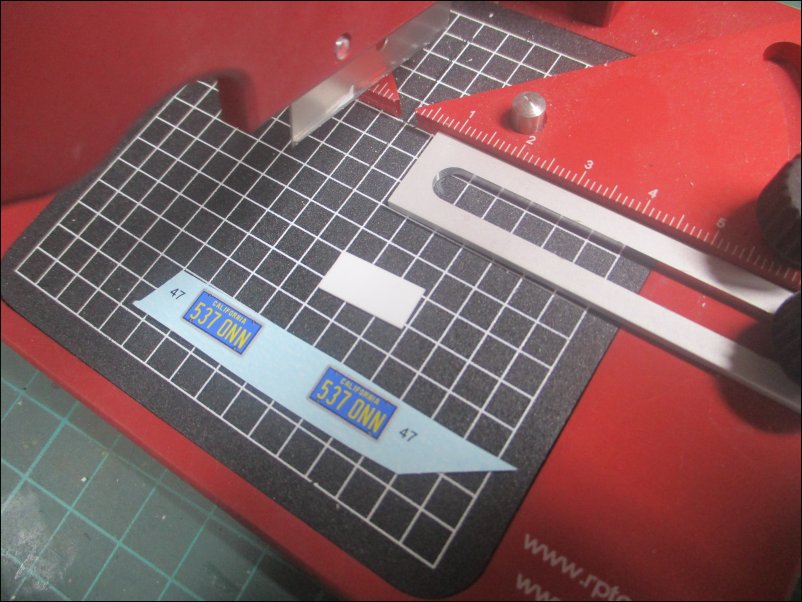
Pictures of the original Ford Torinos used in Starsky & Hutch had registration plates front and rear. The Revell kit has two decals but only one plate to put them on so I cut another one from plastic card:
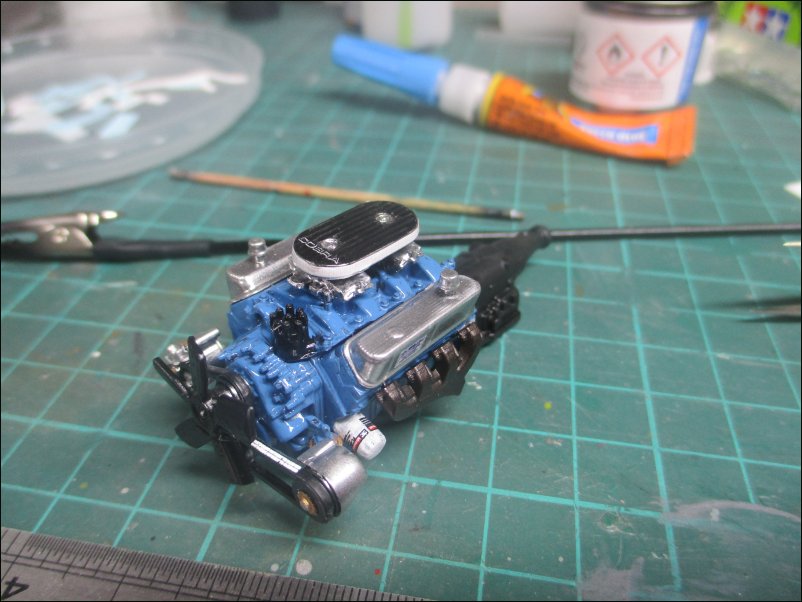
The various engine decals have been applied. I am not sure whether to add spark plug leads or not as my dexterity isn't what it was. I will make a decision in the next few days:
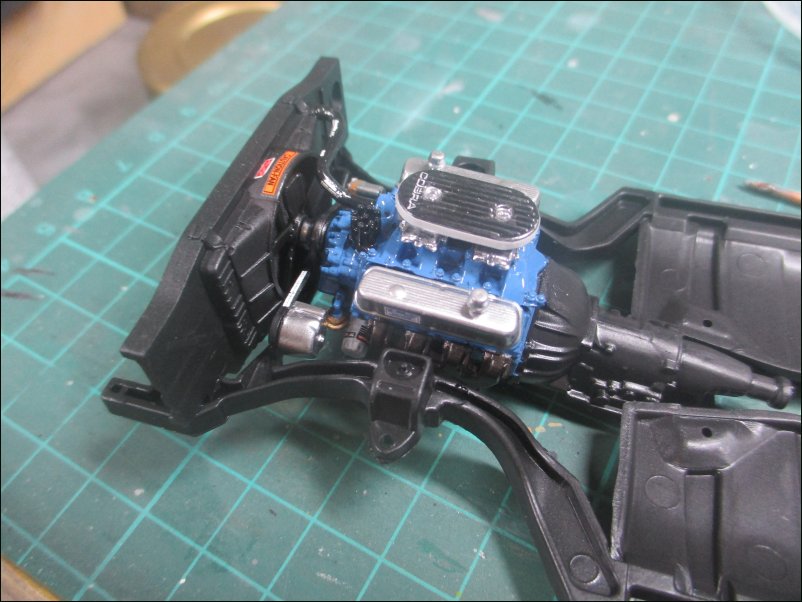
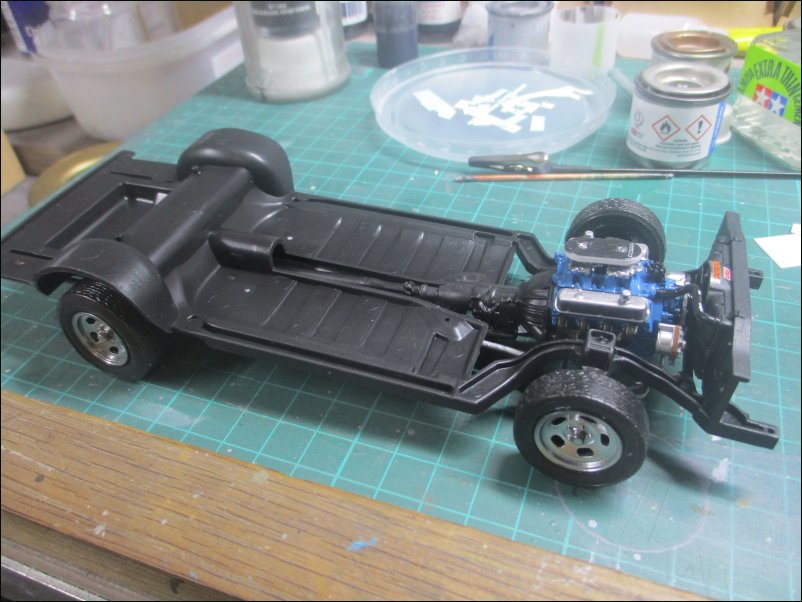
The engine and radiator were fitted to the subframe:
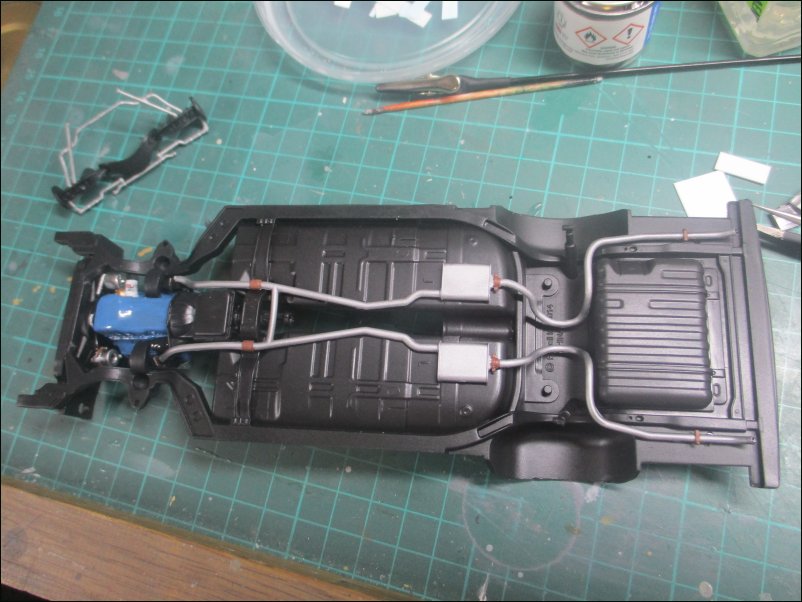
The exhaust system was fitted to the underside of the floorpan:
Front and rear suspension, rear axle and drivedrive shaft fitted:

The wheels have been dry-fitted:
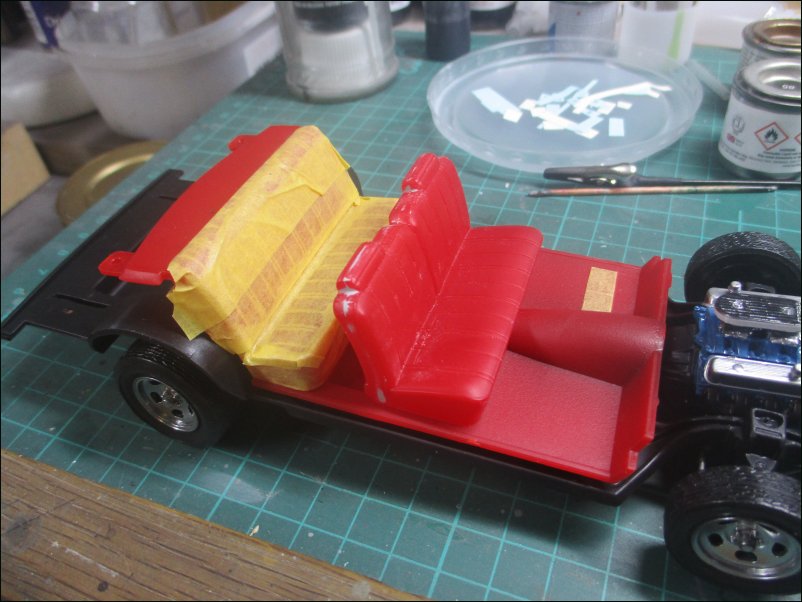
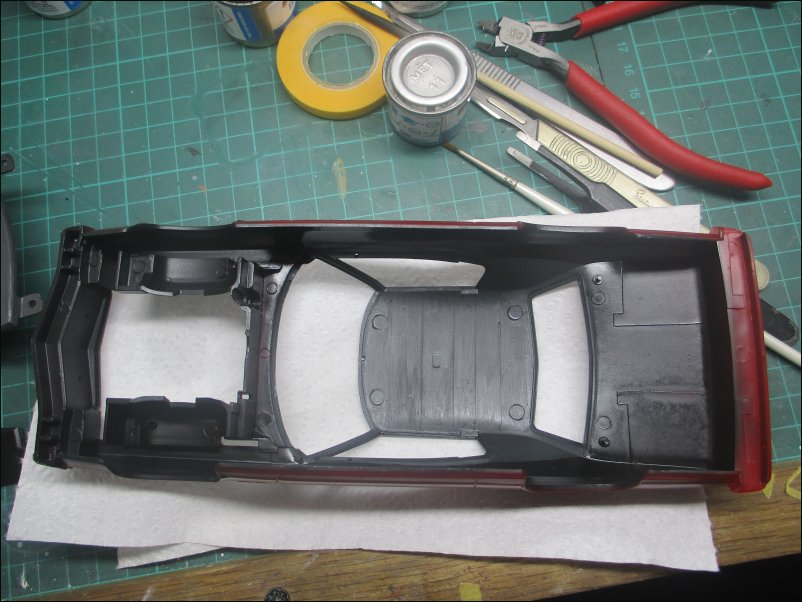
The joins on the front seat halves were filled and sanded. The rear seats have been masked off and the next step will be to paint the grey floor and parcel shelf:
That is all for now.
Dave
Pictures of the original Ford Torinos used in Starsky & Hutch had registration plates front and rear. The Revell kit has two decals but only one plate to put them on so I cut another one from plastic card:
The various engine decals have been applied. I am not sure whether to add spark plug leads or not as my dexterity isn't what it was. I will make a decision in the next few days:
The engine and radiator were fitted to the subframe:
The exhaust system was fitted to the underside of the floorpan:
Front and rear suspension, rear axle and drivedrive shaft fitted:
The wheels have been dry-fitted:
The joins on the front seat halves were filled and sanded. The rear seats have been masked off and the next step will be to paint the grey floor and parcel shelf:
That is all for now.
Dave
Top work dave , iconic motor . Reminds me of seeing a few local lookalikes in the seventies but they were things like morris marinas or datsun cherries with the white stripe painted on , hardly California !! 
Great work so far Dave, coming along very nicely.
davecov
SMF Supporter
More progress to report.
The floorpan and parcel shelf have been painted with H67 Matt Tank Grey. The seats have also been painted with a mix of black and grey:
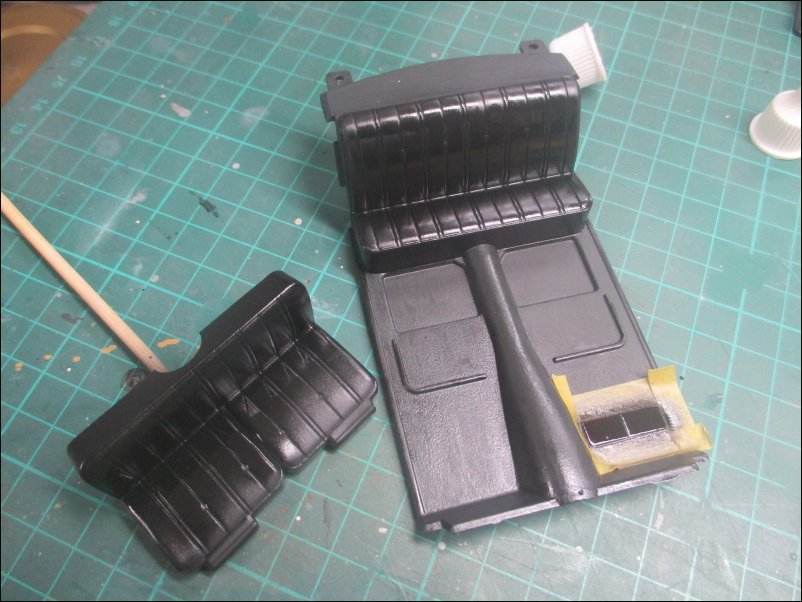
Door panels were also painted with a mix of black and grey. Door handles and window winders were painted H11 Silver:
Roof and pillars was brush painted with H67 Matt Tank Grey:
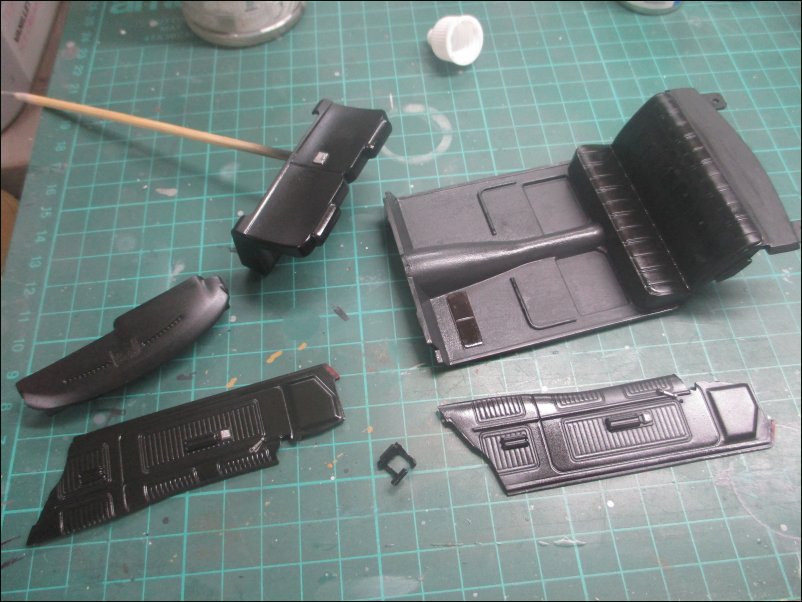
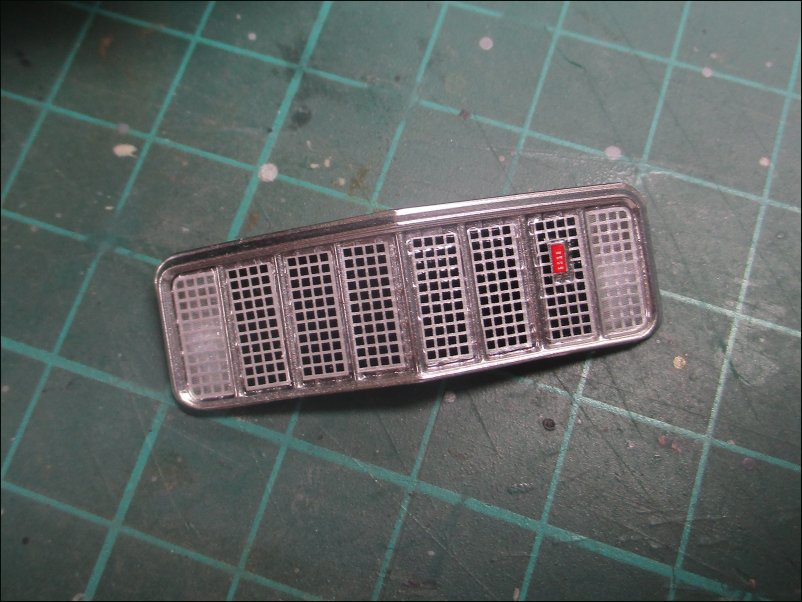
Decals were applied to the radiator grille:
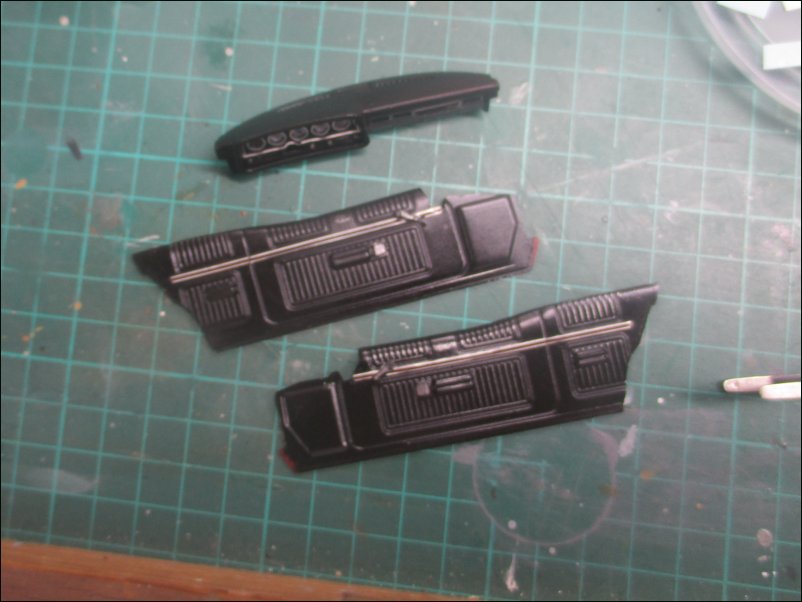
Decals were also applied to the dashboard and door panels:
The door panels, front seats, dashboard were glued to the floor:

That is all for now.
Dave
The floorpan and parcel shelf have been painted with H67 Matt Tank Grey. The seats have also been painted with a mix of black and grey:
Door panels were also painted with a mix of black and grey. Door handles and window winders were painted H11 Silver:
Roof and pillars was brush painted with H67 Matt Tank Grey:
Decals were applied to the radiator grille:
Decals were also applied to the dashboard and door panels:
The door panels, front seats, dashboard were glued to the floor:
That is all for now.
Dave
davecov
SMF Supporter
Another update.
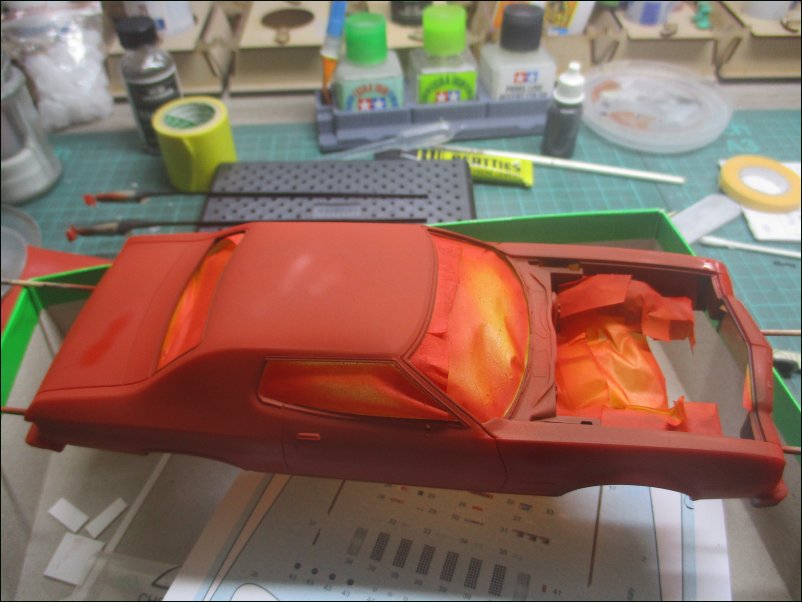
It was finally time to start painting the bodywork. As I had already painted the interior, I had to spend quite a bit of time masking off before I could get my airbrush out:
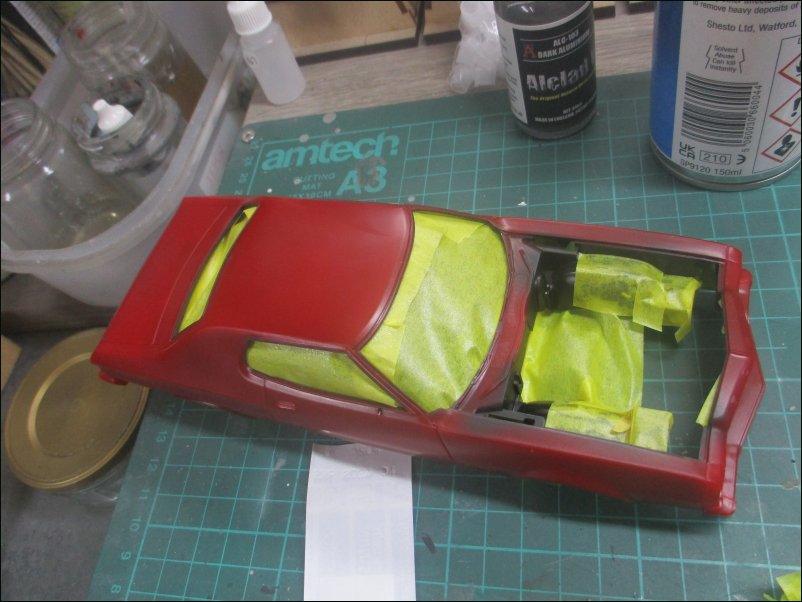
I am applying two or three coats of H60 Matt Scarlet as an undercoat which will be followed by either H19 Gloss Bright Red or H22 Gloss Ferrari Red. I will carry out a test of each colour before making my final decision. The Matt Scarlet hasn't dried yet in this picture:
Bodyshell has got it's first coat too. I will need to apply two more:
That is all for now.
Dave
It was finally time to start painting the bodywork. As I had already painted the interior, I had to spend quite a bit of time masking off before I could get my airbrush out:
I am applying two or three coats of H60 Matt Scarlet as an undercoat which will be followed by either H19 Gloss Bright Red or H22 Gloss Ferrari Red. I will carry out a test of each colour before making my final decision. The Matt Scarlet hasn't dried yet in this picture:
Bodyshell has got it's first coat too. I will need to apply two more:
That is all for now.
Dave
- Joined
- Sep 4, 2019
- Messages
- 9,517
- Points
- 113
- First Name
- Andrew
Dave
Sorry missed the start of this. It's coming on very nicely indeed
How do you get on with Humbrol paints through an AB. A lot of people including me from what I have found them to very hit and miss..... sometimes fine but often not. If no issues, what's your secret!!
ATB.
Andrew
Sorry missed the start of this. It's coming on very nicely indeed
How do you get on with Humbrol paints through an AB. A lot of people including me from what I have found them to very hit and miss..... sometimes fine but often not. If no issues, what's your secret!!
ATB.
Andrew
davecov
SMF Supporter
Hi Andrew @adt70hk,
I rarely have an issue using Humbrol enamels with any of my airbrushes irrespective of the Humbrol enamels being ones I have had for almost 20 years or just purchased last week. I find that the latest Humbrol enamels spray beautifully.
I normally mix Humbrol enamels to a 50-50 ratio using their thinners only. I never use different manufacturer's thinners with different paints (e.g. Revell thinners with Humbrol paints) and never use white spirit. Lots of thin coats is better than one thick coat.
I also strip and clean the airbrush after each colour which might sound over the top but it is a routine I am used to now.
Dave
Last edited:
- Joined
- Sep 4, 2019
- Messages
- 9,517
- Points
- 113
- First Name
- Andrew
Got it!! Thought you might have been using their acrylics..... Thanks again.Hi Andrew @adt70hk,
I rarely have an issue using Humbrol enamels with any of my airbrushes irrespective of the Humbrol enamels being ones I have had for almost 20 years or just purchased last week. I find that the latest Humbrol enamels spray beautifully.
I normally mix Humbrol enamels to a 50-50 ratio using their thinners only. I never use different manufacturer's thinners with different paints (e.g. Revell thinners with Humbrol paints) and never use white spirit. Lots of thin coats is better than one thick coat.
I also strip and clean the airbrush after each colour which might sound over the top but it is a routine I am used to now.
Dave
Andrew
davecov
SMF Supporter
Another update.
The second coat of H60 Matt Scarlet applied to the bonnet:
And to the bodyshell:
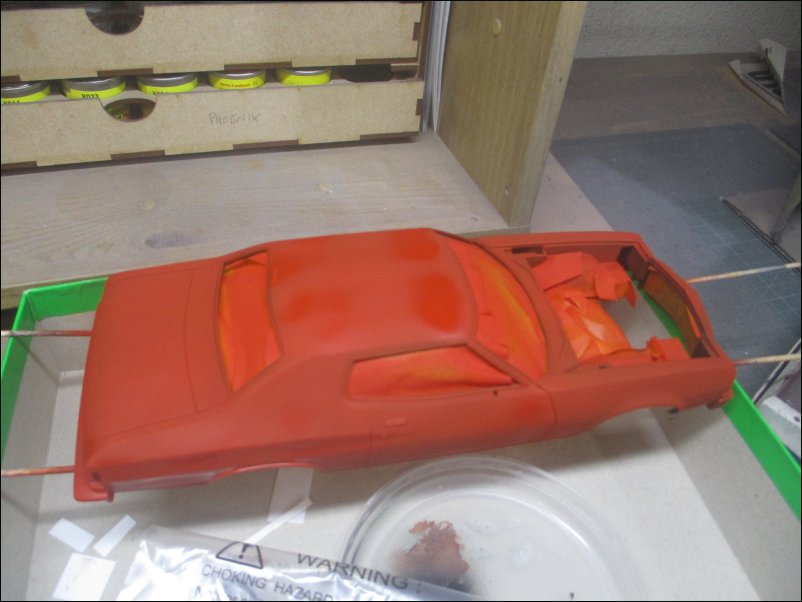
The third coat of H60 Matt Scarlet applied to the bonnet:
And the same to the bodyshell:
I will be leaving the bodyshell and bonnet paint to cure for a couple of days before I do anything more with them. In the meantime I hope to get the edges of the window transparencies masked and painted.
That is all for now.
Dave
The second coat of H60 Matt Scarlet applied to the bonnet:
And to the bodyshell:
The third coat of H60 Matt Scarlet applied to the bonnet:
And the same to the bodyshell:
I will be leaving the bodyshell and bonnet paint to cure for a couple of days before I do anything more with them. In the meantime I hope to get the edges of the window transparencies masked and painted.
That is all for now.
Dave
davecov
SMF Supporter
More painting to report.
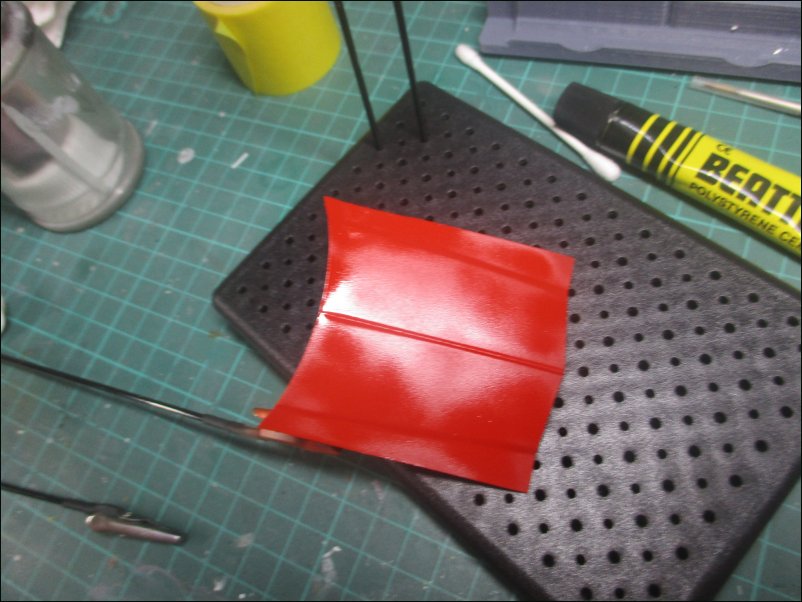
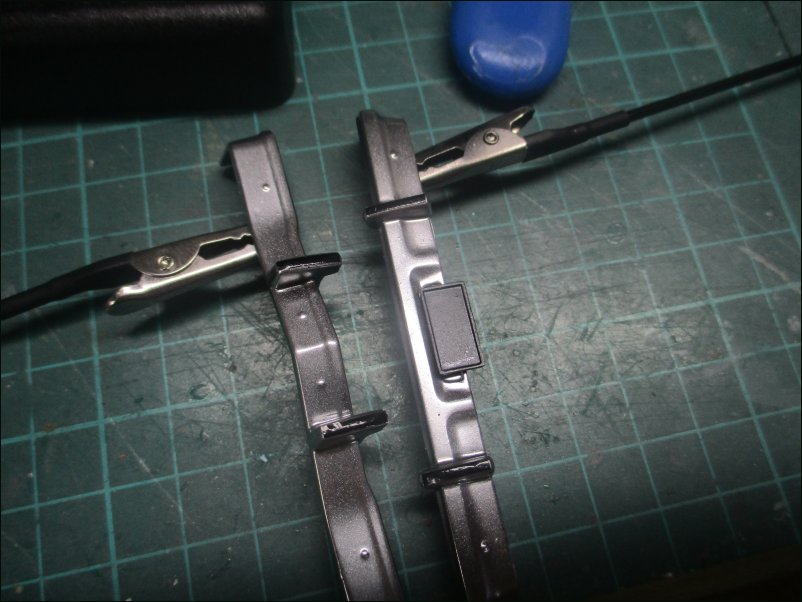
Rather than paint the "rubber" on the bumper overriders, I used black stripe decals. Unfortunately, the striping has proved to be prone to damage so I will have to reapply some new ones at the very end of the build:
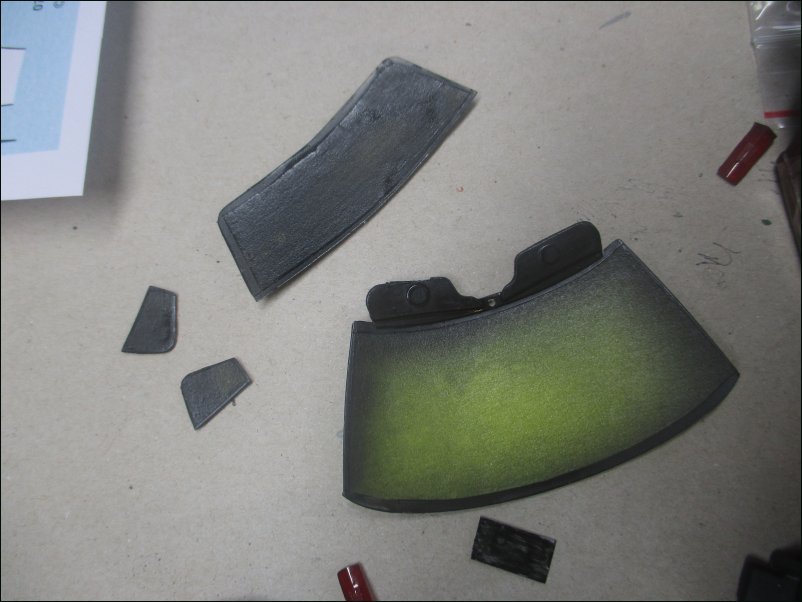
Windows were masked ready for painting with H21 Satin Black:
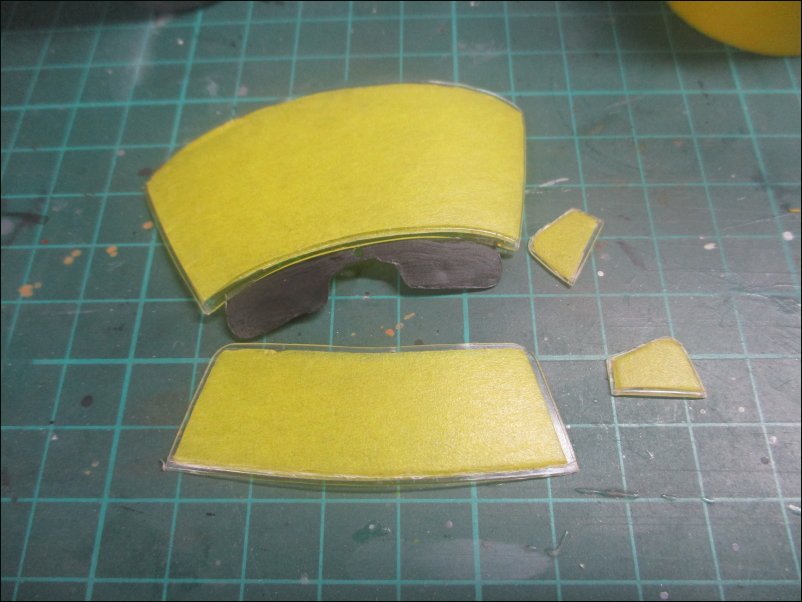
Then they were painted:
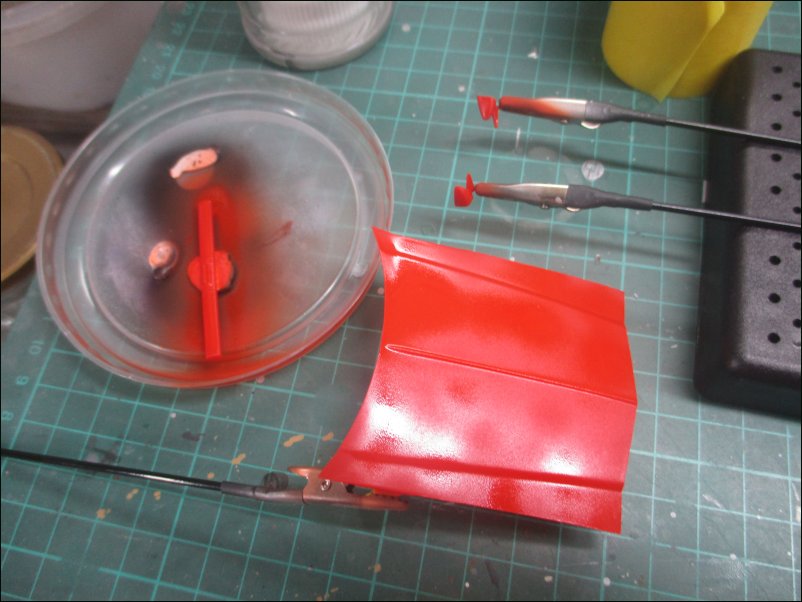
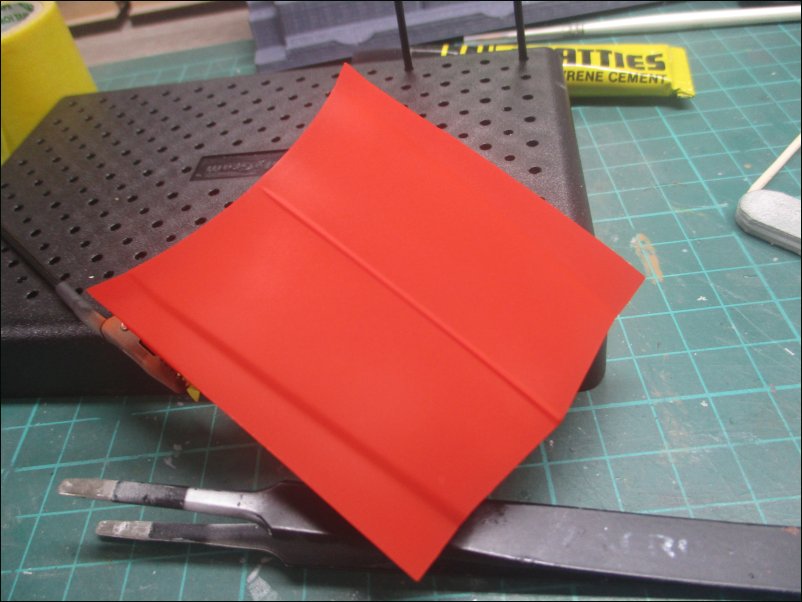
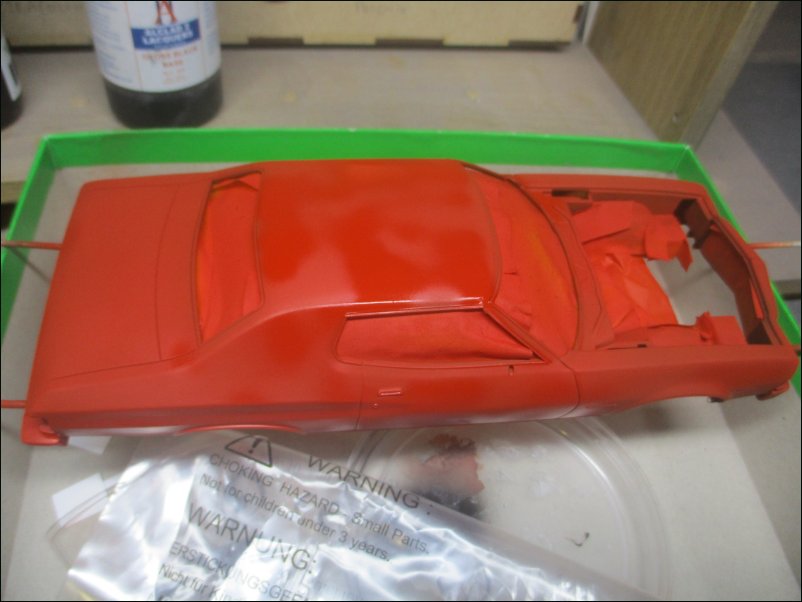
I hadn't intended to paint the bodyshell and bonnet for another day or so but while testing the H220 Gloss Ferrari Red on the underside of the bonnet I decided that I would use it for the whole car:
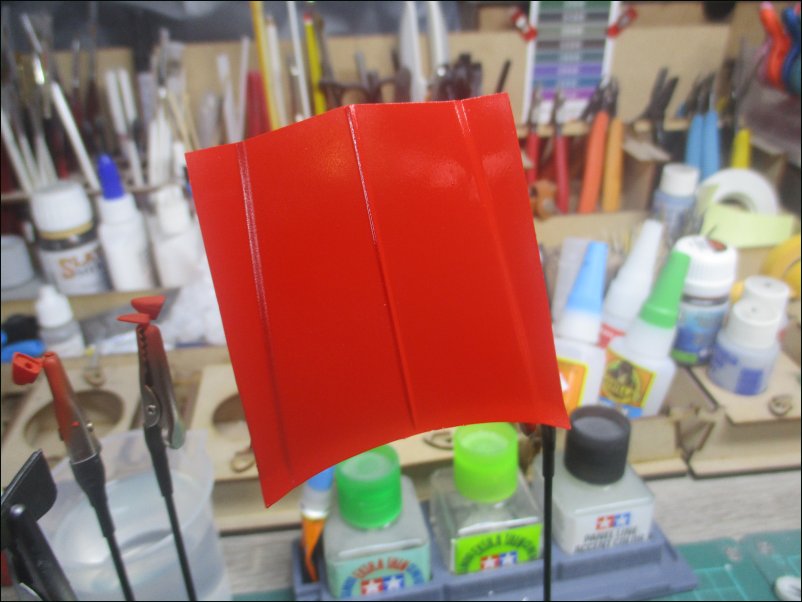
First coat of H220 Gloss Ferrari Red applied:
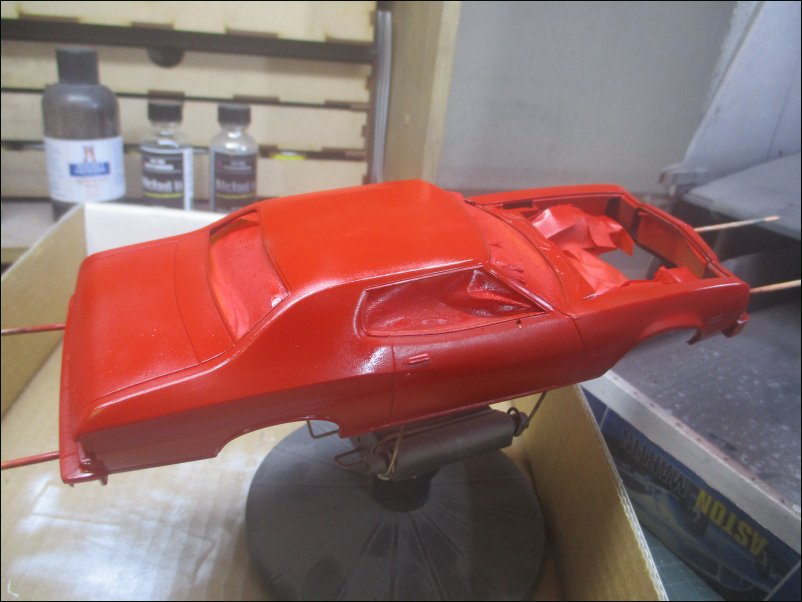
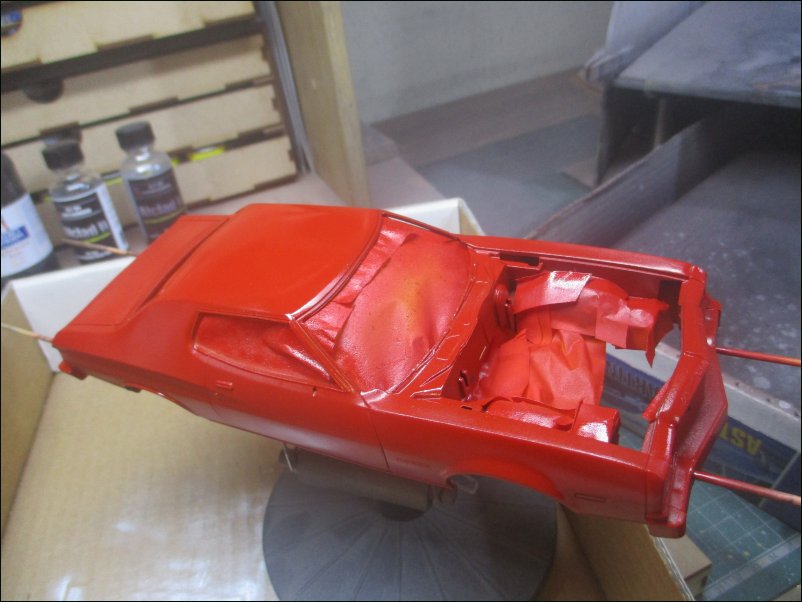
Another view. It looks pretty good but it will get at least one more coat:
That is all for now.
Dave
Rather than paint the "rubber" on the bumper overriders, I used black stripe decals. Unfortunately, the striping has proved to be prone to damage so I will have to reapply some new ones at the very end of the build:
Windows were masked ready for painting with H21 Satin Black:
Then they were painted:
I hadn't intended to paint the bodyshell and bonnet for another day or so but while testing the H220 Gloss Ferrari Red on the underside of the bonnet I decided that I would use it for the whole car:
First coat of H220 Gloss Ferrari Red applied:
Another view. It looks pretty good but it will get at least one more coat:
That is all for now.
Dave
Going along well Dave. Becoming more recognisable with every update.