Dzhon's KV2 Trumpeter 1/35 SCALE

JR

Member of the Rabble and Pyromania Consultant
SMF Supporter
Joined
May 26, 2015
Messages
17,333
Points
113
Location
lincs
First Name
John
More exciting things on the base.

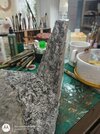
The first thing to do is rough up the Foam Board to give the Sculptamold a key . Followed by an application of full strength PVA.
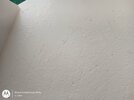
2022_2.jpg

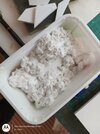
I allow this about 15mins to start to skin and then add another small amount to some Sculptamold .
2022_3.jpg
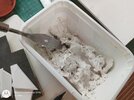
Then add some COLD water ( I used warm once only to find the heat caused a reaction with the plaster and set if hard before I was ready :smiling3: )

2022_4.jpg
Mixed up well , adding more water if you want a very thin coat, but remember the more water you add the longer it takes to dry.
2022_5.jpg
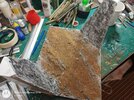
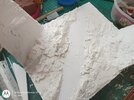
Then apply as required, I've left the center as this will have a very thin coat of filler with some sand added to form the river bed. Yes I know little will be seen if I add to much snow, so have decided to just add a little when the time comes.

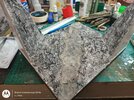
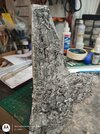
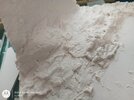
Close up of one side .
2022_6.jpg
Still a lot to do to this, forming the rock base as the layers are built up.

Left to dry fully before any more additions, so while that takes place I'll carry on with the tracks.
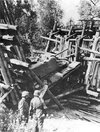
I've some Basswood on- order and tomorrow while gardening I hope to find some suitable lengths of round stock for the massive timbers.

This is the actual photo I'm using showing a KV1 .
05987d99bef7d8f8013da5f60293a0ab WOODERN BRIDGE.jpg


Thanks for looking in, comments welcome.

John.
 

stillp

SMF Supporter
Joined
Nov 17, 2016
Messages
7,234
Points
113
Location
Rugby
First Name
Pete
Great photo John! Looking forward to seeing the completed dio.
Pete
 
  • Like
Reactions: JR

adt70hk

I know its a bit sad but I like quickbuild kits!!!
SMF Supporter
Joined
Sep 4, 2019
Messages
9,517
Points
113
First Name
Andrew
Coming on very nicely John. Can only imagine the surprise the crew got when the bridge gave way!!!

Keep up the great work.

Andrew
 
  • Like
Reactions: JR

JR

Member of the Rabble and Pyromania Consultant
SMF Supporter
Joined
May 26, 2015
Messages
17,333
Points
113
Location
lincs
First Name
John
Great photo John! Looking forward to seeing the completed dio.
Pete
Thanks Peter.
Coming on very nicely John. Can only imagine the surprise the crew got when the bridge gave way!!!

Keep up the great work.

Andrew
Hi Andrew, thanks ,bet there was some swearing when it happened .

Looks like their "TinkerToy" bridge couldn't handle the strain JR :tongue-out3: "Fritz" is telling "Hans"....."Ve should haf used der bigger shtir shtiks from der Shtarbucks Caffe Shoppe! ;) Rick H.
Rick think the Germans were glad they weren't on the bridge at the time being chased by the KV1.

Certainly a case of 'Whoops - what was that bridge weight restriction again??!!'
Ha, and the amount of form filling for replacing the tank !

Looks like Hans is a motorcyclist.
:thumb2::smiling2::smiling2::smiling2::smiling2:
 

Mickc1440

SMF Supporter
Joined
Apr 27, 2018
Messages
4,294
Points
113
Location
Sheffield
First Name
Mick
Interesting start JR really looking forward to watching this come together.
 
  • Like
Reactions: JR

Jim R

SMF Supporter
Joined
Apr 27, 2018
Messages
13,789
Points
113
Location
Shropshire
First Name
Jim
Hi John
That is so useful. A picture is worth a thousand words. I agree with the others that another stunning dio is coming up.
Do you always use PVA for sticking the foam?
Jim
 
  • Like
Reactions: JR

JR

Member of the Rabble and Pyromania Consultant
SMF Supporter
Joined
May 26, 2015
Messages
17,333
Points
113
Location
lincs
First Name
John
Hi John
That is so useful. A picture is worth a thousand words. I agree with the others that another stunning dio is coming up.
Do you always use PVA for sticking the foam?
Jim
Hi Jim, I only use the PVA as an addition to the actual texture on the foam board .
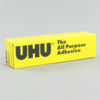
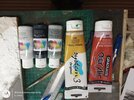
As to gluing the board it's self I use
1646293168194.png
I find this is the best glue for the actual edge gluing of the foam, some say you can use PVA or the normal UHU
1646293275288.png

I don't want to risk trying any other as it might fall apart ! :smiling2:.Hope this helps .
 

scottie3158

SMF Supporter
Joined
Apr 27, 2018
Messages
12,754
Points
113
Location
Spalding
First Name
Paul
I am really looking forward to seeing this come together my friend. Your off to a great start.
 
  • Like
Reactions: JR

JR

Member of the Rabble and Pyromania Consultant
SMF Supporter
Joined
May 26, 2015
Messages
17,333
Points
113
Location
lincs
First Name
John
Thanks John
I have some of the UHU por stuff.
Jim
Great Jim, I remember reading an article by David Neat on the 4D model shop how to page .He talks about the different foams used and what the best glue is best for them .

I am really looking forward to seeing this come together my friend. Your off to a great start.
Thanks Paul, soon the build up the bridge up so stay tuned .
 

Graeme C.

SMF Supporter
Joined
Apr 29, 2018
Messages
1,485
Points
113
First Name
Graeme
Just had a catch up John, a useful step by step on the foam board, that photo certainly gives you something to aim for.:thumb2:
 
  • Like
Reactions: JR

JR

Member of the Rabble and Pyromania Consultant
SMF Supporter
Joined
May 26, 2015
Messages
17,333
Points
113
Location
lincs
First Name
John
Just had a catch up John, a useful step by step on the foam board, that photo certainly gives you something to aim for.:thumb2:
Hi Graeme, thank you , some photos to follow on that.
 

JR

Member of the Rabble and Pyromania Consultant
SMF Supporter
Joined
May 26, 2015
Messages
17,333
Points
113
Location
lincs
First Name
John
Good evening all.
Much has been achieved on the base.


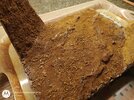
The first thing was to apply a black wash. A spray with IPA mix at 3to 1 than applied.

2022_16.jpg2022_17.jpg2022_18.jpg

Left that to dry and then using thinned PVA, with a dash of washing up liquid watered down this was brushed on.
Followed by a coating of light brown sand, this was them lightly brushed on the vertical sides.
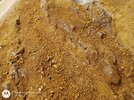
More glue mix after an hr or so on then a different application of a very light dust and stone, again brushed down from the top verticals

2022_19.jpg2022_22.jpg2022_23.jpg

Still allows a little of the first black wash on the Sculptymold to show through. Ill brush this again when fully dry to remove any loose material.
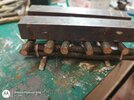
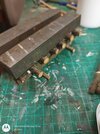
As this dried I started on the bridge.

2022_20.jpg2022_21.jpg
Going to build another one as this for the opposite side, next will be the cutting of planking .

Loads to do on the base with some detailing.

Thanks for looking in and the comments.

John.
 

Attachments

  • 2022_15.jpg
    2022_15.jpg
    199.2 KB · Views: 3

Jim R

SMF Supporter
Joined
Apr 27, 2018
Messages
13,789
Points
113
Location
Shropshire
First Name
Jim
Great stuff John. Very interesting to see how you go about it.
Jim
 
  • Like
Reactions: JR
Top