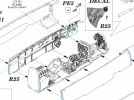
Eduard 1/48 Bf 110E

Tim Marlow

Little blokes aficionado
SMF Supporter
Joined
Apr 27, 2018
Messages
16,874
Points
113
Location
Somerset
First Name
Tim
I’m with Andy S on this….not too keen on starting mine anytime soon either now. You are hammering it into shape though Andy, keep going. Once you get the primer on it will transform the appearance.

Don’t let it put you off Eduard kits though, the Zero I built for the recent Japanese GB was probably the best kit I’ve ever built. It’s a much newer kit, but everything about it was top drawer.
 

Andy T

SMF Supporter
Joined
Apr 26, 2021
Messages
2,054
Points
113
Location
Sheffield
First Name
Andy
..... Blimey!!
This isn't exactly getting me keen to build my one.... what a nightmare!!:astonished:
The disappointment is real mate. I've wanted to build this kit for a while but it's not going as I would like.

Let's hope the '72 version is better :smiling3:

I might even build them side by side to compare. That would be something new for me.

I’m with Andy S on this….not too keen on starting mine anytime soon either now. You are hammering it into shape though Andy, keep going. Once you get the primer on it will transform the appearance.

Don’t let it put you off Eduard kits though, the Zero I built for the recent Japanese GB was probably the best kit I’ve ever built. It’s a much newer kit, but everything about it was top drawer.
Cheers Tim. As I say, I won't judge them on this one build.

If I'd done that with Tamiya after throwing their Harrier in the bin I'd have missed out on many amazing kits :thumb2:
 

Stefee

SMF Supporter
Joined
Feb 12, 2023
Messages
212
Points
93
Location
HemelHempstead
First Name
Stefan
Luckily building cars does not seem to throw up these trials and tribulations that you are experiencing with this build but keep on with it as your skills will make this a build to be proud of, ditched,crashed or flying.
 

Tim Marlow

Little blokes aficionado
SMF Supporter
Joined
Apr 27, 2018
Messages
16,874
Points
113
Location
Somerset
First Name
Tim
The disappointment is real mate. I've wanted to build this kit for a while but it's not going as I would like.

Let's hope the '72 version is better :smiling3:

I might even build them side by side to compare. That would be something new for me.


Cheers Tim. As I say, I won't judge them on this one build.

If I'd done that with Tamiya after throwing their Harrier in the bin I'd have missed out on many amazing kits :thumb2:
Don’t go for their 1/48 Mosquito then Andy, I found building it very like what you are going through now……lots of fettling, filling, and rescribing…..
Probably a bit late for you now, but I did find it useful to deepen the panel lines as I sanded and smoothed out the filler in the joints. Much easier than sanding them right off then trying to rescribe them afterwards because they act as guidelines.
 

Magneto

Oberleutnant
SMF Supporter
Joined
Oct 25, 2023
Messages
296
Points
63
Location
Sky
First Name
Paul
Indeed. I got this bird in both 48 and 72. SometImes I think the ‘weekend’ kits are quite satisfactory. The only thing is you don’t get the masks. If you buy the masks then you might as well get the ‘profi’ kit. But here is a stage further for the zealots :smiling3:

IMG_3486.png
 

Magneto

Oberleutnant
SMF Supporter
Joined
Oct 25, 2023
Messages
296
Points
63
Location
Sky
First Name
Paul
Wrestled some of the etch dials into the sides of the fuselage:

View attachment 495368

And some more above the gunners area. The decals for the radio gear etc looked cartoon-ish so I removed them and did a bit of painting / dry brushing instead:

View attachment 495369

IP and twiddly stick were added in the office and the seat belts were constructed & fitted:

View attachment 495370

I'll throw some muck & dust around then this can be closed up and hope it still fits in the fuselage.
Your painted radios are the ‘profikit’ version to the ‘profikit‘ etch. That’s what I’m saying - sometimes it’s unnecessary and I agree about the cartoonesque appearance of those colour PE parts. I don’t like the idea of someone else doing the painting for me (why not the whole cockpit? A 3d print already painted ‘drop in’ cockpit?). Plus the Painted PE looks very grainy and unnatural.
 
Last edited:

Jim R

SMF Supporter
Joined
Apr 27, 2018
Messages
13,841
Points
113
Location
Shropshire
First Name
Jim
Well Andy she's fighting you all the way. Cockpit looks really nice. The fuselage joins etc are indeed poor but patience will get it sorted. Panel line scribing is indeed difficult but your efforts look neat. How do you go about rescribing rivets?
 

Andy T

SMF Supporter
Joined
Apr 26, 2021
Messages
2,054
Points
113
Location
Sheffield
First Name
Andy
Thanks Jim.

I have a cheap rivet roller tool thing but it doesn't inspire confidence as it wobbles around more than my hands :smiling5: so I'll probably just poke them individually with a scribing point.

There hand painted radios are the ‘profikit’ version to the ‘profikit‘ etch. That’s what I’m saying - sometimes it’s unnecessary and I agree about the cartoonesque appearance of those colour PE parts. I don’t like the idea of someone else doing the painting for me (why not the whole cockpit? A 3d print already painted ‘drop in’ cockpit?). Plus the Painted PE looks very grainy and unnatural.
Bright white decals in this kit.
 

Magneto

Oberleutnant
SMF Supporter
Joined
Oct 25, 2023
Messages
296
Points
63
Location
Sky
First Name
Paul
I was meaning the IP - very grainy. I think they are all like that. Don’t get me wrong I’ve got a lot of these profikits but from time to time I scratch my big bald (I said ‘bald’ lmao!) and wonder if by scrapping off all that great detail only to replace it with some clunky, spiky PE I am not somehow defacing the kit. I’ve seen some brilliant paint jobs on the plastic IPs that look much better than the PE versions.
 
Last edited:

Magneto

Oberleutnant
SMF Supporter
Joined
Oct 25, 2023
Messages
296
Points
63
Location
Sky
First Name
Paul
Thanks Jim.

I have a cheap rivet roller tool thing but it doesn't inspire confidence as it wobbles around more than my hands :smiling5: so I'll probably just poke them individually with a scribing point.


Bright white decals in this kit.
......you have a bed in yours?!!!......
..... Lucky you!!:astonished::tears-of-joy:
For the time being…I have even started culling some kits on eBay. I keep saying ‘No more! You - shall - not - pass!’ before throwing my magic Debit card on the ground. But somehow they just keep getting through.
 
Last edited:

Tim Marlow

Little blokes aficionado
SMF Supporter
Joined
Apr 27, 2018
Messages
16,874
Points
113
Location
Somerset
First Name
Tim
Thanks Jim.

I have a cheap rivet roller tool thing but it doesn't inspire confidence as it wobbles around more than my hands :smiling5: so I'll probably just poke them individually with a scribing point.


Bright white decals in this kit.
Poking them with a scriber is exactly what I do Andy. Never liked those pounce wheels. Have confidence…..it works ;)
 

Tim Marlow

Little blokes aficionado
SMF Supporter
Joined
Apr 27, 2018
Messages
16,874
Points
113
Location
Somerset
First Name
Tim
There hand painted radios are the ‘profikit’ version to the ‘profikit‘ etch. That’s what I’m saying - sometimes it’s unnecessary and I agree about the cartoonesque appearance of those colour PE parts. I don’t like the idea of someone else doing the painting for me (why not the whole cockpit? A 3d print already painted ‘drop in’ cockpit?). Plus the Painted PE looks very grainy and unnatural.
I was meaning the IP - very grainy. I think they are all like that. Don’t get me wrong I’ve got a lot of these profikits but from time to time I scratch my big bald (I said ‘bald’ lmao!) and wonder if by scrapping off all that great detail only to replace it with some clunky, spiky PE I am not somehow defacing the kit. I’ve seen some brilliant paint jobs on the plastic IPs that look much better than the PE versions.
Don’t really agree with most of this I’m afraid. Yes, the finish can be a bit grainy, and they may be a little simplistic, but then so are most plastic cockpit parts. They are far sharper than the vast majority of modellers can achieve with a brush, and kit decals for this sort of thing, especially for IPs, are pretty poorly designed and look even worse when added. Very few kits include seat belts as well, so adding them this way is the least painful option. The newer 3D printed parts are even sharper, by the way. As to “Someone else doing your painting”, do you use decals? If so, what’s the difference? I see these parts as just solid decals that add to a build, nothing more.
I’ve made models both ways, including hand lettering railway stock when suitable transfers were not available, and find using these sort of add ons, along with painting masks, can save a good number of hours in the build that are better used elsewhere. After all, most internal detail is barely visible once the canopy goes on…..
 
Last edited:

Magneto

Oberleutnant
SMF Supporter
Joined
Oct 25, 2023
Messages
296
Points
63
Location
Sky
First Name
Paul
Don’t really agree with most of this I’m afraid. Yes, the finish can be a bit grainy, and they may be a little simplistic, but then so are most plastic cockpit parts. They are far sharper than the vast majority of modellers can achieve with a brush, and kit decals for this sort of thing, especially for IPs, are pretty poorly designed and look even worse when added. Very few kits include seat belts as well, so adding them this way is the least painful option. The newer 3D printed parts are even sharper, by the way. As to “Someone else doing your painting”, do you use decals? If so, what’s the difference? I see these parts as just solid decals that add to a build, nothing more.
I’ve made models both ways, including hand lettering railway stock when suitable transfers were not available, and find using these sort of add ons, along with painting masks, can save a good number of hours in the build that are better used elsewhere. After all, most internal detail is barely visible once the canopy goes on…..
I agree with your disagreement lol

I don’t mean the actual dials - (I mean they’re great although a little subdued? I think the dry brush with white paint is a little brighter.)

I was meaning the actual IP face - it looks like some kind of 70s wallpaper. The painted (base coat) Matt black seems to accentuate the white dials a little more.

That being said I’m only pointing to 72 and 48. At 32 and higher I think these PE sets come into their own. On 5he smaller scales I see the IP as more effect than exactitude.

I must say that I have PE kits and resin but….I’ll carry with comment on the 3d post

edit: you make some good points. I felt it necessary to comment on the 3D thread because this is where I feel this is leading to. There I mention that only a pure scratch builder is a true modeller - so yes, we all use something. Are we like sportsman on peds? :smiling6: As for the decals I haven’t used them for 30 years - Im in a build at the mo but I would prefer to stencil as its not like an aircraft so for that I will be using decals (Peds?)

Im just not overly impressed with the PE - the resin maybe because I haven’t used it yet. That PE box that Andy painstakingly built I think I would have left the kit version or scratched it. And those minute T bar twist handles are crazy small. I dumped mine! (my next build will be an Eduard profi Bf 109 so do tune in if able). I dunno - I try to sit somewhere in the centre of ‘elite Jedi pure scratch builder’ and Mr AM/3D
 
Last edited:

yak face

Wossupwidee?
Staff member
Moderator
SMF Supporter
Joined
Jun 13, 2009
Messages
12,443
Points
113
Location
sheffield
First Name
tony
Great progress andy , despite the kits resistance! Cockpit looks great , are you doing the box art scheme ? If so I wouldnt worry too much about reinstating the nose section joint lines after sanding , the big wasp decal will cover most of it up.
 

The Smythe Meister

Born to be WILD....... until about 9pm
SMF Supporter
Joined
Jan 30, 2019
Messages
5,812
Points
113
Location
Devon
First Name
Andy
I agree with your disagreement lol

I don’t mean the actual dials - (I mean they’re great although a little subdued? I think the dry brush with white paint is a little brighter.)

I was meaning the actual IP face - it looks like some kind of 70s wallpaper. The painted (base coat) Matt black seems to accentuate the white dials a little more.

That being said I’m only pointing to 72 and 48. At 32 and higher I think these PE sets come into their own. On 5he smaller scales I see the IP as more effect than exactitude.

I must say that I have PE kits and resin but….I’ll carry with comment on the 3d post

edit: you make some good points. I felt it necessary to comment on the 3D thread because this is where I feel this is leading to. There I mention that only a pure scratch builder is a true modeller - so yes, we all use something. Are we like sportsman on peds? :smiling6: As for the decals I haven’t used them for 30 years - Im in a build at the mo but I would prefer to stencil as its not like an aircraft so for that I will be using decals (Peds?)

Im just not overly impressed with the PE - the resin maybe because I haven’t used it yet. That PE box that Andy painstakingly built I think I would have left the kit version or scratched it. And those minute T bar twist handles are crazy small. I dumped mine! (my next build will be an Eduard profi Bf 109 so do tune in if able). I dunno - I try to sit somewhere in the centre of ‘elite Jedi pure scratch builder’ and Mr AM/3D
I've got that 109 kit in the stash too,so I'll be looking out for your build when you get round to it :thumb2:.
 
Top