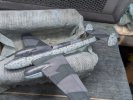
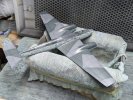
Eduard 1/48 Bf 110E

Allen Dewire

Proud Rabble Member
SMF Supporter
Joined
Apr 27, 2018
Messages
4,122
Points
113
Location
Bamberg
First Name
Allen
I'll be danged Andy!!! You whipped that baby into shape and she's looking great in black. I imagine it was nerve wracking, but the result was worth it Buddy!!! Do you scrape off the primer on the attachment points before gluing, or do you use CA to stick the parts on? Just curious...

Prost
Allen
 

Andy T

SMF Supporter
Joined
Apr 26, 2021
Messages
2,054
Points
113
Location
Sheffield
First Name
Andy
Undercarriage is almost always fiddly and awkward. Any attempt to make it scale accurate results in it being rather fragile as well. Also for good measure it it already painted which does add to the issue. Good luck
Thanks Jim, I need it with my lack of experience and this kit :smiling5:

For this I chose to assemble the gear unpainted actually. With the tiny & vague mounting points I figured a slow cement would give me the extra time needed to jiggle it all something like straight. It was built in situ but not actually glued to the model (if that makes sense). Hopefully now it's set I can reinforce the joints with a bit of CA then paint as an assembly.
I'll be danged Andy!!! You whipped that baby into shape and she's looking great in black. I imagine it was nerve wracking, but the result was worth it Buddy!!! Do you scrape off the primer on the attachment points before gluing, or do you use CA to stick the parts on? Just curious...

Prost
Allen
Cheers Allen, it's getting there.

It's only a thin coat to show up any faults so the belly section got a quick sand but the wing points were just cemented on top. The TET burned through easily enough for something that isn't taking much load.
 

Andy T

SMF Supporter
Joined
Apr 26, 2021
Messages
2,054
Points
113
Location
Sheffield
First Name
Andy
Man I hate this kit :tears-of-joy:

Props to you guys that do this all the time and actually enjoy it. I just can't wait for the ordeal to be over :smiling3:

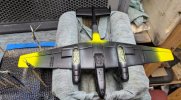
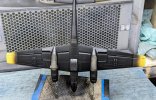
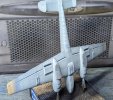
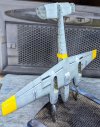
I thought I'd skip ahead to some painting and rekindle the flame but that didn't go to plan either. I painted the yellow bits no problem but while spraying the gear bays I dropped the plane, knocking the airbrush out of my hand which slopped RLM02 all over the rear of the fuselage. Luckily it missed the yellow band and a quick but gentle mop up saved too much further damage.

1000005427.jpg

It's jinxed I tell you, jinxed! :tears-of-joy::tears-of-joy:

Oh, and you might just be able to make out one of the 7 piece landing gear assemblies.
 

Tim Marlow

Little blokes aficionado
SMF Supporter
Joined
Apr 27, 2018
Messages
16,874
Points
113
Location
Somerset
First Name
Tim
I feel your pain on this one Andy. Had very similar experiences with the Grumman avenger I did earlier in the year. Almost everything seemed difficult or just plain hard work. Don’t let it out you off aircraft though, they honestly are not all this hard…….
 

Andy T

SMF Supporter
Joined
Apr 26, 2021
Messages
2,054
Points
113
Location
Sheffield
First Name
Andy
Don’t let it out you off aircraft though, they honestly are not all this hard…….
You make it sound like I've never built an aircraft before :smiling5:

Mind you, the way this is going it looks that way!

Yesterday's two other boggles (they always come in threes) - the pe frame around the front armoured screen broke as I was trying to bend it and there are a few pe pieces that need fitting to the inside of the canopy, as if fixed to the inner frame. One has 2 plastic parts attached to it as well so relatively weighty for the miniscule mounting area.

The battle continues... :tears-of-joy:
 

Jim R

SMF Supporter
Joined
Apr 27, 2018
Messages
13,841
Points
113
Location
Shropshire
First Name
Jim
I feel for you Andy. Some kits do seem to possess a malevolent spirit and I'm afraid this is one of them. Deep breath and carry on. It's actually looking rather good.
 

Allen Dewire

Proud Rabble Member
SMF Supporter
Joined
Apr 27, 2018
Messages
4,122
Points
113
Location
Bamberg
First Name
Allen
Jeez Andy, if it wasn't for bad luck, you wouldn't have any at all...She is looking real good and the yellow is excellent too.

As an idea, maybe look in the phone book to see if you have a Witch Doctor in your area. Have him come over with a anti-jinx potion, and let him do his thing in your shed. Then you should be able to finish this build up without further probs...Just a thought...

Prost
Allen
 

Allen Dewire

Proud Rabble Member
SMF Supporter
Joined
Apr 27, 2018
Messages
4,122
Points
113
Location
Bamberg
First Name
Allen
Excorcism Andy???...Kinda extreme.......But only if the 110 jumps up, starts flying around the shed on it's own spitting green slime out of the MG holes!!!.......A cold one helps sometimes too...
 

yak face

Wossupwidee?
Staff member
Moderator
SMF Supporter
Joined
Jun 13, 2009
Messages
12,443
Points
113
Location
sheffield
First Name
tony
Stick with it andy , it might be putting up a fight but I reckon youre winning . I know the feeling of getting to a certain stage of a tricky build and just wanting to get it done , kind of saps the fun out of it . Luckily the next one usually gets the enthusiasm going again . Cheers tony
 

Andy T

SMF Supporter
Joined
Apr 26, 2021
Messages
2,054
Points
113
Location
Sheffield
First Name
Andy
Thanks Tony, and Jim (missed your earlier post sorry) I've started splashing paint around to break the cycle (update coming once I'm back from the pub) and will return to the tricky bits later.

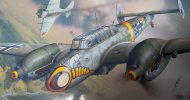
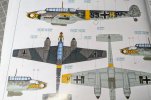
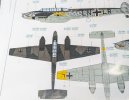
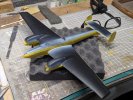
Fun fact - the box art doesn't depict any of the schemes in the joke book, it's a mixture of the camo pattern from one and the markings from another :thinking:

1000005443.jpg
1000005444.jpg
1000005442.jpg

The green nacelles on the lower image are the easiest thing to spot, but it has the wasp marking of the upper one.

Good job I never let accuracy get in the way of a paint job :tears-of-joy:
 

The Smythe Meister

Born to be WILD....... until about 9pm
SMF Supporter
Joined
Jan 30, 2019
Messages
5,812
Points
113
Location
Devon
First Name
Andy
Thanks Tony, and Jim (missed your earlier post sorry) I've started splashing paint around to break the cycle (update coming once I'm back from the pub) and will return to the tricky bits later.

Fun fact - the box art doesn't depict any of the schemes in the joke book, it's a mixture of the camo pattern from one and the markings from another :thinking:

View attachment 495909
View attachment 495910
View attachment 495911

The green nacelles on the lower image are the easiest thing to spot, but it has the wasp marking of the upper one.

Good job I never let accuracy get in the way of a paint job :tears-of-joy:
Mate,looks like a nightmare.. I might sell mine on !!:sad:
 
  • Haha
Reactions: JR

Andy T

SMF Supporter
Joined
Apr 26, 2021
Messages
2,054
Points
113
Location
Sheffield
First Name
Andy
Mate,looks like a nightmare.. I might sell mine on !!:sad:
It's the worst aircraft I've ever built, apart from the Tamiya Harrier, but that's well known as their black sheep. Maybe you will have a better run at yours but I'd never buy another.

Progress from this afternoon. I masked off the yellow and reprimed the damaged areas, also covering any overspray from the previous colours:

1000005445.jpg

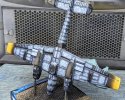
Normally I use the black base technique but thought I'd have a go at some pre-shading on this. I'll never be happy with the final model so it might as well become a test bed to practise for future projects:

1000005446.jpg

Then on with the colour. I always struggle to get a decent interpretation of the real thing but there's enough tonal variation to keep me happy and it's a good foundation for weathering:

1000005447.jpg

I've also got the underside masked off ready for applying the splinter camo tomorrow. I would have made a start this evening but my local had Abbeydale Breweries Deception on draught tonight, so I don't think wielding an airbrush is a good idea!

1000005438.jpg
 

Andy T

SMF Supporter
Joined
Apr 26, 2021
Messages
2,054
Points
113
Location
Sheffield
First Name
Andy
On with the grey. I started with MRP, applying in a mottled way as I often do, then finished off by adding some random blobs of S M S lacquer, which is much lighter than the MRP version so worked well as a highlight:
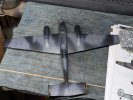
1000005454.jpg

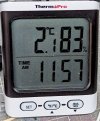
It was around 5°C in the shed so I helped it along with a hairdryer, then applied some masking tape:
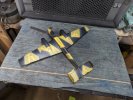
1000005457.jpg

Then I applied the green in a similar way, highlighting by adding a bit of S M S desert sand to the green:
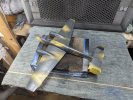
1000005458.jpg

After removing the masking (apart from the bit I missed!) we had this. A few edges of the grey weren't quite right so were subsequently masked and touched up. It might be a bit stylistic for some, but it's exactly the look I was aiming for :
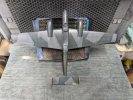
1000005459.jpg

Then on with the mottled sections. I went back & forth with the two colours, trying to be random in size, placement, shape and opacity but would welcome comments on it.

I know there was no set standard but aesthetically do you think there's enough? Too much? Not random enough?

Thanks

Oh, and it's always a worry that one might peel a bit of paint while removing the masking. I didn't, but pulled one side of the tailplane off instead! :smiling5:

1000005461.jpg

1000005462.jpg
 

Andy T

SMF Supporter
Joined
Apr 26, 2021
Messages
2,054
Points
113
Location
Sheffield
First Name
Andy
Thank you both. Given your encouraging comments I've committed and given it a gloss coat ready for decals.

I don't normally bother but it's my first time with this new fangled type so a bit of extra protection can't hurt if I decide to try and remove the film.

1000005465.jpg
 

Tim Marlow

Little blokes aficionado
SMF Supporter
Joined
Apr 27, 2018
Messages
16,874
Points
113
Location
Somerset
First Name
Tim
Before you try and remove the film, check the dates Andy. As I said in my review of them, it’s only those after 2020 that do this. I would hate for them to be older ones that don’t strip. You’ve had enough hassle with this build. To be absolutely honest, the strippable ones respond well to decal fix and look good unstripped as well.
 
Last edited:
Top