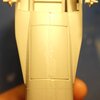
Italeri 1/48 AH-64D Longbow Apache

Archetype

FAA plane builder
Joined
Mar 31, 2019
Messages
925
Points
93
Location
Sussex
First Name
Chris
I was, and had started, to build this completely OOB as a nostalgic piece since it's the same subject I built as my first model.
It turns out that, according to scalemates, this is an evolution of the Italeri AH-64A that I built back in 1995. Back then I preferred the 'A' thanks to the Nicholas Cage / Tommy Lee Jones movie and the fact it didn't have the hideous radar dome on it. Having since learned what this dome allows the Apache to do, I've forgiven the ugliness!

Obligatory box and sprues.

IMG_3637.JPG
IMG_3638.JPG
IMG_3639.JPG
IMG_3641.JPG
IMG_3640.JPG

The final sprue appears to include all the updates for the 'D'.

Decals:

IMG_3642.JPG

Some hand drawn instruction addendums:

IMG_3643.JPG

A handy version scheme addendum:

IMG_3644.JPG

The version to be built:

IMG_3647.JPG

...and the mad Japanese scheme, just for fun.

IMG_3646.JPG


As usual, I started work on the cockpit and naturally started at the gunners forward position. I pulled up some 'D' mark references and was horrified straight away.
It was clear from the instructions that Italeri really did just take the 'A' and made some cosmetic changes.

See the instructions:

IMG_3648.JPG

Compare to the real thing:

1613152507345.png

First, it's not flat. Second, the targetting console is not the same at all. So I ummed and ah'd and decided that I would, for once, attempt some scratching to see if I could improve it. I couldn't make it worse....

I cleaned off the existing buttons and gauges and set about trying to make them up from plasticard, trying to build in an approximation of the angles of the screens and the general console array. I also butchered the targetting console to get something close. I plan on chopping up the kit decals to apply to this later.

IMG_3634.JPGIMG_3635.JPG

I will need to scratch the hood I think aswell because the kit part projects way too far in to the cockpit and is totally the wrong shape and I don't think I can do this adequately without having the instrument panel in place. So the plan is to prime the entire interior which will need to include the rotor housing and seal it all up. There's plenty of room I think without the canopy fitted to get it all done.

IMG_3650.JPG
IMG_3649.JPG


I am well outside of my comfort zone here and am mainly posting for your entertainment / feedback / tips, so all are welcomed and encouraged.

Thanks! ;) :hungry: :tongue-out3:
 

Archetype

FAA plane builder
Joined
Mar 31, 2019
Messages
925
Points
93
Location
Sussex
First Name
Chris
Cheers Paul. I'm almost certain you'll be able to spot mistakes or bad process!

I've just noticed all that flash just forward of the rotors....I don't mind scraping first thing on a saturday with a coffee. Look forward to that!
 
  • Like
Reactions: JR

Ian M

Administrator
Staff member
Administrator
Moderator
SMF Supporter
Joined
Dec 14, 2008
Messages
19,721
Points
113
Location
Falster, Denmark
First Name
Ian
One of my favourite helicopters but oddly enough never built a model of one. I'll make do with watching you build yours.
 
Joined
Feb 25, 2020
Messages
577
Points
93
Location
Gloucestershire
First Name
Carl
My son started making this model but found it too difficult and consequently it’s still half finished in the box. Not even sure it’s salvageable but it will be interesting to see yours finished.
 

Archetype

FAA plane builder
Joined
Mar 31, 2019
Messages
925
Points
93
Location
Sussex
First Name
Chris
One of my favourite helicopters but oddly enough never built a model of one. I'll make do with watching you build yours.

Build, or butcher?

My son started making this model but found it too difficult and consequently it’s still half finished in the box. Not even sure it’s salvageable but it will be interesting to see yours finished.

Finished is a while away. Let’s see how we go and hopefully I might help inspire or solve some of your sons barriers.
 
  • Like
Reactions: JR

yak face

Wossupwidee?
Staff member
Moderator
SMF Supporter
Joined
Jun 13, 2009
Messages
12,398
Points
113
Location
sheffield
First Name
tony
Great subject chris , its one of those ‘form follows function’ aircraft like the A10 , that is ugly but awesome at the same time . Ive got the revell monogram 1/48 in the stash but its the older A model . The job youve got with this one - making an accurate D from a poorly re hashed kit - parallels the job I had with the minihobby Hind , remaking virtually all the cockpit ! Why do makers think they can get away with a half arsed rebox and a few extra parts that dont really address the differences , either do it right or dont bother . Anyways looking forward to this one and its probably going to inspire me to elevate my Apache to near the top of the stash ! Cheers tony
 

Archetype

FAA plane builder
Joined
Mar 31, 2019
Messages
925
Points
93
Location
Sussex
First Name
Chris
I think of it as a flying tank. Heavily armoured and packing a big punch!

Re; the crappy reboxing, I guess it's how they treat lowly subjects. I'm surprised there isn't a definitive Apache kit to be honest given it's prominent role in recnt conflicts, plus the fact that the duke of sussex flew them! Or perhaps that's the reason why not?!

I had and had started the monogram one with a load of PE sometime in the late 90's and rediscovered it when I went through my box of stored kits. It was my first attempt at PE which was a disaster and I didn't get past the cockpit. When I checked the box the fuselage was missing so binned it.
I'm not sure I'll achieve accurate, but something close will do me. It's fun doing something though!
 

Archetype

FAA plane builder
Joined
Mar 31, 2019
Messages
925
Points
93
Location
Sussex
First Name
Chris
This mornings work.

IMG_3651.JPG

Finished up the gunners panel with a few extra bits and completed the pilots panel. The bits to the right and below the two screens are all that remain of the kit moulded instruments. They've had a light primer while I was doing the fuselage pre-assembly primer to see how they look. Not too bad by my own standards.
 

JR

Member of the Rabble and Pyromania Consultant
SMF Supporter
Joined
May 26, 2015
Messages
17,275
Points
113
Location
lincs
First Name
John
Chris.
Have to admire your determination to get it right, and I'm sure with that attitude you will.:thumb2::nerd:
Unfortunately I'm like Paul, can't offer any help.
So will just sit and enjoy the build.
 

Jim R

SMF Supporter
Joined
Apr 27, 2018
Messages
13,724
Points
113
Location
Shropshire
First Name
Jim
Hi Chris
Helicopters make great models. Having said that I have only ever built one. They're not easy to build.
Looks like you have this model well started
I'm not sure I'll achieve accurate, but something close will do me. It's fun doing something though!
...and that is what this hobby is really about - having fun :tongue-out3:
Jim
 

yak face

Wossupwidee?
Staff member
Moderator
SMF Supporter
Joined
Jun 13, 2009
Messages
12,398
Points
113
Location
sheffield
First Name
tony
The panels look great chris , top work , cheers tony
 

Archetype

FAA plane builder
Joined
Mar 31, 2019
Messages
925
Points
93
Location
Sussex
First Name
Chris
I turned my attention to the seats. This is them hot off the sprue.

IMG_3655.JPG


Didn't like the look of the belts or the lumbar support and looked up some references, very few of which showed this set up, so off they came.

IMG_3660.JPG

There were a few additions made to the panels before I reprimed and blacked everything during the week and then detail painted this morning. Dry brushed with dark grey, painted on buttons & switches with a 4/0 brush and belts from masking tape which were painted dark grey and drybrushed light grey. Usefully most references showed the belts slung as modelled, meaning I didn't have to worry about buckles!

Hope you approve of the result. I'm just holding the fuselage together in the pics until I get time to glue. The fuselage casting is pretty thin and bendy so I plan to glue it progressively with Tamiya extra thin to ensure best alignment.

IMG_3662.JPGIMG_3663.JPGIMG_3665.JPGIMG_3666.JPG
IMG_3667.JPG
 

minitnkr

Rabble & escape committee member
SMF Supporter
Joined
Apr 27, 2018
Messages
6,717
Points
113
Location
Dayton, OH
First Name
Paul
Will pay attention to your progress. Looking very strong so far. I have a couple in 1/87 stashed. PaulE
 

Archetype

FAA plane builder
Joined
Mar 31, 2019
Messages
925
Points
93
Location
Sussex
First Name
Chris
Thanks Paul. I am happy with it so far, but plenty of opportunity yet to mess it up!

1/87? Never heard of that scale, sounds interesting. Is it a war gaming scale?
 

Archetype

FAA plane builder
Joined
Mar 31, 2019
Messages
925
Points
93
Location
Sussex
First Name
Chris
Cracking on with all the sub assemblies, namely wings, engines and the 'cheeks' (or whatever their technical name is!).

DSCF2333.JPG


Also got the fuselage glued up. This took about an hour or so last night of carefully lining up the halves as best I could and pplying extra thin cement in short runs, then holding firm until set. I don't like to use masking tape to do this as any surplus glue that splurges out underneath damages the surface and causes more work. I'd rather be patient.
This morning I used a cocktail stick to run surfacer 500 down the seams and in any gaps / sink marks before I attempt any seam cleaning up.
Pretty much all the access panels are either misaligned or have different gauges between each half, which means I'll need to attempt to fill and rescribe, which I am not looking forward to! Almost wish I'd got the resin sets for all the internals!

DSCF2334.JPGDSCF2336.JPGDSCF2337.JPG


I also got the undercarriage legs in place. The large hole is filled with a panel you can see in the first photo. I say filled. It doesn't really fit so will have to solve that too!

DSCF2335.JPG
 

Jim R

SMF Supporter
Joined
Apr 27, 2018
Messages
13,724
Points
113
Location
Shropshire
First Name
Jim
Hi Chris
That cockpit looks nice after your improvements. The fit of the body is going to take some work but I have no doubt you'll sort it.
Jim
 
Top