- Home
- Forums
- Group Builds
- The New Group Builds (2017 on)
- The User Created Group Builds
- 2022 Builds
- Dave's Half track GB: Sept - Nov 2022
You are using an out of date browser. It may not display this or other websites correctly.
You should upgrade or use an alternative browser.
You should upgrade or use an alternative browser.
Jakko’s 1:35 Dragon Sd.Kfz. 251
- Thread starter Jakko
- Start date
Panzerwrecker
SMF Supporter
- Joined
- Mar 2, 2022
- Messages
- 362
- Points
- 93
- First Name
- Los
Looking good Jakko. What period scheme are you Painting it?
- Joined
- Apr 28, 2018
- Messages
- 10,837
- Points
- 113
- First Name
- Jakko
There is really only one choice, AFAIK:

Olive drab all over, with French military registration plate (probably one I can find in the spare decal box, intended for an entirely different type of vehicle).
Olive drab all over, with French military registration plate (probably one I can find in the spare decal box, intended for an entirely different type of vehicle).
- Joined
- Apr 28, 2018
- Messages
- 10,837
- Points
- 113
- First Name
- Jakko
I should really try and get this finished before the group build ends, don’t I? 
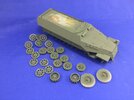
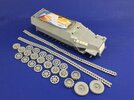
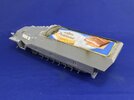
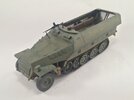
My aim was to spray this at the same time as the JPK 120, but that’s not going to happen if I want it done this month, so this afternoon, I gave it a coat of a mixture of Tamiya XF-58 olive green and XF-55 deck tan (more of the former than the latter). It’s greener than I was aiming for, but it needs more painting so that will probably work itself out. I hope


My aim was to spray this at the same time as the JPK 120, but that’s not going to happen if I want it done this month, so this afternoon, I gave it a coat of a mixture of Tamiya XF-58 olive green and XF-55 deck tan (more of the former than the latter). It’s greener than I was aiming for, but it needs more painting so that will probably work itself out. I hope

- Joined
- Apr 28, 2018
- Messages
- 10,837
- Points
- 113
- First Name
- Jakko
Thanks, and it’s much matter than I had expected it to be.That looks really good Jakko. Tamiya always sprays nice and smooth.
I asked on Missing-Lynx which colour French vehicles in Indochina would have been at the time, and the answer was, paraphrased, “Could be anything as long as it’s olive drab/green.” They might have been American olive drab, but also French post-war OD (which was a bit greener and lighter), and it was also suggested the vehicles might even have been (re)painted in leftover Japanese paints. So I’m aiming for a believable colour as it might have appeared after fading under the tropical sun. And that fading isn’t as clear-cut as you might think, because, for example, American aircraft OD in the Pacific faded to paler versions, while Dutch KNIL aircraft OD faded to be greener than it was originally.Are you working from a color photo for the shade of green you needed? Or just the normal French green that they use?
Which is all a roundabout way of saying I’m making up the colour as I go along, as long as it’s believable

I’m not overly worried about that, if I’m honest. The tracks articulate well enough, and if they do break, I’ll just glue the links to the sprocketsI shall be watching with interest on how those tracks are going to bend around the sprockets

- Joined
- Apr 28, 2018
- Messages
- 10,837
- Points
- 113
- First Name
- Jakko
Onwards and more or less upwards:
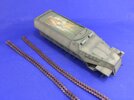
This is an overspray of Mig IDF green in most of the panels etc. to break the monotone colour and make the model look more interesting. Also, the tracks were sprayed with Vallejo German red-brown, which I had intended to do yesterday but only remembered when I was cleaning out my airbrush Spraying them today didn’t go without a hitch, the short form of which is that somehow, a part inside the airbrush got dislodged when I pulled out the needle to try and solve a problem with it getting a little clogged, and that resulted in me having to eventually clean out all the paint and strip and clean half the airbrush a couple of times before it suddenly worked properly again. No idea what was actually the case or how I solved it, but it seems to work again. However, I ended up brush-painting the last 5 cm or so of one side of one of the tracks, because by that time the airbrush didn’t want to at all anymore.
After the paint had dried, I added an overall wash of Mr. Aqueous Hobby olive drab (1) thinned with water, over the whole vehicle (and running gear, not pictured):
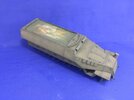
The reason for this is mainly because I felt it was still too green and wanted a more olive drab colour. The wash achieved that, and also pulled the lighter blotches and the background more together, as well as making the paint look more weathered. Now it needs shading and highlighting

This is an overspray of Mig IDF green in most of the panels etc. to break the monotone colour and make the model look more interesting. Also, the tracks were sprayed with Vallejo German red-brown, which I had intended to do yesterday but only remembered when I was cleaning out my airbrush
 Spraying them today didn’t go without a hitch, the short form of which is that somehow, a part inside the airbrush got dislodged when I pulled out the needle to try and solve a problem with it getting a little clogged, and that resulted in me having to eventually clean out all the paint and strip and clean half the airbrush a couple of times before it suddenly worked properly again. No idea what was actually the case or how I solved it, but it seems to work again. However, I ended up brush-painting the last 5 cm or so of one side of one of the tracks, because by that time the airbrush didn’t want to at all anymore.
After the paint had dried, I added an overall wash of Mr. Aqueous Hobby olive drab (1) thinned with water, over the whole vehicle (and running gear, not pictured):

The reason for this is mainly because I felt it was still too green and wanted a more olive drab colour. The wash achieved that, and also pulled the lighter blotches and the background more together, as well as making the paint look more weathered. Now it needs shading and highlighting

- Joined
- Apr 28, 2018
- Messages
- 10,837
- Points
- 113
- First Name
- Jakko
After the wash was dry, I added another, now for shading:
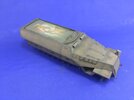
This is actually two different ones, which is hopefully visible here:
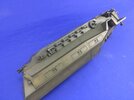
The underside got a wash of Army Painter Strong Tone, thinned roughly 1:1 with water because I think straight from the bottle it’s too strong for use on vehicles. This went onto the lower hull and below all overhanging parts, including the outward slope of the rear plate and all the wheels except the outsides of the front wheels and the outer row of roadwheels. Everything else then got a similar wash, but from Army Painter Soft Tone, which is lighter and browner than Strong Tone.
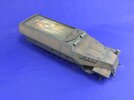
When that had dried, I drybrushed the whole model with Italeri Verde Mimetico 2 to both highlight and bring back a bit of a green tone:
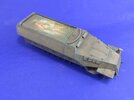
And then some more, lighter drybrushing with Revell Light Olive for more obvious highlights:

This is actually two different ones, which is hopefully visible here:

The underside got a wash of Army Painter Strong Tone, thinned roughly 1:1 with water because I think straight from the bottle it’s too strong for use on vehicles. This went onto the lower hull and below all overhanging parts, including the outward slope of the rear plate and all the wheels except the outsides of the front wheels and the outer row of roadwheels. Everything else then got a similar wash, but from Army Painter Soft Tone, which is lighter and browner than Strong Tone.
When that had dried, I drybrushed the whole model with Italeri Verde Mimetico 2 to both highlight and bring back a bit of a green tone:

And then some more, lighter drybrushing with Revell Light Olive for more obvious highlights:

scottie3158
SMF Supporter
Jakko, Really looking the part now.
Jim R
SMF Supporter
A lot of work has gone into that paint job and it's certainly been worth while. You have definitely got rid of the monotone look.
- Joined
- Apr 28, 2018
- Messages
- 10,837
- Points
- 113
- First Name
- Jakko
ThanksReally looking the part now.

Not really, if I’m honestA lot of work has gone into that paint job
 Overall washes are pretty quick to apply, which is part of why I prefer them to pin washes — I tried that, and for starters it’s far too laborious for my taste. Aside from that they never seemed to really blend into the surrounding area when I tried it, which an overall wash does automatically. Of course, the downside to putting a wash over the whole model is that it changes the colour everywhere to some degree or other, so it often takes a little experimentation on the underside to find one that works.
I never used to see the point of painting this way, but when I now compare my old models with ones painted like this, I must say I much prefer this style. Painting an AFV in a single colour might be realistic, but it doesn’t look realistic. However, I don’t think it should be overdone, with much paler upper sides than lowers. A little goes a long way.You have definitely got rid of the monotone look.
Looking good Jakko. The washes/filters have modulated the finish quite nicely. Very necessary on a single colour vehicle or they can just look like a monolithic slab.
Pin washes need a gloss finish and non water based paint to work best from my experience. Definitely a slow job though. It needs a sharp brush and dilute paint. It also helps prevent “coffee staining” if you moisten the model surface with thinners before starting out.
Pin washes need a gloss finish and non water based paint to work best from my experience. Definitely a slow job though. It needs a sharp brush and dilute paint. It also helps prevent “coffee staining” if you moisten the model surface with thinners before starting out.
- Joined
- Apr 28, 2018
- Messages
- 10,837
- Points
- 113
- First Name
- Jakko
Even with that, and applying thinner first and the wash on top of that while it was still moist, I found it difficult to get them to flow as I wanted them to, and usually ended up with shadows that were too sharp for my taste. So I stopped putting all the effort in except where it will actually enhanced something, like in those vision slits in the side of the armourPin washes need a gloss finish and non water based paint to work best from my experience.

I asked on Missing-Lynx which colour French vehicles in Indochina would have been at the time, and the answer was, paraphrased, “Could be anything as long as it’s olive drab/green.”
Oh, you gotta love the arm-chair experts on there. They always manage to give me good laugh....
Which is all a roundabout way of saying I’m making up the colour as I go along, as long as it’s believable
And I think you have done a great job, not only with the color, but with the washes and dry brushing too. I would think that in a tropical climate, the rain, humidity, sun, and heat will erode the original paint color quite quickly. I think you've nailed it rather well. If the end finish is too shiny though, you can always say it's sitting in the rain...
Prost
Allen
- Joined
- Apr 28, 2018
- Messages
- 10,837
- Points
- 113
- First Name
- Jakko
Thanks all 


I think the main thing is to not let yourself get offended by the pedantry some people showOh, you gotta love the arm-chair experts on there. They always manage to give me good laugh....
TBH, I just do some stuff that feels like it would work, and more often than not, it does. I doubt the paintwork will win any prizes, but I do keep thinking that if I can paint like this, anybody can … The only somewhat difficult bit is spraying the lighter patches on the panels.And I think you have done a great job, not only with the color, but with the washes and dry brushing too. I would think that in a tropical climate, the rain, humidity, sun, and heat will erode the original paint color quite quickly. I think you've nailed it rather well.
It’s not as matt as it was after I sprayed the green, but still acceptably so. In any case, this way of painting tends to turn models matt anyway — the Mr. Aqueous Hobby paint I use a lot for OD nowadays dries semigloss, but after a wash and drybrush, there is usually very little of that partial shine left.If the end finish is too shiny though, you can always say it's sitting in the rain...
- Joined
- Apr 28, 2018
- Messages
- 10,837
- Points
- 113
- First Name
- Jakko
With the painting finished, I added decals and then began to add dirt and grime.
Starting with the decals, I dug through my spare decals box and found two French Indochina registration plates on the sheet of the Italeri M24 Chaffee kit, so I stuck them on. (French plates being rather rare in my collection, I was glad I found at least these that start with IC like in the photo of the real thing.)
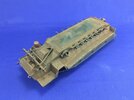
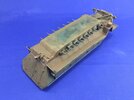
The dirt is mainly a couple of washes of a few reddish-brown acrylic paints thinned with water, mixed so they cover fairly evenly without accumulating in all the nooks and crannies too much. The colour was chosen after I searched for soil colours in Vietnam, and found that fairly large parts of the north of the country have yellowish-red soil. I only applied the washes to the underside and the overhanging rear plate, though, as I want to show this vehicle as fairly clean.
When these were dry, I heavily drybrushed more of the same colour, unthinned, to represent dirt thrown onto the vehicle by the wheels, and then followed it with a much lighter drybrush of a sand colour to make highlights/dried mud.
It shows better on the real model than in these photos, though.
I also added the wash to the wheels and tracks:
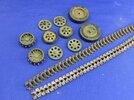
First, i had painted all the rubber parts dark grey and put a wash of thinned-down Indian ink over those. When that had dried, I added the dirt wash and then drybrushed the rubber with dark grey again (after the wash had dried, of course). The insides of the track were instead drybrushed with a medium-dark metallic colour and then with a lighter one, as little dirt would accumulate here due to all the wheels riding over it.
Starting with the decals, I dug through my spare decals box and found two French Indochina registration plates on the sheet of the Italeri M24 Chaffee kit, so I stuck them on. (French plates being rather rare in my collection, I was glad I found at least these that start with IC like in the photo of the real thing.)


The dirt is mainly a couple of washes of a few reddish-brown acrylic paints thinned with water, mixed so they cover fairly evenly without accumulating in all the nooks and crannies too much. The colour was chosen after I searched for soil colours in Vietnam, and found that fairly large parts of the north of the country have yellowish-red soil. I only applied the washes to the underside and the overhanging rear plate, though, as I want to show this vehicle as fairly clean.
When these were dry, I heavily drybrushed more of the same colour, unthinned, to represent dirt thrown onto the vehicle by the wheels, and then followed it with a much lighter drybrush of a sand colour to make highlights/dried mud.
It shows better on the real model than in these photos, though.
I also added the wash to the wheels and tracks:

First, i had painted all the rubber parts dark grey and put a wash of thinned-down Indian ink over those. When that had dried, I added the dirt wash and then drybrushed the rubber with dark grey again (after the wash had dried, of course). The insides of the track were instead drybrushed with a medium-dark metallic colour and then with a lighter one, as little dirt would accumulate here due to all the wheels riding over it.

