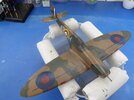
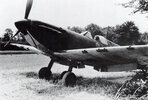
Kotare Spitfire Mk.Ia (1/32)

Jakko

Way past the mad part
SMF Supporter
Joined
Apr 28, 2018
Messages
10,797
Points
113
First Name
Jakko
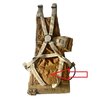
I've now gone down a dark alley. If this piece of camping mat was between the pilot and the parachute pack it was either attached to the harness or pack (the latter seems unlikely). I can't find any evidence for it
Maybe they just had a loose piece of it that they put on top of the parachute just before sitting down on it?
 

stona

SMF Supporter
Joined
Jul 22, 2008
Messages
11,472
Points
113
First Name
Steve
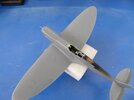
Got back at 2.00 am Sunday morning (private charter to some godforsaken corner of Birmingham airport!) and have managed to get a bit more done.

Goodness me, it looks like a Spitfire.

joined.jpg

This is the best fitting and engineered 1/32 Spitfire I have built, and I've built them all. The fit is incredible, I reckon the major components could be snapped together without glue; no idea why you'd do that, but you could. I've just reminded myself that those ailerons are just pushed into place and not secured by anything but friction.

You can't really give higher praise than that.
 

Ian M

Administrator
Staff member
Administrator
Moderator
SMF Supporter
Joined
Dec 14, 2008
Messages
19,721
Points
113
Location
Falster, Denmark
First Name
Ian
That is an impressive fit Steve!
 

stona

SMF Supporter
Joined
Jul 22, 2008
Messages
11,472
Points
113
First Name
Steve
I haven't given up!

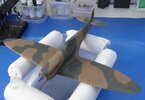
Camouflage has been applied as and when I've had a chance. It's been masked for the hard edge usually seen on Spitfires of this period, in a factory finish.

cam1.jpg

Just some walkway lines to spray and then on to varnish and decals.
 

adt70hk

I know its a bit sad but I like quickbuild kits!!!
SMF Supporter
Joined
Sep 4, 2019
Messages
9,496
Points
113
First Name
Andrew
Looking very good!
 

stona

SMF Supporter
Joined
Jul 22, 2008
Messages
11,472
Points
113
First Name
Steve
Finally something I really don't like about this kit (just my opinion).

The decals!

There's nothing intrinsically wrong with them, they go on alright, but look at the code letters and roundel on this side:

P1010777.JPG

That's all one decal, which might be okay at 1/72 but at this scale is ridiculous. With hindsight I should just have separated them, but success on this side led to overconfidence on the other side, resulting in a disaster, which brings me to another point. The colour of the codes looks way off to me. It should be Sea Grey Medium, but to my eye it's not close and is much, much too blue. This meant matching decals for the disaster was a real problem. I found a roundel in the spares, which was old and has 'shattered' a bit (I can fix that) but for the codes I had to cut up and make letters from the other decals in the kit... Not fun.

P1010778.JPG

Also, the decals include things like detail for hinges and some stencils which is not a bad idea but is something I would normally do myself if I wanted to.

Next time I would simply use masks and spray these markings!
 

langy71

SMF Supporter
Joined
Apr 27, 2018
Messages
1,558
Points
113
Location
Nottingham
First Name
Chris
Finally something I really don't like about this kit (just my opinion).

The decals!

There's nothing intrinsically wrong with them, they go on alright, but look at the code letters and roundel on this side:

View attachment 485880

That's all one decal, which might be okay at 1/72 but at this scale is ridiculous. With hindsight I should just have separated them, but success on this side led to overconfidence on the other side, resulting in a disaster, which brings me to another point. The colour of the codes looks way off to me. It should be Sea Grey Medium, but to my eye it's not close and is much, much too blue. This meant matching decals for the disaster was a real problem. I found a roundel in the spares, which was old and has 'shattered' a bit (I can fix that) but for the codes I had to cut up and make letters from the other decals in the kit... Not fun.

View attachment 485881

Also, the decals include things like detail for hinges and some stencils which is not a bad idea but is something I would normally do myself if I wanted to.

Next time I would simply use masks and spray these markings!
If you hadn't mentioned them I'd have never noticed the colours... good rescue buddy..
 

adt70hk

I know its a bit sad but I like quickbuild kits!!!
SMF Supporter
Joined
Sep 4, 2019
Messages
9,496
Points
113
First Name
Andrew
Not an expert by any stretch if the imagination but there is definitely a blue tint too them.... And as you you say in one piece too....

Well rescued though!
 

stona

SMF Supporter
Joined
Jul 22, 2008
Messages
11,472
Points
113
First Name
Steve
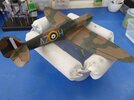
Finally finished the decals, at least all those I'm applying.

decals.jpg

Kotare supply dozens of individual and miniscule decals for all the dzeus fasteners on the engine cowlings but they, for me, were a bridge too far. They are a very nice and unusual detail and I'm sure some would have fun applying them, but I can live without them :smiling3:

Next up some varnishing and weathering. This is this very aircraft shortly after P/O Richard Hardy was compelled to deliver it to the Germans at Cherbourg, having been damaged in an earlier action. There are quite a few images of this aircraft, the Germans seem to have been quite proud to have become the new owners and took several photographs.

Spitfire-MkIa-RAF-234Sqn-AZH-).jpg

Apart from some staining from the gun barrels and at the ejection ports there is a lot of oil under the nose coming, unsurprisingly, from the oil tank. It's not unusual to see oil here, but I wonder if this might be as a result of some damage or just hard flying. I won't be doing anything as extreme as this. Also notable is that when the new Sky underside colour was applied all those 'Location For Wingtip Steadying Trestle' and other stencils were over painted and not replaced. There are no under wing roundels either.
 

stona

SMF Supporter
Joined
Jul 22, 2008
Messages
11,472
Points
113
First Name
Steve
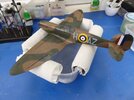
I'm calling this one done!

Here's a brief history and some of my usual ham fisted photos:

 
Top