Wingnut Wings 1/32 Halberstadt Cl.II (late)

Allen Dewire

Proud Rabble Member
SMF Supporter
Joined
Apr 27, 2018
Messages
4,120
Points
113
Location
Bamberg
First Name
Allen
Sorry Bro, but you have me beat there. This is new ground for my old butt and I have no clue. I can understand It is a bit difficult to do what I'm doing in 1/48, but a man with your skills would nail it if you wanted to!!! Now, please keep going with yours, so I can see how to do more with mine...OK???...

Prost
Allen
 

scottie3158

SMF Supporter
Joined
Apr 27, 2018
Messages
12,760
Points
113
Location
Spalding
First Name
Paul
Sorry Bro, but you have me beat there. This is new ground for my old butt and I have no clue. I can understand It is a bit difficult to do what I'm doing in 1/48, but a man with your skills would nail it if you wanted to!!! Now, please keep going with yours, so I can see how to do more with mine...OK???...

Prost
Allen
We are in the same boat mate and you were quite correct it is an Albatros I am changing my sherry provider.
 

Mark1

SMF Supporter
Joined
Apr 17, 2021
Messages
3,566
Points
113
Location
South london
First Name
Mark
Wow Colin, that was before I took the dive into wing thingy's in 2019. I went back and read through your build and finished item posts. Absolutely fantastic work Sir!!! As Tim said, it was masterclass. I can only hope I can do mine half as good as yours. Might I ask, if you remember, what size rigging line you used? I'm lucky as my plane has less rigging than yours did...


My best memory of Red Baron was when you pulled out of a dive, all the parts would creak and squeak before the wing broke off!!! The sound effects were great. For it's time, the game was so cool and I knew I could never be a good WWI pilot playing it. Taking off was a huge problem as the thick manual had nothing written in it about how to do it. I can't remember how many times I pushed the wrong button on my joystick, released a bomb, and blew myself up sitting on the runway...


Thanks Jim! It is a test of nerves and my skills to do the mods, but fun, all the same. The fair was great, but small compared to the last time I went. maybe next year it will be bigger...


You are never late Andrea and it's always a pleasure to have you joining the party...


True Andrew, but even for the price, a kit really can't include everything. Trying to mold them would have been a nightmare I think...


Thanks Tony and I am going to give it my best (never went to) college try. If I mess up, I still have a few in the stash to attempt a better result. Colin set a pretty high bar with his build though...

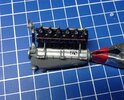
I've ordered some paint and a set of resin turnbuckles from Gaspatch. I don't have enough sanity to do what Colin did on his and twist them up myself. I took the easy way out! I also ordered some Infini 0.13mm black elastic rigging. Hopefully, it's the right size and I'll get the 2 orders before the end of the week. I did do a bit more on the motor and wired the spark plugs,

View attachment 473740
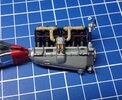
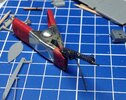
One definitely needs three hands for this. The heavy brass block did make it easier with only two though. I wanted a good hold, so I used CA to attach them to the plug ends. One of those times the CA decided not to set quickly, like it should. I ended up using 3 different types before I got the job done. After the CA had dried thoroughly, I cut the rest of the sprue off each plug. Not having a warm and fuzzy over the strength of the attachment, I went back and applied a drop of CA on top on each plug. In the end and with a drop of black paint,

View attachment 473742
We had this. The wires are too long and a bit wonky in their bends, but none fell off and they do look like spark plugs. The other side,

View attachment 473741
None of these came undone either yet, so I guess I got lucky. I also don't think Bosch will be calling me to work for them any time soon!!! I'm still not decided what color to paint the cables. They could have been black, brown, tan, off yellow or maybe blue. I wasn't around back then, so maybe a little artistic license could be used. I like dark blue myself and it would be a nice color variation to the black of the cylinders...

I really can't do any more or assemble the motor, until my paint order comes. In between, I have been working on my Panther dio too. We still have temps below zero, so hissy stick work is out for time being. I thank you all again for your comments and interest in my Halberstadt. Till next time...

Prost
Allen
Looking very good so far Allen
 

colin m

Moderator
Staff member
Moderator
SMF Supporter
Joined
Dec 26, 2008
Messages
8,608
Points
113
Location
Stafford, UK
First Name
Colin
Wow Colin, that was before I took the dive into wing thingy's in 2019. I went back and read through your build and finished item posts. Absolutely fantastic work Sir!!! As Tim said, it was masterclass. I can only hope I can do mine half as good as yours. Might I ask, if you remember, what size rigging line you used? I'm lucky as my plane has less rigging than yours did...
Thanks Allen, but from what I've seen of yours, this is going to be something very special. For rigging I used 0.165mm monofilament and the control wires were 0.085mm
 

Allen Dewire

Proud Rabble Member
SMF Supporter
Joined
Apr 27, 2018
Messages
4,120
Points
113
Location
Bamberg
First Name
Allen
Morning all, from a foggy east side of London Bamberg...A small update to follow...

Looking very good so far Allen
Thank you Mark, but still along way to go though. Oh, and please take back your fog Sir!!!...

Thanks Allen, but from what I've seen of yours, this is going to be something very special. For rigging I used 0.165mm monofilament and the control wires were 0.085mm
Thanks for the info Colin. I did manage to get some Infini black to use. I can't say if this will be special or not. My skills are up to the job, but sometimes the nerves aren't playing along at all...

After getting my paint order, I could move on and try to assemble the motor after it was painted. There were 3 decals to add to the motor block. WnW's decals seem really nice, but I found you have to leave them in water for longer as stated, or they won't come off the paper. I had also decided to paint the plug wires blue for contrast. Like I said, they could have been various colored ones used and I wasn't around to see them in 1916. The motor so far,

IMG_3501.JPG
The other side,

IMG_3502.JPG
I gave the intake wrap a coat of Vallejo European dust wash to give it a worn look. I might give it another too. The MIG old brass paint worked well on the fuel Injector thingies. Next up was the headache children known as the magnetos,

IMG_3504.JPG
I really had to scratch my head and have a cold one, to find a way to get the 6 sprue wire ends together as tightly as possible. I ended up making 2 looms from some thin sheet, punched out with a 0.8mm hole in them. The fun got even better as I tried to get all of the strands through the hole in each one. With that finally done, I slid them back as far as I could towards the cap and dripped cement on the ends. Using my fingers and then tweezers, I got them as small and rounded as possible to let them dry. I had painted the wires on the cap blue earlier. When they were almost dry, I gently bent them with my fingers to achieve a 90° angle. These will be trimmed to the proper length needed and CA'd to the tube ends on the motor. I also painted the urn looking thing and let it dry......

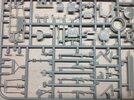
In the meantime, I decided to start cleaning up parts for the cockpit. Our Dave Lovell is building Roden's Old Bill pigeon bus and has had to deal with large 1/72 sprue gates. This is what I had to deal with in 1/32 parts,

IMG_3503.JPG
The part on the right has sprue gates, but the part on the left, has sprue walls!!! Careful use of the fine cutters worked for them and clean up was easy too. It's funny, with this kit there are super fine gates, huge ones and every size gates in between, so care is needed when removing parts. Here's another nice thing about the busy instructions of the kitset,

IMG_3507.JPG
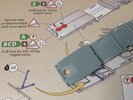
You have 3 motor options and WnW's make clear what one has to do. If you look at the part, you can see the imprint of the 160HP cut out next to the one I drilled out for the 180-200HP motor. I suggest you cut out the hole with tip of a new blade and carefully trim it as close as you can, to it's 4.5mm size. Then use the 4.5mm bit to finish the job and keep it perfectly round...

That's it for now folks and there's plenty more still to do!!! Thanks for stopping in and have a great week...

Prost
Allen
 

colin m

Moderator
Staff member
Moderator
SMF Supporter
Joined
Dec 26, 2008
Messages
8,608
Points
113
Location
Stafford, UK
First Name
Colin
I did manage to get some Infini black to use
A long time ago whilst bumbling around looking up on rigging etc. There was a German aircraft mentioned (a bi plane but I forget which one) which not only had no rigging, also was so strong it didn't actually need interplane struts. They were however fitted, just to keep the pilots happy.
 

Jim R

SMF Supporter
Joined
Apr 27, 2018
Messages
13,806
Points
113
Location
Shropshire
First Name
Jim
This is progressing very nicely Allen. Rather strange about the various sprue gates. Does the size correspond to the size of the part? Well done with the wires through the hole - a bit like the pint in a half pint pot :smiling:
 

JR

Member of the Rabble and Pyromania Consultant
SMF Supporter
Joined
May 26, 2015
Messages
17,358
Points
113
Location
lincs
First Name
John
Nice work Dude1 , esp like that wrap .

Is it possible to have some more side plates, we've run out in the kitchen, and the Rabble are getting rather impatient. I' ve asked Matron to call and instruct a certain group to behave !
 

Allen Dewire

Proud Rabble Member
SMF Supporter
Joined
Apr 27, 2018
Messages
4,120
Points
113
Location
Bamberg
First Name
Allen
Evening Good People,

As some of you may have noticed, I have been sort of absent on here for a while. Real life probs from across the big pond have taken up a lot of my time and mental state. I'm not going to go into the details, but I am finally getting back into the swing of things, hobby wise, and have cleared my head a bit. I do apologize for not answering your comments sooner and for my sporadic commenting on all of the fine work going on here too. I do have a lot to ketchup on over the next few days. Thanks for your understanding everyone...

A long time ago whilst bumbling around looking up on rigging etc. There was a German aircraft mentioned (a bi plane but I forget which one) which not only had no rigging, also was so strong it didn't actually need interplane struts. They were however fitted, just to keep the pilots happy.
Wow Colin, that sounds really interesting. I have been researching WWI planes, but haven't found any info on this. If you happen to remember, it would be great if you could post it here...

I'm liking that intake wrap Allen - I'm guessing they did that to cure a problem with the long inlet path icing up...

Nick
Thanks Nick. My thought was it was to prevent the engine heat from inducing vapor lock in the intakes. That is very plausible too, so it may have worked in both instances. I know, I wouldn't want to be flying around in one of these crates in the winter. Probably freeze your dangles off in the open cockpits!!!...

This is progressing very nicely Allen. Rather strange about the various sprue gates. Does the size correspond to the size of the part? Well done with the wires through the hole - a bit like the pint in a half pint pot :smiling:
I found it odd too Jim, that the gates would be so different without respect to the size of the part. It was a battle to thread the holes and I needed more than a pint for the nerves! Hope you are well and here is an idea of the gate sizes,
IMG_3438.JPG
Note the cockpit inner frame on the top left...

Allen,
Some lovely work going on mate.
Thanks so much my friend. How's the Albatros doing? I was hoping you would have posted an update so I could follow suit Paul...

A fine job your making of that engine.
Thanks too Mark. I screwed up and cut the magneto wires off too short on the right side though. I'll have to leave that engine cover on when I'm done. Mud can't help me there I'm afraid...

Fine work Allen
Thank you 'Admiral' Bob. I am glad to see you have conquered your posting woes and I have to catch up with your floaty buildy thingy to see how you're getting along Sir...

Nice work Dude1 , esp like that wrap .

Is it possible to have some more side plates, we've run out in the kitchen, and the Rabble are getting rather impatient. I' ve asked Matron to call and instruct a certain group to behave!
Thanks Dude 2 and the wrap was a PITA, but came out good in the end. Sorry, but I don't have any more sides to offer. Bought more cases of beverages and if the rabble have hunger, grab one by the collar and send him off to BK, on Berliner Ring, to get some burgers and chips for the hungry ones. Make sure they all chip in a tenner first!!!...

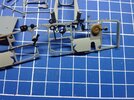
I have managed to do some things at the table even though the mind wasn't into it. This kit requires a lot of pre-painting of parts before you can assemble them. It's time consuming and better than trying to do it afterwards. You also have to add (microscopic) decals to the items too. I have been working on the pit of late,

IMG_3514.JPG
The pit frame is painted with RLM84 gray-blue and the other stuff in flat black. The wheel is wood color and used to raise and lower the antenna for the radio. I applied the wrong decal on it and had to remove it, hence the blotch. The decal on the black box and on top of the mount for the handle were very tiny, but they went down well. The dials weren't too bad and I have since filled them with a thick blob of Micro Kristal Klear to simulate glass over them. I then got on with the pilots LMG 08/15 'Spandau' and more nasties,

IMG_3515.JPG
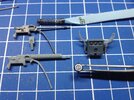
The kit offers a plastic MG or the option of a 'high Detail' MG using etch. Went with the latter and used my 1/2 round bending plate as it had the same size of 2.5mm, as required for the etch cooling jacket. I also used a 2mm drill bit to form it and keep it round. Dabbed some CA to hold it together and slapped some paint on it. Added some decals to the radio amplifier (screwed them up a bit) and the onboard compass. The finished Spandau LMG,

IMG_3517.JPG
I think it looks 100% better than the plastic kit part. I even drilled out the barrel for the realistic effect (hard to see). I then came to the realization that my damn mat is too small for all this nonsense and it's time to buy a bigger one,

IMG_3518.JPG
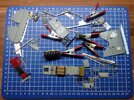
I'll have to wait till the show next month as I don't want to order one online that comes with a speed bump in it. Then, in a fit of stupidity, I decided to try rigging the controls for the joystick controlled, tail wing flappy things,

IMG_3519.JPG
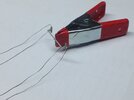
The Infini rigging is really cool and easy to use. I drilled the 4 holes with a .35mm bit, threaded it in and dabbed it with a bit of CA to hold it place. I was surprised how stretchy the material is too. When the time comes, the wing rigging shouldn't be too hard to do with it (famous last words)...

That's it for now. I'll try and ketchup with all your great builds shortly folks. Thanks for looking in and have a good one!!!

Prost
Allen
 

JR

Member of the Rabble and Pyromania Consultant
SMF Supporter
Joined
May 26, 2015
Messages
17,358
Points
113
Location
lincs
First Name
John
Dude1.
Agree with the painting on those very small parts before fitting . Certainly coming on .
 

yak face

Wossupwidee?
Staff member
Moderator
SMF Supporter
Joined
Jun 13, 2009
Messages
12,427
Points
113
Location
sheffield
First Name
tony
Fantastic work allen , and no need to apologize for any absence, as long as youre ok . The detail work and general loveliness of this build is great to see , the Spandau looks superb , the kit part with its solid holes just wouldnt have looked right especially at this scale so you were right to go for the PE . Keep up the excellent work mate , cheers tony
 
Top