Scotties big Zundapp

scottie3158

SMF Supporter
Joined
Apr 27, 2018
Messages
12,783
Points
113
Location
Spalding
First Name
Paul
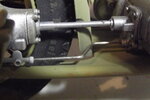
Luckily for you there is only one picture tonight. The prop shaft and hydraulic pipe for the rear brakes were appalling, moulded so far off centre that they would have been so thin when cleaned up. So it was easier to make them the prop shat is some ally tube with ally collars cut to size and the pipe work a mixture of the kit part punched nuts and wire.

DSCF3637.JPG

cheers
Scottie
 

Allen Dewire

Proud Rabble Member
SMF Supporter
Joined
Apr 27, 2018
Messages
4,122
Points
113
Location
Bamberg
First Name
Allen
Knit one, Perl two. Knit one, Perl two. Knit one......Don't care if this damn scarf takes 6 months to make with thread!!!

Seriously Bro, this is so, so good and soooo you!!! The pic of this on the bench, says it all. Love it!!! BTW, what wire are you using to do the linkage and fuel lines? It looks like it takes bends really well and smoothly too.

Prost
Allen
 
  • Like
Reactions: JR

Jim R

SMF Supporter
Joined
Apr 27, 2018
Messages
13,866
Points
113
Location
Shropshire
First Name
Jim
Quite simply superb. I like what you did with the decal - very good idea.
 

tr1ckey66

SMF Supporter
Joined
Mar 6, 2009
Messages
3,686
Points
113
First Name
Paul
Beautiful work, this just keeps getting better!
Cheers
Paul
 

scottie3158

SMF Supporter
Joined
Apr 27, 2018
Messages
12,783
Points
113
Location
Spalding
First Name
Paul
Knit one, Perl two. Knit one, Perl two. Knit one......Don't care if this damn scarf takes 6 months to make with thread!!!

Seriously Bro, this is so, so good and soooo you!!! The pic of this on the bench, says it all. Love it!!! BTW, what wire are you using to do the linkage and fuel lines? It looks like it takes bends really well and smoothly too.

Prost
Allen
Allen, Thanks mate if your knitting is anything like mine it will take a year to do a row. The wire is just normal copper wire I have a selection of diameters and some with a coating and some plain, I have a pair of pliers that form a radius but tend to favour just bending round a suitable diameter.
Quite simply superb. I like what you did with the decal - very good idea.
Jim, Thank you matey really appreciate it.
Beautiful work, this just keeps getting better!
Cheers
Paul
Paul, you are to kind thank you.
 

Mini Me

SMF Supporter
Joined
Jun 1, 2018
Messages
10,162
Points
113
First Name
Rick
Nice thing about copper is it's malleability,so there isn't much, if any, "spring back" when forming or bending it. ;)
 

Tim Marlow

Little blokes aficionado
SMF Supporter
Joined
Apr 27, 2018
Messages
16,904
Points
113
Location
Somerset
First Name
Tim
Rick,
Very true I collect wire from all sources old flex etc I also have some steel wire of various gauges but I can't remember where I got it.
I’ve got a drawer full of old crap as well Paul ;)
 

scottie3158

SMF Supporter
Joined
Apr 27, 2018
Messages
12,783
Points
113
Location
Spalding
First Name
Paul
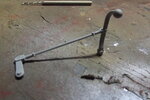
I had some fun today the rod I was waiting for has turned up so the first linkage was replaced. As far as I can make out this lever could engage/disengage the drive to the side car all though I could be wrong.

Firstly the kit part

DSCF3638.JPG

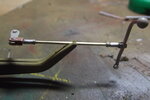
Although not exactly bad it does lack definition so Scratched it had to be. So using brass rod. copper sheet punched and drilled nuts and punched details and part of the original linkage I came up with this.

DSCF3639.JPG

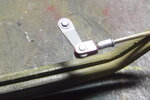
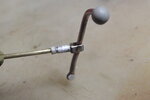
then a picture of each end. The arm is not glued in place yet to allow me to position it correctly.

DSCF3640.JPG

DSCF3641.JPG

next the gear selector but that will be another day.

cheers
Scottie
 

Mini Me

SMF Supporter
Joined
Jun 1, 2018
Messages
10,162
Points
113
First Name
Rick
Love it!.... Don't forget to safety wire those clevis nuts or they'll back off and throw your linkage out of adjustment. :tongue-out3: :tongue-out2: ;) :thumb2:
 

Jakko

Way past the mad part
SMF Supporter
Joined
Apr 28, 2018
Messages
10,974
Points
113
First Name
Jakko
As far as I can make out this lever could engage/disengage the drive to the side car all though I could be wrong.
From looking at a few photos, the rear lever seems to be on the differential, and IIRC, it’s to lock the differential so power always goes to both rear wheels.

Incidentally, never build a BMW R 75 or Zündapp KS 750 as a solo machine without a sidecar as if they were also used that way (both Tamiya and Italeri released 1:35 scale sets like that in the 70s). These bikes were designed from the ground up to have the sidecar, and if the sidecar is removed, the differential lock is too weak for prolonged use. With the lock disengaged, you won’t be going anywhere, of course: all power will go to the free end of the differential, and the bike’s rear wheel then doesn’t turn at all. Enterprising people (after the war) built a plate to stick to the outside of the differential so the bike could be ridden without a sidecar and without destroying the lock, though.
 

therapy

SMF Supporter
Joined
Apr 21, 2019
Messages
887
Points
93
Location
East Anglia
First Name
Nick
This is fabulous Scottie! Incidentally, what do you use to cut the brass rod/tube whilst not mashing the end?

Nick
 

Jim R

SMF Supporter
Joined
Apr 27, 2018
Messages
13,866
Points
113
Location
Shropshire
First Name
Jim
Really skilled scratch work there Scottie. It's getting very difficult to decide if the photos are reference or your build.
You will really have to treat yourself to some new tweezers :smiling:
 
Top