Andy T's 1/72 Tamiya Ki-61 "Tony"

Andy T

SMF Supporter
Joined
Apr 26, 2021
Messages
2,041
Points
113
Location
Sheffield
First Name
Andy
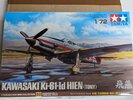
Or Kawasaki Ki-61-Id Hien to give it its Sunday name.

Thanks for letting me join in with this group build at the last minute. It's been a while since I built a wingy thing so I didn't take much persuading. I've chosen this baby Tamiya kit to ease me back into the skies gently and I must admit to knowing very little about the subject so please forgive any discrepancies, especially on the colours which be as close as I can get with what I have.

Enough rambling, here she is:
2023-07-05 13.57.00.jpg

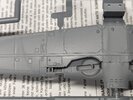
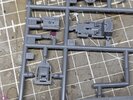
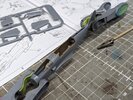
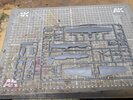
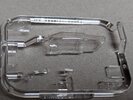
There aren't many parts in the kit but what there are seem very crisply moulded and well detailed
2023-07-05 14.07.42.jpg

2023-07-05 13.57.52.jpg

2023-07-05 14.10.27.jpg

2023-07-05 14.08.22.jpg

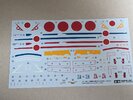
There are plenty of decals to choose from, although inspired by some recent builds, especially by Tony / Yak Face, I'm going to attempt to paint as many as I can.
2023-07-05 13.58.04.jpg

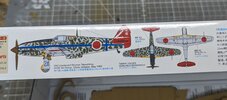
Talking of painting this will be my first bare metal finish, and just to make it a bit more spicy I'm having a go at the field applied camouflage too. :anguished:
2023-07-05 14.17.44.jpg

Now I have purchased the Tamiya detail up decal set for this camo but it will be a last resort. I'm hoping I can freehand it with a brush or hissy thing. Fingers crossed!
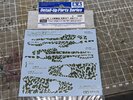
2023-07-05 14.09.21.jpg


That's the (overly long) intro out of the way, time to start snipping.
 

Ian M

Administrator
Staff member
Administrator
Moderator
SMF Supporter
Joined
Dec 14, 2008
Messages
19,800
Points
113
Location
Falster, Denmark
First Name
Ian
So this was when the Japanese started to copy Western design.... That looks rather Me 109 ish to me... lol

I am sure you can manage that camo without resorting to the decals Andy.
 

Andy T

SMF Supporter
Joined
Apr 26, 2021
Messages
2,041
Points
113
Location
Sheffield
First Name
Andy
Cheers everyone, it does seem nice so far.

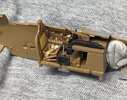
I got the cockpit started and have found a colour that looks near enough to all the various shades I've seen these painted in. The evident ejector marks are hidden once assembled so I left them be. Hairy sticks out tomorrow for some detail painting.

2023-07-05 21.21.59.jpg
 

adt70hk

I know its a bit sad but I like quickbuild kits!!!
SMF Supporter
Joined
Sep 4, 2019
Messages
9,526
Points
113
First Name
Andrew
Cool.....as Ian said it does look a bit 109 ish!
 

Andy T

SMF Supporter
Joined
Apr 26, 2021
Messages
2,041
Points
113
Location
Sheffield
First Name
Andy
Cool.....as Ian said it does look a bit 109 ish!
I agree. Hardly surprising as I watched a video about this 'plane tonight. Apparently the designer was trained by a well known german designer, then went to Europe to study aircraft design, and later produced this

On behalf of Dornier, Vogt was briefly sent to Italy, then in 1923, to the Kawasaki in Kobe, Japan, which was a licensed manufacturer of Dornier aircraft. In Japan he was appointed as chief designer, and he trained the young Japanese engineer Takeo Doi to be his successor. Doi later designed the Ki-61 Hien.
 

Tim Marlow

Little blokes aficionado
SMF Supporter
Joined
Apr 27, 2018
Messages
16,854
Points
113
Location
Somerset
First Name
Tim
Looks interesting Andy. Strikes me that you could use that decal set to produce paint masks. After all, if they are like the usual Tamiya decals it will be like covering the plane in vinyl stickers…..
 

Andy T

SMF Supporter
Joined
Apr 26, 2021
Messages
2,041
Points
113
Location
Sheffield
First Name
Andy
Thanks Tim.

The idea is to use the decals as a guide if I can manage it. The few images I've seen that are detailed enough seem to suggest it was slapped on in the field with brushes, so I doubt any 2 were the same,or even similar.

Perfect as it gives me scope for cock ups :smiling5:

But yes, I suppose scanning & printing on to tape would work rather well, I just fancy the challenge of free hand.
 

Geoffers

SMF Supporter
Joined
Jan 26, 2017
Messages
1,051
Points
113
Location
Shropshire
First Name
Geoff
Good start Andy, looks a nice kit :thumb2:

I think you meant to say “artistic licence” rather than “cock ups” :tears-of-joy:

Geoff.
 

Andy T

SMF Supporter
Joined
Apr 26, 2021
Messages
2,041
Points
113
Location
Sheffield
First Name
Andy
Either way Geoff it'll give me a handy excuse lol


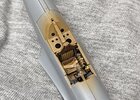
So I finished the 'pit this afternoon. OOB apart from some rudimentary lap belts, so not amazing detail but I think it'll suffice

2023-07-06 18.41.56.jpg

2023-07-06 18.42.07.jpg

2023-07-06 18.43.27.jpg

Unlike any other aircraft I've built the cockpit slots in after the fuselage halves are brought together rather than being sandwiched. That should allow me to fix any seams without worrying about sanding dust, although with the way it's been engineered there won't be a lot to do, and the visible seams won't need any sort of re-scribing after sanding.

Clamps weren't really needed but should help give a bit of squeeze out in the joint.

2023-07-06 19.07.10.jpg
 

The Smythe Meister

Born to be WILD....... until about 9pm
SMF Supporter
Joined
Jan 30, 2019
Messages
5,791
Points
113
Location
Devon
First Name
Andy
Blimey Charlie!!
That cockpit is putting mine to shame!!:flushed:.... Superb stuff mate,it looks fantastic :thumb2:
P.S. I know you ain't called "Charlie"!!;)
 

Jim R

SMF Supporter
Joined
Apr 27, 2018
Messages
13,815
Points
113
Location
Shropshire
First Name
Jim
Typical Tamiya by the look of it. Decent detail and a great fit. That cockpit is stunning, especially for 1/72. I reckon freehand brush painted camo will be just right for this. As you say it was field applied so not really neat or to a standard pattern.
 
Top