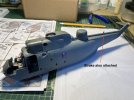
Doug's 1/48 Airfix Sea King

Jakko

Way past the mad part
SMF Supporter
Joined
Apr 28, 2018
Messages
10,814
Points
113
First Name
Jakko
That will be the real use of a time machine. None of this faffing about changing history for the better, or ensuring established history plays out, or making sure your parents go to the Fish Under The Sea dance — it will be much better for checking details about vehicles that no longer exist so models of them can be made more accurate :smiling3:
 

Waspie

SMF Supporter
Joined
Mar 13, 2023
Messages
2,481
Points
113
Location
Portland - Dorset
First Name
Doug
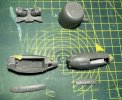
Todays progress. Not a lot considering the whole day was spent in the garage!! (Bench).

It was a tidying up the sea tray, making the foolishly removed throttle quadrant and a rotor brake. Also fitted the sonar transducer/SU to the body but that was an epic fail which meant removing it and I will have to find a suitable piece of wire to use to suspend the sonar!!!!
(One step forward two back!!!!).

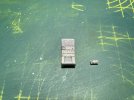
Pic 1
Upper cockpit IP with my scratched quadrant minus the levers to the right!
IMG_1270.JPG

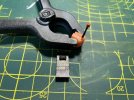
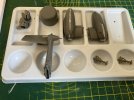
Pic 2
Quadrant fitted and painted. Rotor brake scratched and painted ready to be attached. That will happen once the cockpit clear screens have been painted and are ready to fit.
IMG_1273.JPG

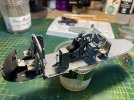
Pic 3
Crew seats installed. The pic was taken prior to the sonar connector failing. At this stage a wash had been applied to the deck.
I spent some time drilling out the plastic in the transducer to accept a new 'cable'. Also drilled out a hole in the sonar head to attach the new 'cable' (when I source it).
IMG_1275.JPG

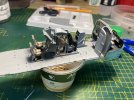
Pic 4
Flying controls, cyclic and collective not fitted yet as I'll wait until the cockpit is just about to be sealed up as they are very flimsy.
IMG_1276.JPG

That's all folks.
Quite tired after all that maintenance!!!!!

Off to the dog house now!! I blew dinner for tonight!!!! Bows head in shame!!!
 
Last edited:

Waspie

SMF Supporter
Joined
Mar 13, 2023
Messages
2,481
Points
113
Location
Portland - Dorset
First Name
Doug
Allowed myself a bit of extra time as Rick had problems with what I was about to assemble. (thanks for the heads up Rick). So with the idea I will have to do a bit of additional work to get a good fit I put together the undercarriage sponsons. Luckily, the same problem didn't emerge. I dry fitted the upper panels as that was the suspect part with no issues luckily. ( I was ready though - files and scalpels ready for surgical removal of any offending part!!)
So, with al that extra time I awarded myself a special extra Waspie brew, a Kit Kat and 30 minutes being savaged by the she devil with four legs!!!!
One thing I nearly missed, a clear part on the starboard sponson, that nearly caught me out!!!
Also attached the larger radome to its mount then assembled the port and starboard exhausts to the bulkhead.

Pic 1
Not a lot but chipping away!
IMG_1277.JPG
 

Waspie

SMF Supporter
Joined
Mar 13, 2023
Messages
2,481
Points
113
Location
Portland - Dorset
First Name
Doug
Doug, very impressive detailing mate this is looking really good.
Thank you Paul.
One lesson I am really taking on board now is - not rushing. As proved the other day and had to correct myself. (Rushing and trying to get ahead of myself is why the sonar transducer cable came apart!!
Just before I was about to apply TET to the sponson a second read of the instructions and the clear piece jumped out at me!! Lucky! That could have been messy if I missed it!!
 

Waspie

SMF Supporter
Joined
Mar 13, 2023
Messages
2,481
Points
113
Location
Portland - Dorset
First Name
Doug
Been grabbing a few minutes here and there the past couple of days.

Pic 1
Sponsons have been pre assembled, a couple of seams needed some attention and is in hand, just waiting for the filler to harden and then rub down.
Tail section too was assembled, the tail will be spread so don't have to worry about disconnect couplings and associated wiring.
IMG_1278.JPG

Pic 2
Wire for the transducer was found and glued into the top. When set I'll trim it to the correct length ready for fitting inside the King!
IMG_1279.JPG

Pic 3
Sea Tray has now been installed and all the troop seats fitted.
One thing I discovered yesterday was there is an aftermarket part that would have saved me making the sheepskin seat pan covers. That said, I'm happy with my cotton wool substitute! Won't be long before the cabin finished and Ill be in a position to but the bulkheads in place and button it up!!
IMG_1280.JPG

That's it for now.

Comments, good - bad all welcome.

That's all folks!
Doug
 

Waspie

SMF Supporter
Joined
Mar 13, 2023
Messages
2,481
Points
113
Location
Portland - Dorset
First Name
Doug
OK, I found the after market detailing I was referring to in my previous post. It's a Quinta product and looks ok. If I'm honest if Id known about this set prior to obtaining the Eduard set I would have gone for the Quinta. Harness's look good and even include the inertia reel at the rear of the seat plus the rotor brake handle which Rick and I had to scratch.

Link to Quinta Sea King cockpit detailing.
 

Waspie

SMF Supporter
Joined
Mar 13, 2023
Messages
2,481
Points
113
Location
Portland - Dorset
First Name
Doug
Brrrr, it's been a tad cold to work in the garage of late. But I have grabbed a few minutes here and there.
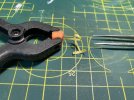
Clear windows have been added to the fuselage and duly masked up with a mix of tape and liquid mask in preparation for some decent spraying weather. Having been given an idea by Chris aka @Steve-the-Duck. I decided to have a go at making a dispatcher harness for the back of the Sea King. (For those unaware, a dispatcher is a harness worn by back seat crews to allow them to safely walk around the back if the cabin door is open.)
Initially I chose some thin tape then trimmed it to both length and width, One end connects with the roof of the SK and a waist band then worn around the waist of the wearer.
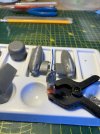
Pic 1
The end connecting to the roof is between the jaws of the clamp. A waist band, complete with the two locking straps at one end of the waist band.I did add a very thin piece of tape just visible at the lower left part of the 'loop'.
IMG_1286.JPG

Pic 2
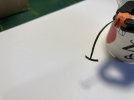
I then painted it a nato green. Most were a canvass colour the same as parachute harnesses but I chose green as there were a few green harnesses in circulation. (There was an interim stage where they decided on a blue coloured nylon harness but the securing clips were frequently coming undone in flight. After many of us formally complaining. The MOD in its wise and ultimate wisdom reinstated the older designed canvass harnesses).
IMG_1287.JPG

Pic 3
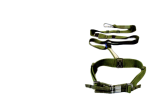
Actual dispatcher harness very similar to the one in service use in the 60/70/80/90's!
Screenshot 2024-02-25 at 18.25.39.png


The intention is to connect one end to the upper deckhead close to the cabin door and the waist back sat on the rear troop seats.

At that point, frost bight was starting to take hold so I retired indoors to a warm brew and a bite of lunch!!!

Comments and criticisms most welcome.

Doug
 
Last edited:

Waspie

SMF Supporter
Joined
Mar 13, 2023
Messages
2,481
Points
113
Location
Portland - Dorset
First Name
Doug
Determined today to get something done. Too cold the past few days, today was bordering on cold but very wet!!!
So - a quick dash to the garage and a catch up on what was going on with the King!!!
Took some measurements of the cabin doorway and sea tray ready for the finishing off of the sea tray were it mates with the cabin door.
After that I decided it was time to get the cabin together and if able to attach the outer shell. I prepared some strips of tape to help keep bits in place until the TET set. Enough blather!

Oh!! Edited bit. I forgot to add, before it was all buttoned up I did add some additional weathering tot he corners of the sea tray, where all the dirt and mundungous got trapped from any sea water that did get inside.

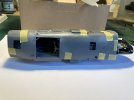
Pic 1
All four components stitched together. Only problem is the sonar transducer is very exposed so I sat it on the well which is only dry fitted at the moment!! Loads of tape to keep it all in place.
IMG_1288.JPG

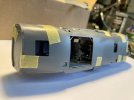
Pic 2
A view through the cabin door!
IMG_1289.JPG

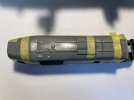
Pic 3
IMG_1290.JPG

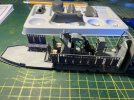
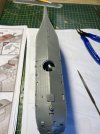
Pic 4
Hull installed showing sonar well with the SU visible.
IMG_1291.JPG

Pic 5 (The end)
Finally I hear you sigh. The port side with rear of engine bay and top of transmission shown.
IMG_1292.JPG

As usual folks any comments or criticisms much appreciated.
Looking forward to the next wet day - Not!!!!
 
Last edited:

Waspie

SMF Supporter
Joined
Mar 13, 2023
Messages
2,481
Points
113
Location
Portland - Dorset
First Name
Doug
Today's foray into the garage gave me time to get it more looking like an airframe. (Albeit a decrepit airframe but an airframe non the less).

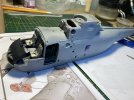
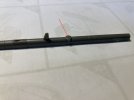
The tail transmission cover had a wee bit that the destruction said remove - so it was removed.

Pic 1
Arrow showing the offending piece that was to be surgically removed!
IMG_1293.JPG

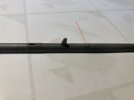
Pic 2
Begone!!!!! Carbuncle removed by Dremmel, file and smoothing stick!!
IMG_1294.JPG

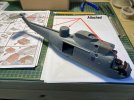
Pic 3
Arrows showing all the differing parts that were attached in todays little session.
IMG_1295.JPG

Pic 4
And the port side strake. That gave a few problems in that when one locating tab was attached one of the others would spring out. So I decided to simple attach one at a time and wait until the TET set then move to the next.
I can't remember the strake being on the Mk1, maybe Rick ( @rickoshea52 ) may know? 'RICK' he shouted!!!!
IMG_1296.JPG

I really want to get on a start spraying but the conditions here on Fraggle simply aren't suitable, too cold and way too wet/humid. So I'm going to play the waiting game.

Anyway, that's it for today. C&C's most welcome as usual, but be gentle - I've got a headache!!!!!!

Doug
 

rickoshea52

SMF Supporter
Joined
Dec 20, 2011
Messages
3,975
Points
113
Location
North West
First Name
Rick
I understand the strake was introduced when the HAS2 with updated engines was introduced. The additional tail rotor blade and strake counteracted the increased torque from the newer engines as far as I can find out. Happy to be corrected though.
 

Waspie

SMF Supporter
Joined
Mar 13, 2023
Messages
2,481
Points
113
Location
Portland - Dorset
First Name
Doug
I understand the strake was introduced when the HAS2 with updated engines was introduced. The additional tail rotor blade and strake counteracted the increased torque from the newer engines as far as I can find out. Happy to be corrected though.
Re the engines, the upgrade was that when they got rid of the open loop spring the pilots were always babbling about??
 
Top