First diorama - The Choice

PaulinKendal

SMF Supporter
Joined
Jul 13, 2021
Messages
1,059
Points
113
Location
The Lake District
First Name
Paul
OK, I'm one of the world's great procrastinators, but I've run out of excuses not to start on this. The three figures are painted, and I don't want to start building the feature tree until the base is at least part-completed. So start on the base I must.

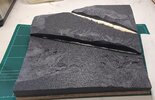
I started by cutting a 12mm ply baseboard - it's 12" x 11" (don't ask, I'm of an age that switches between metric and imperial as the fancy takes me).

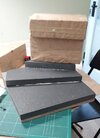
Then I started sticking on layers of dark grey 25mm styrofoam using gorilla glue. Weights are housebricks wrapped in brown paper (for cleanliness) - a neat trick I pinched off my missus, who used them when she was a bookbinding apprentice.
20230226_152314.jpg
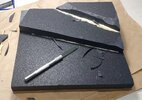
Then I began chopping away sharp edges.
20230227_100108.jpg
20230227_101955.jpg
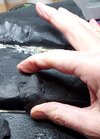
Then the shapes were further softened with a blowtorch.
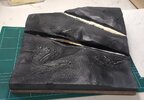
20230227_102449.jpg
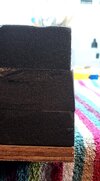
You can see that the foamed glue has melted at a slower rate than the Styrofoam, so I've cut that away.

I'm now thinking about coating it with Sculptamold and adding foam clay rocks. Not sure about the order here - rocks first? Sculptamold first?
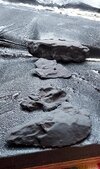
20230227_105741.jpg
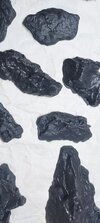
Just to emphasise that these rocks really are foam:
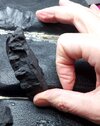
20230227_105800.jpg

20230227_105801.jpg
 

PaulinKendal

SMF Supporter
Joined
Jul 13, 2021
Messages
1,059
Points
113
Location
The Lake District
First Name
Paul
I'm also wondering whether I should coat the styrofoam in PVA - I'd like to use the flexibility of the rocks to bend them around a bit, but to do so I really need to use cyano - and I think that'll attack the Styrofoam.

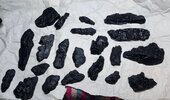
The foam clay rock is weird stuff - like a damp, greasy-feeling, slightly elastic plasticine. But it's nice and clean to use - squishing it into the moulds was a piece of cake compared with mucking around with liquid plaster, tapping it to remove air bubbles and so on. I just squashed it in and stuck it in the freezer. One frozen it comes out of the moulds cleanly, retaining all the detail. A few days curing and it's done!
20230225_075905.jpg20230225_075954.jpg
 

AlanG

Moderator
Staff member
Moderator
SMF Supporter
Joined
Dec 2, 2008
Messages
7,492
Points
113
Location
Scotland
First Name
Alan
Could you not use a different contact adhesive such as Evo-stik or UHU or alike?
 

PaulinKendal

SMF Supporter
Joined
Jul 13, 2021
Messages
1,059
Points
113
Location
The Lake District
First Name
Paul
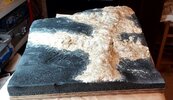
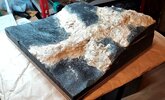
I decided to whack on some Sculptamold, just to get a feel for it and set up the underlying structure. Once this has gone off I can start thinking about the bare rock outcrops. I added some burnt umber acrylic paint - but clearly not nearly enough! Still, it should ensure there's no completely white bits to worry about.
20230227_122230.jpg20230227_122236.jpg
I might spray it all a uniform brown, just so I can see the overall shape - at the moment, the grey foam and beige sculptamold are all I can see.
 

PaulinKendal

SMF Supporter
Joined
Jul 13, 2021
Messages
1,059
Points
113
Location
The Lake District
First Name
Paul
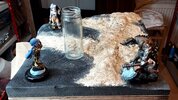
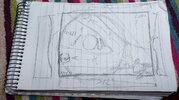
I should say that it looks like I'm just slapping this all together, but there has been plenty of forward planning - lots of this going on:
20230227_124838.jpg

That planning seems absolutely vital to me. Without it, I might've missed that my intended front view would've presented one of the figures to viewer like this:
20230226_125235.jpg

... so I switched it around, of course!
 

wotan

SMF Supporter
Joined
May 16, 2018
Messages
1,044
Points
113
Location
Quebec
First Name
John
Excellent start Paul. That base geology looks very nice. Just look out for too large empty spaces on a big base. This tends to make it difficult to maintain the relationship between the figures. With the space you have available maybe a little house or some sort of ruin would fill it up. Also don't forget that when you add the rocks, (which look very convincing by the way) they should bed into the base as though they are atleast partially buried and not just sitting on top.

Keep it coming
John
 

PaulinKendal

SMF Supporter
Joined
Jul 13, 2021
Messages
1,059
Points
113
Location
The Lake District
First Name
Paul
Thanks for the advice @wotan. Re. empty spaces, I'm intending to make a really large tree. Like, REALLY large!

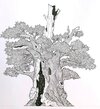
I want it to dominate the scene, pushing viewers to really inspect in detail what's going on beneath it. I've taken tons of pictures, but this tree, with its big, intricate trunk and relatively small canopy, is closest to what I hope to achieve.

20230216_155033.jpg20230216_154954.jpg
You can see that there's a long dead branch, as well as some old branches near the centre that have broken, but with new growth coming from them. This is in winter, of course.

Here's a couple of images that show the combination of live growth, dead wood and intricate trunk I'm after.
Screenshot_20230118-103735_Samsung Internet.jpgtree-drawing.jpg
With the rocks, they'll be bedded in with more Sculptamold - the first application of Sculptamold was just to get a feel for it and create some basic structure.

Thanks again for the input. And I'm really looking forward to doing some buildings - just not for this scene!
 

Jim R

SMF Supporter
Joined
Apr 27, 2018
Messages
13,726
Points
113
Location
Shropshire
First Name
Jim
What a great idea and a great start. I totally agree that good planning is important. I find that wood glue, that white PVA type stuff, sticks foam. I do like those rocks - money well spent.
 

adt70hk

I know its a bit sad but I like quickbuild kits!!!
SMF Supporter
Joined
Sep 4, 2019
Messages
9,496
Points
113
First Name
Andrew
Hi Paul

Can't offer any advice as I've never done a dio. I do have one on the stalled pile though, so will follow with interest.

Loving what you've done so far.

ATB.

Andrew
 

PaulinKendal

SMF Supporter
Joined
Jul 13, 2021
Messages
1,059
Points
113
Location
The Lake District
First Name
Paul
Thanks chaps.
Are you using any special type of wire for the tree? The tree is looking very good.
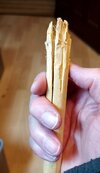
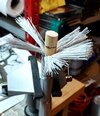
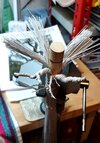
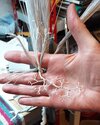
It's florists' wire, Jim. It comes in various grades and finishes. I've got paper covered 30 gauge wire precut to 14" - normally used for making sugar flowers, apparently. So really cake decorators' wire, I guess. Made by a company called Culpitt. The paper covering should make the next stage easier - the whole tree gets a liberal coating of PVA to consolidate it, and the paper should soak that up and hold it together better.
 

JR

Member of the Rabble and Pyromania Consultant
SMF Supporter
Joined
May 26, 2015
Messages
17,275
Points
113
Location
lincs
First Name
John
Every thing seems right Paul, like Jim said the PVA will do for the foam.
Don't know how much you've used Sculptamold before but I add a small amount of PVA to it just to help it to bind .
Very impressed with the tree, I've some of that florists wire , lovely stuff to work with . Yours looks really good .
 
Top