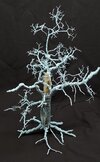
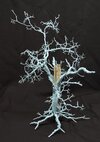
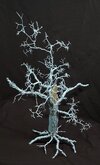
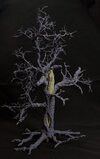
First diorama - The Choice

rtfoe

SMF Supporter
Joined
Apr 29, 2018
Messages
7,509
Points
113
Location
Malaysia
First Name
Richard
Hi Paul, just read through your progress and it looks real good from planning to the wired tree. Japanese pound shops like Daisho stock all types of handicraft glue including those for polyfoam. Uhu also has one for polyfoam.
The huge tree will add character and pull the eye to what is around and under it just like what I am attempting to do for my dio as well. Dios with 2 to 3 levels of height usually are more interesting. An empty space needs to have a purpose if there is one or should be occupied. Odd number figures or subjects will break stereotyping and monotony of the scene. If possible to not space subjects evenly unless they are in a parade.
Judging from the tree assembly it looks like you either are gifted or experienced, either way that's good. Definitely a dio worth looking forward to. BTW what will you be using for the leaves?

Cheers,
Wabble
 

PaulinKendal

SMF Supporter
Joined
Jul 13, 2021
Messages
1,061
Points
113
Location
The Lake District
First Name
Paul
Thanks all, you're very kind.

@rtfoe - what am I using for leaves? I'm not completely decided. I've got some postiche and foam scatter (on order from Greenscene) but, until that arrives, I don't know whether it'll be good enough for such a big tree.

Part of the problem is that I intend to paint the groundworks black (or dark brown) then colour it as per Martin Kovac (YouTuber Night Shift). The technique gives a great unified finish and means you don't have to buy tons of different coloured materials. However, if I'm using pre-coloured foliage for the tree, how do I integrate that into the groundwork (that I've painted myself) beneath it?

I'm not too bothered at the moment, because I've quite a way to go before that becomes a pressing issue. I may use pre-coloured foliage materials and do a bit of judicious airbrushing on it to tie it in with the rest of the scene. We'll see - happy for any suggestions anyone might have, of course.
 

PaulinKendal

SMF Supporter
Joined
Jul 13, 2021
Messages
1,061
Points
113
Location
The Lake District
First Name
Paul
I've just seen that AK Interactive do some superb 1/35th scale laser cut Oak leaves, which would be the right size for this. Sticking those on individually would look incredible, but also be a Herculean task, which I'm not sure I'm up to.

The workaround would be to make this an autumn/winter scene, sticking fifty or so dead leaves on the tree itself and then adding many more of them on the ground beneath.

Hmm...
 

rtfoe

SMF Supporter
Joined
Apr 29, 2018
Messages
7,509
Points
113
Location
Malaysia
First Name
Richard
I did mine with a full head of hair(leaves). Simply stretching fine fibre cotton over the branches and then spraying with spraymount and attaching bunches of my wifes dried fern. Sought of cheating.

Cheers,
Wabble
 

AlanG

Moderator
Staff member
Moderator
SMF Supporter
Joined
Dec 2, 2008
Messages
7,494
Points
113
Location
Scotland
First Name
Alan

PaulinKendal

SMF Supporter
Joined
Jul 13, 2021
Messages
1,061
Points
113
Location
The Lake District
First Name
Paul
I did mine with a full head of hair(leaves). Simply stretching fine fibre cotton over the branches and then spraying with spraymount and attaching bunches of my wifes dried fern. Sought of cheating.

Cheers,
Wabble
I've just started working through your dio build, Richard. Fabulous stuff (the waterfalls!) - I'm sure I can learn plenty from that thread alone. The laser cut plants certainly look superb, too. Like you, I'm a bit of a gardener, and I think that helps in making vegetation look realistic.
 

rtfoe

SMF Supporter
Joined
Apr 29, 2018
Messages
7,509
Points
113
Location
Malaysia
First Name
Richard
As Alan has said you can make tons with a punch. Initial investment is high but the returns if you intend to make more oak leaf dios will be good.
Thanks...can't wait to learn something more from you too which I already have from painting figs skin tones.
You'll probably finish yours ahead of me as 'Whooaah, Yes I'm the great procrastinator...wohuwohu...' the Elvis movie isn't getting much gongs is it?

Cheers,
Wabble
 

PaulinKendal

SMF Supporter
Joined
Jul 13, 2021
Messages
1,061
Points
113
Location
The Lake District
First Name
Paul
I've just slapped on a first coat of dilute PVA. When I added the IPA most of the mixture turned into a gloopy, stringy mess - like very sticky snot! Was the IPA a mistake, or was it just the old, cheap PVA I was using? Any thoughts, anyone?

I'll be putting further coats of PVA on once this first coat is dry.
 

Tim Marlow

Little blokes aficionado
SMF Supporter
Joined
Apr 27, 2018
Messages
16,779
Points
113
Location
Somerset
First Name
Tim
I've just slapped on a first coat of dilute PVA. When I added the IPA most of the mixture turned into a gloopy, stringy mess - like very sticky snot! Was the IPA a mistake, or was it just the old, cheap PVA I was using? Any thoughts, anyone?

I'll be putting further coats of PVA on once this first coat is dry.
Sorry mate, missed this. I think that’s the IPA and PVA reacting……best bet would be to dilute the PVA and add a drop or two of dish soap to reduce the surface tension. That’s what I do when I’m consolidating wargames or railway scenery and want the flock to stop shedding. It soaks through pretty well.
 

PaulinKendal

SMF Supporter
Joined
Jul 13, 2021
Messages
1,061
Points
113
Location
The Lake District
First Name
Paul
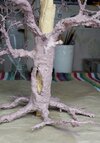
After a first layer of Flexi-Bark™. This is messy stuff to apply, but it should get easier with subsequent layers. Still some wire showing, although fairly minimal due to the fine grade of wire I used. The finish is very bobbly but I can sand it down a bit once I have sufficient on.
20230329_190044.jpg
 

PaulinKendal

SMF Supporter
Joined
Jul 13, 2021
Messages
1,061
Points
113
Location
The Lake District
First Name
Paul
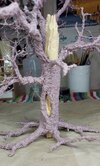
I've just added a second coat on the main trunk - you can see it's pretty gloopy, runny stuff. I'll take another pic once it's gone off, so you can see how it shrinks back. It has certainly given a lot more structure to the armature - much less flex.
20230329_193201.jpg

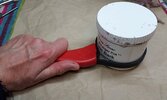
The pot is a bit of a bugger to open - the texture/latex mix makes it perfect for binding up the thread of the lid. Without one of these oil filter wrenches I'd've been properly stuck.
20230329_191450.jpg
 

PaulinKendal

SMF Supporter
Joined
Jul 13, 2021
Messages
1,061
Points
113
Location
The Lake District
First Name
Paul
Depending on how well this works, I might get some liquid latex to use as a finishing coat - it should tone down the bobbliness. I think the Flexi-bark™ is basically liquid latex with a fine texture added, possibly ground cork powder or something similar.
 
  • Like
Reactions: JR

PaulinKendal

SMF Supporter
Joined
Jul 13, 2021
Messages
1,061
Points
113
Location
The Lake District
First Name
Paul
Here's the second coat once it's cured. You can see it has shrunk right back again.

20230330_070951.jpg
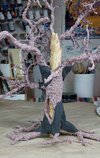
I'm not happy about how closely the main trunk is conforming to the cylinder of dowel beneath - so I've added some foam clay to buttress the roots and reduce the regular cylindricality (is that even a word?) of the trunk. I think it looks much better, or will do once it has cured and I've covered it with more Flexi-Bark.

20230331_193011.jpg
 
Top