Rick’s 1/48 Airfix Sea King HAS5

Waspie

SMF Supporter
Joined
Mar 13, 2023
Messages
2,603
Points
113
Location
Portland - Dorset
First Name
Doug
That video was quite helpful. I'll modify the T handle but probably skip the sonar console as it doesn't look too out of place to my eye. This will all be buttoned up anyway.
Looking at the vid I am still coming to terms with 'how did I forget the lower panel?' I have been racking my grey cell trying like !! to remember what controls were there!! All I can come up with is illumination settings for the two screens, Doppler and Range.

Still your doing a grand job replicating the office!
 

rickoshea52

SMF Supporter
Joined
Dec 20, 2011
Messages
3,981
Points
113
Location
North West
First Name
Rick
IMG_2055.jpeg
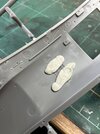
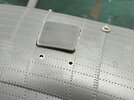
The time has come to tackle the fuselage window inserts to fill the apertures not required for this mark of Sea King.
The two that fill the aft cabin windows have a subtle curve & taper that makes it virtually impossible to fit incorrectly. I did one window at a time to ensure no mix ups.
Getting the insert flush with the fuselage required a bit of white tack as a support on the inner surface while adhesive is applied and cures - I used Tamiya extra thin.

IMG_2050.jpeg

With the insert sitting proud I gently pushed it until flush checking ensure no white tack squeezed into the gap. Some adjustment was necessary.
IMG_2052.jpegIMG_2051.jpeg

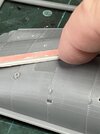
Using a smooth sanding stick to spread an even pressure, the very light abrasive action helps to indicate when the insert is as good as flush can be.
IMG_2053.jpeg

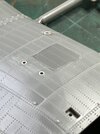
For the LH side forward window I marked up the top edge side and fitted the insert using the same method. Note the row of rivet lines on this part aligns with the fuselage as a useful guide to correct fit, the insert also seems to only fit flush this way too.
IMG_2054.jpeg
IMG_2055.jpeg

A thin smear of perfect plastic putty has been applied to the gaps, I’ll check this later and adjust.

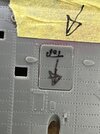
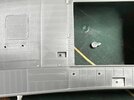
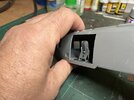
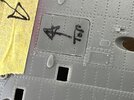
There are two pressure refuelling points moulded and one of these needs to be filled with an insert depending on the mark of Sea King. In this case the filler aft of the cargo door should be filled using the blanking insert provided. This has a tiny arrow which I assume indicates up. You might think the hole in the recess would be a guide to correct fitting but it’s actually for the filler point cap.

IMG_2057.jpegIMG_2056.jpeg
 

rickoshea52

SMF Supporter
Joined
Dec 20, 2011
Messages
3,981
Points
113
Location
North West
First Name
Rick
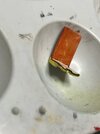
Well, my first attempt at the seat belts failed miserably. The 1mm tape stuck to the paper and seemed too wide anyway.
For my second go I used 0.75 mm tape laid out on my cutting mat and painted black with a Posca pen. This was cut to appropriate lengths for the five point harnesses and included a length for the back that runs down to the inertia reel drums at the base of each seat. A section of plastic rod was cut to size and glued to each seat and painted light grey leaving the ends white per the real thing.
A deliberate omission are the white nylon anti-fret panels fitted to the seat backs to stop the seat belts fraying during use.
Another piece of thinly sliced plastic rod was cut to represent the Quick Release Buckle (QRB) on the lap straps and painted after fitting.
IMG_2049.jpeg

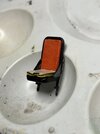
I wasn’t happy with the pilots seat cushions. I’m pretty certain that by 1988, when this scheme set, the seat pans would have the Personal Survival Packs (PSP) as standard. (Fun fact: my first job after school was in the factory that made the yellow fibre glass seat pack shells - which was 1988).
Using a mix of Vallejo light brown and white for the sheepskin cushion, NATO green for the nylon liner and my yellow Posca pen for the seat pack I got to something I can live with.
Seatbelts were done the same as before. Note the stowage for the sea anchor from the kit fitted to one of the seats, this is the second pilot/navigators position.
IMG_2058.jpegIMG_2059.jpegIMG_2060.jpeg
After a coat of varnish these will receive a wash to tone them down.
 

rickoshea52

SMF Supporter
Joined
Dec 20, 2011
Messages
3,981
Points
113
Location
North West
First Name
Rick
Paint pens - bought a set some time ago - should have done it earlier....
Build - Really enjoying your take on this iconic aircraft.
Pleased to see it grow.
Mike.
Thanks. The paint pen idea can save a lot of time and paint. The amount of time spent shaking a bottle and squirting out too much followed by the tedious clean up was getting tight on my bits. A paint pen is such a simple solution.
 

Andy T

SMF Supporter
Joined
Apr 26, 2021
Messages
2,039
Points
113
Location
Sheffield
First Name
Andy
That's a great looking kit and your additions will lift it even higher.
 

Waspie

SMF Supporter
Joined
Mar 13, 2023
Messages
2,603
Points
113
Location
Portland - Dorset
First Name
Doug
Nice Rick - very nice.
All the way through the 80 PSP’s we’re in use. Wasps and Sea Kings, both SK squadrons I was on, 706 & 819 used PSP exactly as you have replicated. Three connectors on each which attached to the individuals LSJ.
 

Waspie

SMF Supporter
Joined
Mar 13, 2023
Messages
2,603
Points
113
Location
Portland - Dorset
First Name
Doug
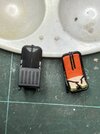
Interior done and glued together, just the dipping sonar to add and a touch up here and there. I managed to break one of the delicate collective levers. A neutral was has been applied all over to give depth.

View attachment 490638View attachment 490639View attachment 490640View attachment 490641
Rick, Really nice job buddy. All that's missing is the smell of OM15 and gearbox oil!!!
Do the Airfix instructions show a fire ext above the rear bulkhead in the back above the curtain? Reason I ask, they never had one in any of the SK's I flew in!! Having had 5 fires from the sonar pump and being back seat crew I always had to go past the offending flaming pump to steal the fire extinguisher from behind the pilots!!
 

rickoshea52

SMF Supporter
Joined
Dec 20, 2011
Messages
3,981
Points
113
Location
North West
First Name
Rick
Rick, Really nice job buddy. All that's missing is the smell of OM15 and gearbox oil!!!
Do the Airfix instructions show a fire ext above the rear bulkhead in the back above the curtain? Reason I ask, they never had one in any of the SK's I flew in!! Having had 5 fires from the sonar pump and being back seat crew I always had to go past the offending flaming pump to steal the fire extinguisher from behind the pilots!!
The fire extinguisher is moulded on the bulkhead curtain in this kit. The HAR3’s had a hand held extinguisher in the rear cabin by the MS10 liferaft.
The MS10 is conspicuous by its absence in this kit.
 

Waspie

SMF Supporter
Joined
Mar 13, 2023
Messages
2,603
Points
113
Location
Portland - Dorset
First Name
Doug
The fire extinguisher is moulded on the bulkhead curtain in this kit. The HAR3’s had a hand held extinguisher in the rear cabin by the MS10 liferaft.
The MS10 is conspicuous by its absence in this kit.
I wonder why Airfix did that?
Can’t speak about other RN Squadrons but 819 carried a MS10 every sortie, we also had SAR pack which held hi-lines, strops, mk4 harness for double lifts and a plethora of other SAR related kit. That sat from aft of the cabin door to where the bulkhead met the curtain. In front of that sat the MS10, (upright), and the LWS in front of the rear troop seats.
No fire ext!! :confused:
That configuration changed when the unit turned into a designated SAR flight with 2 x Mk6’s.
 

Waspie

SMF Supporter
Joined
Mar 13, 2023
Messages
2,603
Points
113
Location
Portland - Dorset
First Name
Doug
thats very neat, didnt realise it was so 'busy' in the back.
The build Rick is doing is a Mk5 with LAPADs kit, (the additional seat behind the sonar and radar ops seats). The additional seat would be used for passive submarine detection.
That didn’t mean an extra crew member, the sonar operator worked both stations!!! Busy busy!!
 

rickoshea52

SMF Supporter
Joined
Dec 20, 2011
Messages
3,981
Points
113
Location
North West
First Name
Rick
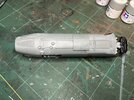
That’s the cabin inner shell glued to the cabin floor. I was going the get the fuselage buttoned up tonight then realised I hadn’t painted the inside walls of the cockpit. A job for tomorrow before I head south on a business trip.

IMG_2066.jpegIMG_2067.jpeg

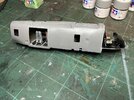
Something occurred to me as I dry fitted the interior to the LH fuselage half. There is a window aperture on the inner cabin and when installed you can see it against the blanked off fuselage window. Hmmm?
IMG_2073.jpeg
 

Jim R

SMF Supporter
Joined
Apr 27, 2018
Messages
13,809
Points
113
Location
Shropshire
First Name
Jim
Cracking job you're making of this Rick. Well done filling those window apertures - looks straightforward but certainly not. Great looking cockpit. Glad the fuselage halves went together ok.
 
Top