Rick's 1-87 Scale Kitbashed Brockway Shovel

Mini Me

SMF Supporter
Joined
Jun 1, 2018
Messages
10,160
Points
113
First Name
Rick
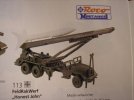
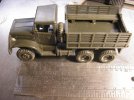
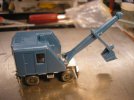
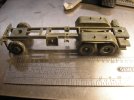
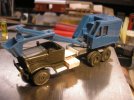
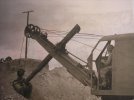
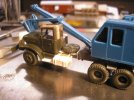
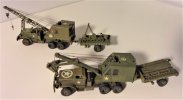
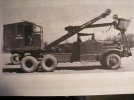
I spotted one of these Shovels several years ago, under construction on another Forum, by a current member of this forum. I was very intrigued and sought out some of the components required for such an endeavor. As stated in my earlier post in "What's on the bench 2022", I had the luxury of watching Mr. Eberle build one of these first........mine will not be a "carbon copy" but there will be common components with some subtle differences. I will be using components of three different models in order to produce a "reasonable" facsimile of the original as used by the U.S. Army Engineering Battalions during WWll. The chassis is from a ROCO Minitanks Honest John missile launcher I played with as a young teen. The cab is from another ROCO model; Corbitt prime mover and lastly the shovel itself, a small rendering from Wiking, it came as part of a demolished building kit I bought for my first Diorama, some years ago. First is a pic of what the actual shovel looked like then some pics of the basic models I will be using to complete the build. Enjoy........oh, and before anyone says anything , yes......the operators cab on the shovel is on the wrong side. Not sure what to do about that (if anything)......still mulling it over.P1012240.JPGP1012238.JPGP1012239.JPGP1012241.JPGP1012237.JPG
 

Mini Me

SMF Supporter
Joined
Jun 1, 2018
Messages
10,160
Points
113
First Name
Rick
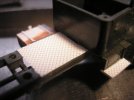
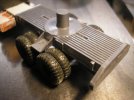
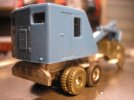
So I spent most of yesterday and the day before chopping and hacking off the unwanted bits and pieces of the Chassis for the missile launcher.........It is a bit of a time saver as the wheelbase is within a couple of inches of the required 197" for the shovel version. Brockway Being one of the primary builders produced frames for all three versions in 185",197" and 220" wheel bases.
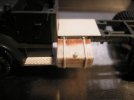
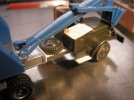
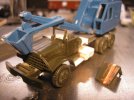
Next up is the cab (stolen from the Corbitt Prime mover (short wheel base) as the cab steps and fuel tank were molded into the Corbitt frame I ended up scratching a fuel tank and steps. The mods to the chassis of the shovel are rather drastic as there was a lot of "stuff" that had to disappear. once it was properly shimmed and leveled on the frame it don't look half bad. The distance between the shovel mount and the back of the cab got a covering of "tread" plate to fill the void.........looks like a good place to lay a spare tire, Hmmmmmm. P1012242.JPGP1012243.JPGP1012244.JPGP1012245.JPGP1012246.JPG
 

JR

Member of the Rabble and Pyromania Consultant
SMF Supporter
Joined
May 26, 2015
Messages
17,275
Points
113
Location
lincs
First Name
John
Wow Rick that's some build you've started there. Good progress as well.
Pity about the crane operators position, nothing you can do about that.
Front row seat please .
 

Mini Me

SMF Supporter
Joined
Jun 1, 2018
Messages
10,160
Points
113
First Name
Rick
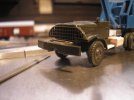
It's OK JR, Paul had to deal with the same situation on his build as well......it's a small compromise on an otherwise unobtainable model.. I do however, have a trick or two up my sleeve (along with a pair of Aces from last Saturday's poker game) as to modifying the shovel cabin to a different Mfg. by the name of Osgood. They also produced shovels for the Army and the Control Cab is oriented similarly to the one you see in my build. As you can see from this photo (for ref. only) the cab is close , so some work will be required to configure it properly. Also, here is a shot of the New front bumper and Winch assembly. still some work to do but you get the idea.P1012247.JPGP1012248.JPG
 
Last edited:

adt70hk

I know its a bit sad but I like quickbuild kits!!!
SMF Supporter
Joined
Sep 4, 2019
Messages
9,499
Points
113
First Name
Andrew
Very different and very interesting Rick and off to a flying start too!

ATB.

Andrew
 
Last edited:

Mini Me

SMF Supporter
Joined
Jun 1, 2018
Messages
10,160
Points
113
First Name
Rick
Tim, Andy, Jim, Mick, Mr. Jones, John and Tony......Thank you all for the encouraging comments. If it had not been for the "pioneering" work of Paul E. I probably would have never thought of doing one of these beasts. Yes, it seems I'm off to a good start but I feel that won't last, as soon I will be faced with "rigging" this monster and as I have not done this before it will be uncharted waters for me to muck about in.......might have to kick Paul a PM and pick his brain. Cab mods are next along with cutting down the soft top to cover a single seat cab.

Steve, the tread plate is no longer in production ..........I acquired two sheets (3.5" X 5.75") of this material at a local hobby shop at the least, 20 years ago. I still have one sheet and some bits left.....It has been much easier to work with than its etched brass counterpart.........I shall miss it when it's gone as it is no longer in production.
 
Last edited:

Lee Drennen

Box Stock Builder with a Twist/ Rabble Member
SMF Supporter
Joined
Apr 29, 2018
Messages
5,649
Points
113
Location
Wortham Mo
First Name
Lee
Rick very nice work. I used to drive a old Brockway 360 back in 1992 not as old as yours mine was a 1969 no power steering and a very long hood I loved that truck. Good idea using the long frame from the Honest John. Seated by Mr. Jones and Commander Race.
 

Mini Me

SMF Supporter
Joined
Jun 1, 2018
Messages
10,160
Points
113
First Name
Rick
Thanks Paul I'm not going to go too far down that road myself........just enough to give the impression that's all.
Glad you stopped by Lee, those old trucks were hell on ones physic.....my uncle was a trucker and suffered for it.
 

Mini Me

SMF Supporter
Joined
Jun 1, 2018
Messages
10,160
Points
113
First Name
Rick
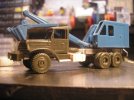
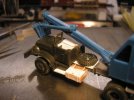
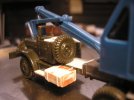
So here are today's efforts.......I have finished the cab mods and managed to miraculously get the tipping windshield and soft top to match up....as I'm sure Paul E. can testify, that is a "dicey" proposition on the best of days. I have shown the spare tire in two positions, neither of which do I have photo refs. to indicate which was used by the builders of these Shovel platforms. If anyone has knowledge of which was used please feel free to pass me the word. Oh, I forgot to mention, the "racing stripe" on the soft top......oops, huge mistake while measuring to cut down and rejoin the original top. :thinking: :angry:P1012252.JPGP1012253.JPGP1012254.JPGP1012256.JPGP1012258.JPGP1012259.JPG
 

minitnkr

Rabble & escape committee member
SMF Supporter
Joined
Apr 27, 2018
Messages
6,721
Points
113
Location
Dayton, OH
First Name
Paul
The second position was used. The tire captured by a similar holder (just larger) as that used on the 2.5ton short wheelbase prime movers & tractors. One side fixed to the base & the left side flexible, capturing the tire on 3 sides w/channel shaped metal. You can make out the holder behind the cab in the first photo, there just isn't a tire in it.
 

Mini Me

SMF Supporter
Joined
Jun 1, 2018
Messages
10,160
Points
113
First Name
Rick
Thanks Paul, I saw that "blob" behind the cab, but could not identify what it was so I just wasn't sure........easy solution to make a rack. :thumb2:
 
Top