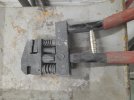
Thanks Mark..........armed with new information I am currently scratching out said spare tire rack so's I can get it mounted in its proper location. Once done, I can start to focus on the shovel itself. Glad you stopped by.
You are using an out of date browser. It may not display this or other websites correctly.
You should upgrade or use an alternative browser.
You should upgrade or use an alternative browser.
Rick's 1-87 Scale Kitbashed Brockway Shovel
- Thread starter Mini Me
- Start date
Mark1
SMF Supporter
I always stop by on what your up to Rick,even if you don't t know it


Nice updates Rick are you going to replace the Toyish bucket with a Dragline Bucket or a Clam Shell or Bottom Dump Bucket?
What I currently have is a Bottom Dumper.........prolly will stick with that unless something better comes along. The main boom is defo going to get some improvements, just don't know to what extent. Thanks for the complement Lee and I hope you stick with this build as I am committed one way or another to finish it.
Oh I’m not going anywhere JR has me tied to the chair. Care on.Lee and I hope you stick with this build as I am committed one way or another to finish it.
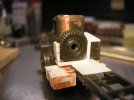
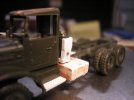
So here is my take on the spare tire position..........I looked at several views of these on other vehicles and came up with what I think is a viable solution. I used Evergreen styrene channel stock in three pieces. the fixed end was easy to let into the base. The operating end required not only to be let into the channel but also had to be narrowed at the bottom, thereby creating a "Joggle" to the upper portion. and finally it had to be slightly rolled to match the curve of the tire. The retaining bolt and nut is what holds this oversized clamshell together, clamping the wheel/tire assembly in place. Then I got to looking at the wheel and tire and I noticed there were no lug nut holes (or lug nuts for that matter) and the hub was still in the center of it. I drilled out the hub and attacked the back of the wheel with a .250 dia. "ball" grinder bit and hollowed it out, flipped it over, laid out the lug nut locations and drilled those up. I know it don't look like I did very much but this little contraption is a model in itself. 



That's a lot of great plastic surgery going on here.
- Joined
- Apr 28, 2018
- Messages
- 10,936
- Points
- 113
- First Name
- Jakko
Usually the case, isn’t it? It takes a ton of effort to end up with something that looks like you could make it in five minutes. That’s why we have Internet forums, so you can actually tell people about itI know it don't look like I did very much but this little contraption is a model in itself.

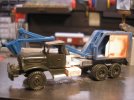
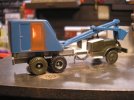
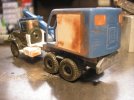
Well, I've been burning the midnight oil on the shovel cab. Mojo is extraordinarily high at the moment so have got a good start on the necessary mods. had to blank out several windows and completely removed the left side in order to bring this more in line with what I am trying to represent.......A machine with the cab door open so you can see a bit of the insides. Did a lot of filing and sanding to the rear to give it a rounded look rather than the three flats on the original model. I actually rounded all the sharp edges...... More to the look of the standard shovels of that time period. I hung some hooks and chain on the right hand frame to add a little interest and am wondering where to put the engineer tools or if this machine was so equipped? That's about all for now, way past my bedtime. Questions and or Criticism always welcome. 


Last edited:
"Joggle" is an old aircraft Mechanics term for a piece of formed sheet metal that has a sort of lazy step in it.....usually to overlay one sheet of metal over another at a joint or seam in order to get a smooth transition.......make sense?Rick I do like the term " Joggle " all sorts of things come to mind !
Matron sorry , ooh that hurt !
Do the two go together?!!Lots of Whiskey and a steady hand JR..
Jim R
SMF Supporter
Hi Rick
You never cease to amaze me. You must have a steady hand, the eyes of a hawk and the patience of a saint. Spare wheel looks just right there.
Jim
You never cease to amaze me. You must have a steady hand, the eyes of a hawk and the patience of a saint. Spare wheel looks just right there.
Jim
Mark1
SMF Supporter
Rick, the pioneer toolset went on the front flat w/o window. Sometimes a jerrycan rack was added as well as lights for night work.
Just so Mark.
Just so Mark.

