Scotties Bedford RL

Jakko

Way past the mad part
SMF Supporter
Joined
Apr 28, 2018
Messages
10,837
Points
113
First Name
Jakko
Whether to prime or not depends on the paint you use, I’d say. If you like spraying Tamiya or Mr. Hobby acrylics, or probably any lacquer-based paint, it’s probably unnecessary — though you may want to prime the metal bits anyway. For water-based acrylics, though, I definitely would put a primer on first.
 

minitnkr

Rabble & escape committee member
SMF Supporter
Joined
Apr 27, 2018
Messages
6,724
Points
113
Location
Dayton, OH
First Name
Paul
I only use primer on resin when it's really glossy, but yours is very dull & has a strange finish so I would go ahead.
 

Airborne01

SMF Supporter
Joined
Mar 30, 2021
Messages
3,173
Points
113
Location
Essex
First Name
Steve
RLs were generally Deep Bronze Green until later (much later) in my experience mate - depends on when/where you are portraying your masterpiece (ie some UK Base Depot or a BAOR unit ... some lasted in the former until well into the 80's.
Steve
 

Jim R

SMF Supporter
Joined
Apr 27, 2018
Messages
13,749
Points
113
Location
Shropshire
First Name
Jim
You really are making a superb job of this.
Your 'silkpursery' knows no bounds.
Paul sums it up nicely.

Personally I would prime. If for no other reason than it will highlight any areas which might need some remedial sanding or filling.
 

scottie3158

SMF Supporter
Joined
Apr 27, 2018
Messages
12,722
Points
113
Location
Spalding
First Name
Paul
Whether to prime or not depends on the paint you use, I’d say. If you like spraying Tamiya or Mr. Hobby acrylics, or probably any lacquer-based paint, it’s probably unnecessary — though you may want to prime the metal bits anyway. For water-based acrylics, though, I definitely would put a primer on first.
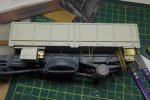
Cheers Jakko I normally use acrylic so I might give it a prime.
I only use primer on resin when it's really glossy, but yours is very dull & has a strange finish so I would go ahead.
Cheers Paul, everything about this build is strange mate.
RLs were generally Deep Bronze Green until later (much later) in my experience mate - depends on when/where you are portraying your masterpiece (ie some UK Base Depot or a BAOR unit ... some lasted in the former until well into the 80's.
Steve
Steve, I will probably go for a deep bronze green now have to find the right colour. We still had an RL box body when I was in Germany in the early 80's.
You really are making a superb job of this.

Paul sums it up nicely.

Personally I would prime. If for no other reason than it will highlight any areas which might need some remedial sanding or filling.
Jim that's a good idea no doubt there will be lots of imperfections by the time I'm finished.
 

Graeme C.

SMF Supporter
Joined
Apr 29, 2018
Messages
1,485
Points
113
First Name
Graeme
Primer on the resin & metal would be a good idea, it would, at least give a prepared, even surface to paint on.
 

Mini Me

SMF Supporter
Joined
Jun 1, 2018
Messages
10,161
Points
113
First Name
Rick
I think the Bronze Green would be well suited to the old "Beddy"......Prime or perhaps a black base in case you would care to do a little modulating of the final color. ;)
 
  • Like
Reactions: JR

scottie3158

SMF Supporter
Joined
Apr 27, 2018
Messages
12,722
Points
113
Location
Spalding
First Name
Paul
Primer on the resin & metal would be a good idea, it would, at least give a prepared, even surface to paint on.
Graeme, I agree i Think its the way forward.
I've never seen anyone post that they regretted priming a model. Plenty (including me) have regretted not priming.
Pete
I think the Bronze Green would be well suited to the old "Beddy"......Prime or perhaps a black base in case you would care to do a little modulating of the final color. ;)
Rick. Bronze green it is.
 

scottie3158

SMF Supporter
Joined
Apr 27, 2018
Messages
12,722
Points
113
Location
Spalding
First Name
Paul
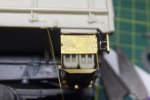
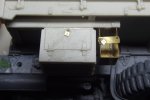
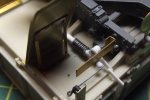
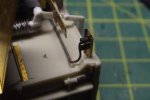
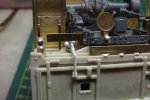
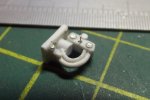
Another update you must be bored stupid by now. The load bed is now fitted and apart from a few blow holes its quite well detailed. As the build continues I have come to realise how much of the kit is missing, these I will come to later. The lockers have been added along with some etch padlocks from the spares box. Also fitted are the POL carrier and jerry can rack. The mud guards and brackets were soldered together for strength and then fitted. The tailgate damper was missing so I have made one from a few bits of plastic and wire to represent the spring. Next the convoy disc and number plate were added from the kit etch. Missing were the lamp holders for the said items so these were fashioned from evergreen rod. Also missing were the rear light brackets and lights. These were made from some brass sheet and the lights, referred to rubies because of their shape in the military were made from punched plastic and foil. The wiring/and bulb holders were added to the back from lead wire and tubing.

Enough dribble here are some pics.

DSCF4082.JPG

DSCF4084.JPG

DSCF4085.JPG

DSCF4086.JPG

DSCF4087.JPG

DSCF4090.JPG

Thanks for following along
Scottie
 

Mini Me

SMF Supporter
Joined
Jun 1, 2018
Messages
10,161
Points
113
First Name
Rick
Much "silk pursery" in evidence here!.......not bored in the least Sir! ;)
 
  • Like
Reactions: JR

Tim Marlow

Little blokes aficionado
SMF Supporter
Joined
Apr 27, 2018
Messages
16,797
Points
113
Location
Somerset
First Name
Tim
Looking fantastic Scottie. Looks like you cracked the glazing OK.
 

scottie3158

SMF Supporter
Joined
Apr 27, 2018
Messages
12,722
Points
113
Location
Spalding
First Name
Paul
Much "silk pursery" in evidence here!.......not bored in the least Sir! ;)
Thank you Rick.
How on earth could we ever get bored of admiring work like that?
To Kind Andy.
More mastery every time I pop in for a look. Excellent Scottie.

Nick
Cheers Nick.
Coming along very nicely mate!
Steve
Cheers Steve.
Thanks Neil.
Incredible work Scottie
Thank you kindly Mick.
Superb work Scottie. The model must be getting very fragile with all your detailing.
It is Jim. I have all the etch tie downs to add yet.
Looking fantastic Scottie. Looks like you cracked the glazing OK.
Tim, I hope so there was no good location on any of them and its the first time I have used a glazing film on curved surfaces.
 
Top