Jakko’s 1:35 Dragon Sd.Kfz. 251

The Smythe Meister

Born to be WILD....... until about 9pm
SMF Supporter
Joined
Jan 30, 2019
Messages
5,812
Points
113
Location
Devon
First Name
Andy
BLIMEY ..
So much information going on here my tiny mind can't take it all in....
.... In fact I almost forgot what you're building Jakko!! ;)
Nonetheless I've regained my senses and will be following along all the way :smiling3:
 

Jakko

Way past the mad part
SMF Supporter
Joined
Apr 28, 2018
Messages
10,954
Points
113
First Name
Jakko
On my Trumpeter kit the rollers are correct but also incorrectly centred on the flats.
Oddly, Dragon did get that right with their Sd.Kfz. 7.

I have built a short section of track and it fits ok and seems to sit nicely against the tyre. Moving the rollers will be a major job
I’m debating whether to just leave them in place too. I will certainly add the rollers (I’ve had to order some rod of about the right diameter, though), but like I said, I haven’t found a good way yet to make the teeth that the rollers go between. If I can’t find one I’ll probably just add the rollers and leave it at that :smiling3:

.... In fact I almost forgot what you're building Jakko!! ;)
The only non-German, non-American halftrack in this GB, I think :smiling3:
 

Jakko

Way past the mad part
SMF Supporter
Joined
Apr 28, 2018
Messages
10,954
Points
113
First Name
Jakko
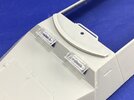
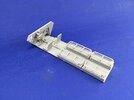
This kit is not endearing itself to me.

57FBB203-A0DC-4190-A670-B04FD8FAF032.jpeg

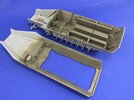
That is the floor with the seat frames installed, but no seats yet because I want to paint underneath first. I cleaned up and glued those frames in place yesterday, and when I went on today, I discovered something rather important that the instructions make not clear at all:

40407E6B-B822-42E7-BE69-1653DE790EF0.jpeg

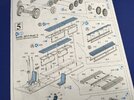
Yes, for the wooden slat seats, you don’t need those frames at all … but that’s not how it looks from the drawings. They give me the impression that the wooden seats go on top of the frames just like the leather ones did.

75F094F4-9D46-461A-9AFD-1062EB0422F2.jpeg

So I duly cut them off again, and cleaned up the area after taking that photo. The instructions make another mistake about the wooden seats, namely that they show parts B12 and B13 without their legs, which go into the holes in the lockers under the seats. I had to trim down those legs, except the ones on the corners, because the other frames had filled the holes for them.

Also, those same parts don’t sit completely underneath the seats: instead, the seats sit inside the L-shape you can see in the top half of the wooden seats drawing. If you do glue B12/B13 fully under the seats, the rears will sit far too high and the inboard sides will be outboard of the locker edge — guess how I discovered all of this.

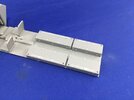
Those little parts also all come with a ton of ejector pin nodules that you have to remove, so these seats, of either type, are not a quick job at all. But this is them in place:

ECB058F2-FEC7-4935-9B6F-790F8D8F938D.jpeg

Still loose, because like I said, I want to paint underneath first.

Oh, yeah, and I filled the holes for the driver’s gas mask container on the left side of the firewall, as I doubt the French would have kept that in.
 

Jakko

Way past the mad part
SMF Supporter
Joined
Apr 28, 2018
Messages
10,954
Points
113
First Name
Jakko
......fun, fun, fun,........
… in the sun, sun, sun …

Well, actually in the attic room with the sunshade on the window down, but hey, it was sunny :smiling3:
 

Jakko

Way past the mad part
SMF Supporter
Joined
Apr 28, 2018
Messages
10,954
Points
113
First Name
Jakko
I glued the floor into the lower hull and added more parts to the interior:
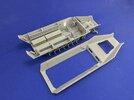
7359A7DD-6977-42A6-9AFC-2427D58669C3.jpeg

It’s not complete yet, of course. After that I added the driver’s visors:
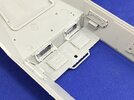
B77A5035-8591-4829-897E-90C2C39C97DA.jpeg998497F3-4C79-41B8-BE13-3289AE4512AB.jpeg

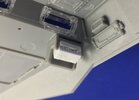
Why these are moulded in clear plastic, I have no idea, but I do know it makes the job harder because it’s not that easy to tell if you’ve cleaned them up enough or not. Two parts are still missing, the armoured glass blocks, which I’ll install after painting. Those are the only bits that do benefit from being in clear plastic, but oddly, Dragon only provided them for the front ports, and not for the sides or the spare blocks you can see in the lower hull. This is a missed opportunity, IMHO.

Also, don’t make the mistake I did and fit the visors’ plate into the upper hull before installing the visors themselves. It’s hard to get them in place like that, and it would probably have been easier when the plate was still loose (as the instructions tell you to do it, BTW).

There are two sets of engine deck hatches, so make sure you use the ones on sprue A, not sprue C. I didn’t pay attention to the letters and just looked for the right shape of part, so I cleaned up the wrong ones and found they wouldn’t fit in the hinges moulded to the upper hull. The other set does :smiling3:

Another small point is the curved bullet splash guard on the roof (part C31). This has a ridge on one side that is supposed to fit into a curved track in the roof plate, but it’s so tight a fit that I cut about half a millimetre off the ends of that ridge and even then it only just wanted to go in. What’s more: the instructions show it upside-down, with the locating ridge upward, in step 12 of the instructions for the basic APC — but not in step 11 for the IR-equipped variant (to add to the confusion, only steps 1 through 4 are common to the three variants; each then gets its own steps 5 through 12 to build the rest of the model).

With the rear doors and a few more parts added, and the upper hull still loose on the lower:
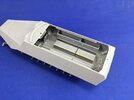
E6B88796-BC6E-488E-82EE-25ECDBE2B156.jpeg

There is another thing to watch out here: the grab rails, D24, have an angled surface so that they sit horizontal against the sloped hull sides. If you’re not careful, you can easily glue them upside-down so they angle down instead — I only found out when adding the second one …
 
Last edited:

Tim Marlow

Little blokes aficionado
SMF Supporter
Joined
Apr 27, 2018
Messages
16,874
Points
113
Location
Somerset
First Name
Tim
Starting to look the part Jakko, despite Dragon’s best effort to fox you ;)
 

Jakko

Way past the mad part
SMF Supporter
Joined
Apr 28, 2018
Messages
10,954
Points
113
First Name
Jakko
It’s not doing my regard for Dragon any good, no. And to think I just bought a Dragon M2 halftrack kit (like the M3 @Dave Ward is building, but slightly shorter) from someone today …
 
Last edited:

Allen Dewire

Proud Rabble Member
SMF Supporter
Joined
Apr 27, 2018
Messages
4,122
Points
113
Location
Bamberg
First Name
Allen
It's good to see you driving on, even with the horrible Dragon destructions Jakko. Patience is the key to success with it. Might it be easier to download the destructions from Dragon's kit DR6861 from Hobby Easy and use those instead. Of course, without the Nebelwerfer pieces. Most of all, keep having fun!!!...

Now you know why I sold all my Dragon 251 kits (except 2) and bought AFV Club kits instead...

Prost
Allen
 

Jakko

Way past the mad part
SMF Supporter
Joined
Apr 28, 2018
Messages
10,954
Points
113
First Name
Jakko
I don’t think Dragon’s instructions are as bad as many people make them out to be, but they could most definitely be better. If I want to build any other 251s in future, though, AFV Club will definitely be higher on the list than Dragon …
 

Jakko

Way past the mad part
SMF Supporter
Joined
Apr 28, 2018
Messages
10,954
Points
113
First Name
Jakko
More interior parts added …

0FDEFB89-04EE-48F5-A6C2-F162C6777F58.jpeg

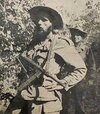
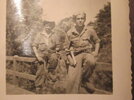
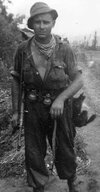
I had chucked the MP 40s and their magazine pouches into my spares boxes, but looking for photos of French soldiers in Indochina today, I came across pictures like these:

MP 40 1.jpegMP 40 2.jpgMP 40 3.jpg

It turns out the French used the MP 40 fairly extensively after the war, including in Indochina and Algeria, so I dug them back out and glued the pouches to the side walls where I had filled ejector pin marks earlier. The MP 40s themselves will follow after painting, though seeing how one of the men in the second photo has a Sten, I might just put one of those into the vehicle instead of an MP 40 on one side.

I also added the rifle racks in the forward stowage bins, but no rifles yet — again, after painting. I’ll put either four MAS 36s in one side, or two on each side. Ideally I would want eight rifles, but that would mean buying another set of Tamiya French infantry just to pilfer their weapons, and the one I have was expensive enough as it is.

The back rests for the benches were too neat and straight, so I carved, filed and scraped hollows into them, and a tear in one, to reflect they’ve been in use for a number of years already. A coat of liquid cement over them when I was done evened out the scratches again.
 

Jakko

Way past the mad part
SMF Supporter
Joined
Apr 28, 2018
Messages
10,954
Points
113
First Name
Jakko
Today I made a radio:

EADC0E69-6D8D-4EE7-98B0-15D8FF6BEC41.jpeg

The kit comes with a German one, but I kind of doubt the French would have used that, because from 1944 they had been re-equipped almost entirely with American gear. After some research, I decided on an SCR-300 infantry radio, since this is an APC — I have no idea if it’s correct or even plausible, but this radio was widely used by French troops in Indochina, so it seems a reasonable enough choice. It’s also easy enough to build from some square rod, strip and punched discs, and fits inside the German radio rack that the kit provides. I left off the battery box that sits underneath the actual radio, as I figure that would have been hooked up to the vehicle’s electrical system.

Also, I made the main part of the grille on the front plate:

B10EB303-9F1D-4522-95E1-0F4F46E2F610.jpeg

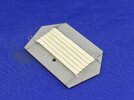
These are six pieces of 2 × 0.5 mm strip, 21 mm long, cut from plastic card because I didn‘t have suitable strip at hand. The whole is almost 10.5 mm high and sits 5 mm above the lower edge of the plate. All these dimensions I got by measuring up the front plate and grille in the photo and the kit’s plate, by the way.

The little bits of plastic at the lower corners are spacers so the bottom louvre sits open. I’ll cut them down once the glue dries, and then also fill in the openings on the sides with putty.
 

Jakko

Way past the mad part
SMF Supporter
Joined
Apr 28, 2018
Messages
10,954
Points
113
First Name
Jakko
With the interior construction done (I hope), I sprayed it with Mr. Hobby Olive Drab (1) lightened with some Tamiya Deck Tan:

9D1351C6-0457-4751-AE15-649159D8C4EA.jpeg

Nothing fancy, just an allover coat of it. I had to coax the last drops out of the bottle to get enough paint for all of it :smiling3: (I have three more, but using those would have meant mixing more of what was a random couple of drops into an unknown amount of paint that was left in the bottle.)
 

Jim R

SMF Supporter
Joined
Apr 27, 2018
Messages
13,841
Points
113
Location
Shropshire
First Name
Jim
Nice to see paint on the interior.
...... would have meant mixing more of what was a random couple of drops into an unknown amount of paint that was left in the bottle.
and even you guesstimating ain't that good :tongue-out3:
 

Jakko

Way past the mad part
SMF Supporter
Joined
Apr 28, 2018
Messages
10,954
Points
113
First Name
Jakko
It wouldn’t really have mattered if it didn’t match perfectly, of course — the washes and drybrushings and stuff that will follow is going to change the colour and would have drawn not-quite-matched mixes together. It’s more that by getting the last drops out of the bottle that would come out, I avoided the mixing up of another batch entirely. I prefer to take the path of least resistance for stuff like that :smiling3:
 

Ian M

Administrator
Staff member
Administrator
Moderator
SMF Supporter
Joined
Dec 14, 2008
Messages
19,805
Points
113
Location
Falster, Denmark
First Name
Ian
Some interesting alternativ finishes you shown there Jakko. I might have go for the British/Canadian one (big surprise).
 
Top